
A couple of weeks ago, Millie and I went to Cafe Javasti for an after-doctor-appointment-treat. It’s on our way home, so we often go there, and they have such yummy everything! We got coffees and an apple oat jumble bar to split. If I had known how good it was going to be, I would have gotten two! Truly one of the best “crumb” type of desserts I have ever had, and it set me on a wild goose chase trying to reproduce it.
After several attempts, I think I’ve got what I’m looking for – a crunchy, slightly crumbly bottom crust, almost jam-like apple filling, and a light crumb topping. I used my crumb recipe from these Blueberry Crumb Muffins, adding in some oats. This recipe is a little fussy and time consuming (you have to make it one day in advance to do it right), but in my opinion it is well worth it.

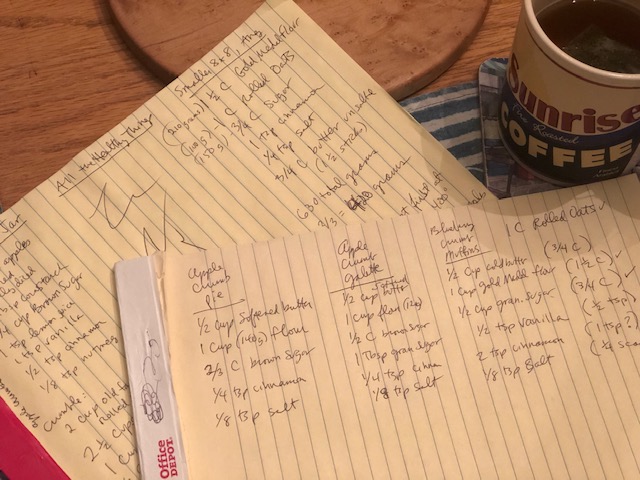
Apple Crumb Bars
(Adapted from Ashlea Carver’s recipe)
Crust/Crumb Topping
- 1 1/2 cups (210 grams) all-purpose flour (unbleached Gold Medal Flour* if you have it)
- 1 cup (100 grams) oven-toasted old-fashioned rolled oats**
- 3/4 cup (150 grams) granulated sugar
- 1 heaping teaspoon cinnamon
- 1/4 teaspoon kosher salt
- 3/4 cup (1 1/2 sticks) unsalted butter, cold and cubed
Apple Filling
- 2 good sized Gala*** apples, peeled, cored, and cut into 1/2″ cubes
- juice of 1/2 lemon
- 2 tablespoons granulated sugar
- 2 dashes cinnamon
- 1 heaping teaspoon corn starch
- Line an 8″ x 8″ square cake pan with parchment paper, making sure there is overhang for easy lifting. Set aside.
- In a large bowl, mix together the flour, oats, sugar, cinnamon, and salt. Cut in the cubes of butter with a pastry blender or rub it in with your fingers. Keep going until you get a sandy texture and there are no more large pieces of butter.
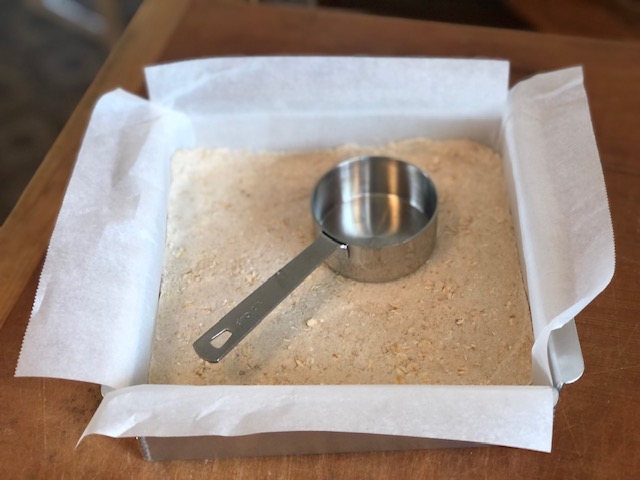
- Put 2/3 of the crumb mixture (about 3 cups worth, or 400 grams) into your prepared pan. Spread the crumb evenly, and press it down firmly either with your fingers or the back side of a measuring cup. Place the pan/crust into your freezer for 30 minutes. Put the remaining crumb mixture in the fridge. Go check your email or have a cup of tea.
- About halfway through your chill time, preheat your oven to 400°. When the 30 minutes is up, remove crust from freezer and place another sheet of parchment paper on top of the chilled crust and fill it with dried beans or pie weights. Bake the crust on the middle rack of your preheated 400° oven for 15 minutes. Rotate the pan and bake for 15 minutes longer.
- While the crust is baking, peel, core and dice your apples into 1/2″ cubes. Toss with 2 tablespoons sugar and 2 dashes cinnamon. You don’t want to overdo it with the cinnamon, because you want the apples to taste like apples!
- In a medium (10 inch) non-stick saucepan, saute the prepared apples on medium-high heat, stirring often. You will see a lot of juice at first. Keep cooking and stirring until you no longer see any juices, and the apples have darkened. Some might even have started to caramelize. This might take 8 to 10 minutes, give or take a few. Just keep an eye on them. You don’t want them to burn!
- Remove apples from heat. Mix a couple of teaspoons of the fresh lemon juice with the teaspoon of cornstarch. Drizzle over the hot apples and mix well. Set aside.
- When the crust is done baking, carefully remove the parchment paper containing the pie weights and set into a bowl. The crust should look darker, and have darkened edges. If you like a crunchier crust, you can pop it back into the oven for another 5 to 10 minutes. Remove from oven and turn the temperature down to 350°.
- Spread the apples evenly over the baked crust. Get the remaining crumb topping from your fridge and sprinkle evenly over the apples. There should be plenty. Beware that the pan is very hot to the touch… ask me how I know.
- Using oven mitts, place the pan into the 350° oven and bake for 30 minutes. After 30 minutes, turn the oven down to 200° and bake for another 30 minutes, ensuring a nice, light crumb. This also dries the apple filling a bit, which helps keep the bars from getting soggy.
- Remove from oven and place on cooling rack; let cool completely in the pan. Once completely cool, cover pan well with aluminum foil and place in the fridge to chill overnight.
- When ready to serve, remove from the pan by lifting the sides of the parchment paper. The dessert should come out easily. Cut the bars with a very sharp knife, pressing all the way down, into 16 or 25 bars, depending on how big you want them to be. These keep nicely at room temperature for several days. Enjoy!
Notes:
*I chose Gold Medal flour (unbleached) for this recipe because it is lower in protein, so it makes for a more tender crumb, but you can use any all-purpose flour you have on hand.
**I buy the oven-toasted oats from Trader Joe’s, but you can toast them yourself easily enough this way.
***I like Gala apples for this dessert, as they keep their shape nicely, and have a good flavor, which intensifies nicely when cooked down. Golden Delicious might also be nice if you can’t find Galas.
Here are some photos of the process:
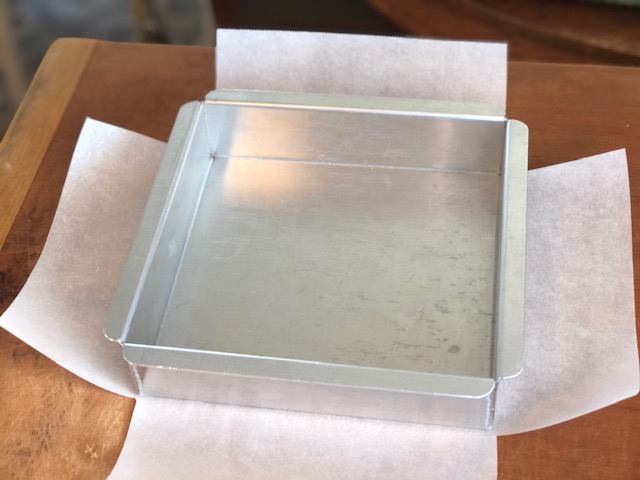
Cutting the corners makes it easier to line.

Leave plenty of overhang.
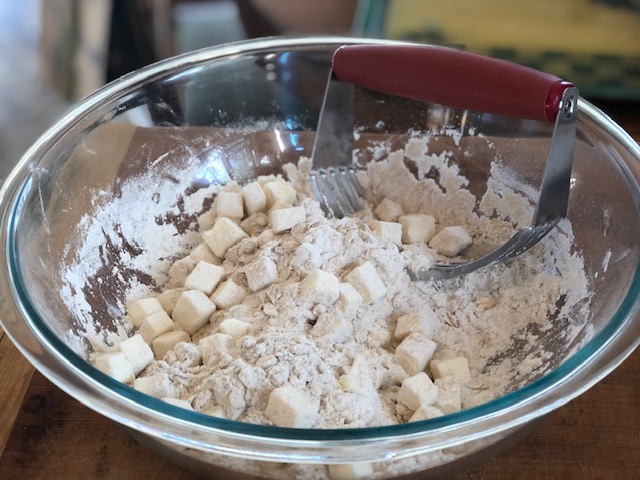
Add cubes of cold butter and coat them in the flour/sugar/oat mixture.

Start cutting in the butter, you can use your fingers for this if you like.

This looks ready.
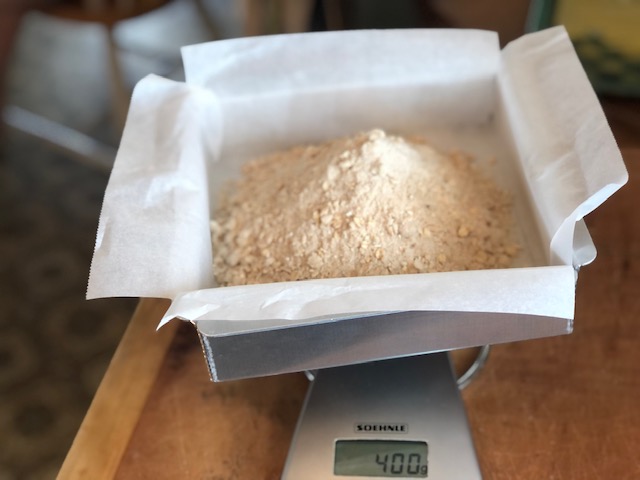
Put 2/3 of the crumb into the pan.
Spread evenly and press down firmly to make a bottom crust. Freeze for 30 minutes.
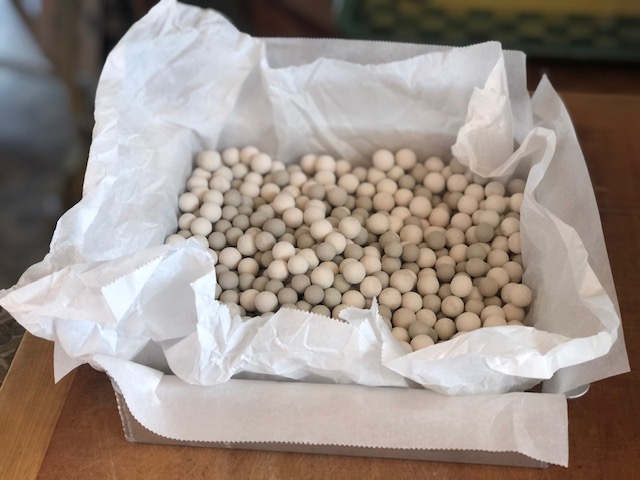
Line crust with parchment and fill with pie weights or dried beans. Bake at 400°.

After baking it might look like this. I like it a bit darker.

Prepare the apples.
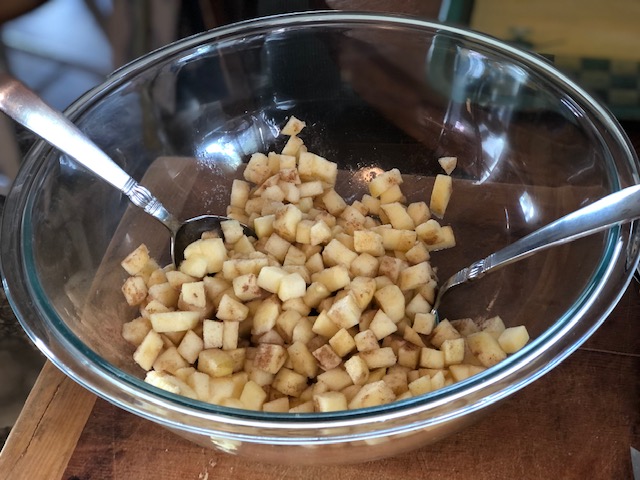
Toss in sugar and cinnamon.
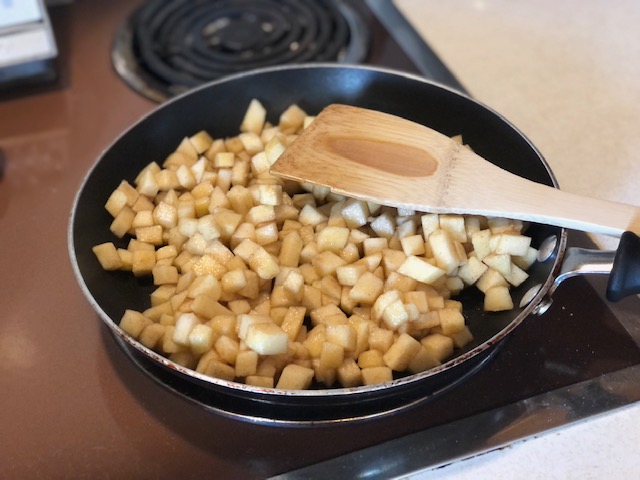
Cook down on medium-high heat.
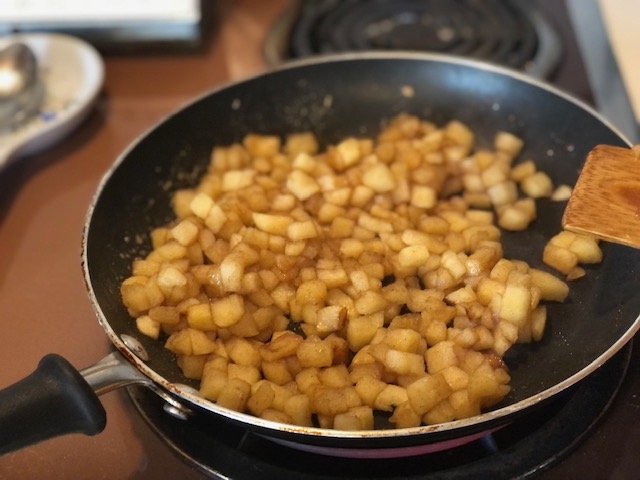
This looks right.
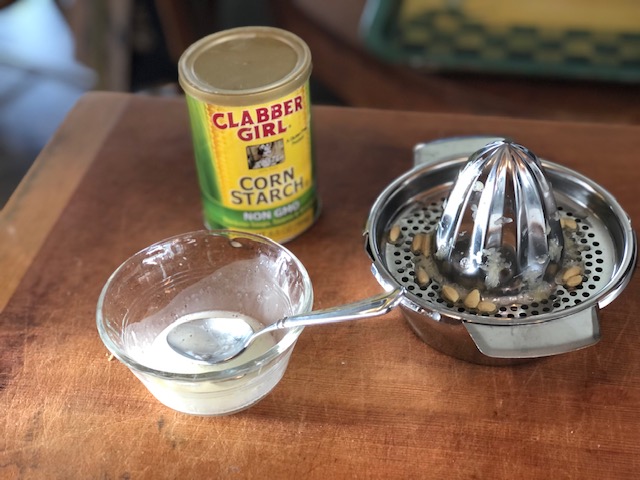
Mix corn starch and lemon juice and mix into apples.

Spread apples evenly over baked crust, being careful of hot pan!

Sprinkle remaining 1/3 of crumb over apples and bake at 350°, then dry at 200°.

Pull out of pan once it has chilled in fridge overnight.
Cut with a sharp knife.

I just love this shot, so I had to share it with you.
Enjoy!

This is a tasty looking little recipe!
Thanks Dorothy! I am obsessed, and have to talk myself out of making them *again* just to be sure of how much I love them!!!
beautiful pictures, process and product!!
Awwww, thank you Deb!! And I’m so glad that you were part of that process too!!
Pingback: Apple Crumb Bars | and everything nice - Apple News
My favorite step: “Go check your email or have a cup of tea.” 🙂
Hehe… that usually takes about thirty minutes, right?