Slow Cooker Chili

img_0005

This chili is very simple. I got the recipe from my friend Shelli. When our oldest kids were just teeny tiny, they were good buddies.

music

Me, Shelli’s son Asher, and Mara.

We spent a lot of time together back then. Long luxurious days where we talked about sleep issues, eating habits, our families, our history, and all the while watching our sweet babies discover the world.

IMG_1251

Asher and Mara.

Another thing we shared with each other was recipes. I remember having this chili at Shelli’s. I remember sitting in her kitchen, and being impressed that Asher was going to eat that chili. At the time, I wasn’t a big chili fan, but that was the best chili I had ever had. Maybe because I was with Shelli, and she made it, and we were sharing pieces of our lives with each other.

Shelli and her family moved to Colorado shortly after our kids turned two. I still miss her. Whenever I make this chili, I think of her, and I remember those days that seemed to last forever.

IMG_1839

Brunch in our old back yard. Shelli is in pink.

For the record, I have changed the recipe many times, because I am often in a hurry, and will make it with just the ingredients I have available. But what I like is how simple it is. This recipe really is a blank slate; you can add or take away whatever you like, and it will still turn out great. But it is best exactly how Shelli made it.

You can ignore the writing in red, that was my addition, back when I wrote down everything I did. As you can see from the recipe, the original is not a slow cooker recipe, and it is perfectly simple and delicious exactly as written. Make it that way.

But, if you have a day like mine… today I have to work in the afternoon, and then work again this evening… then you can make this in your slow cooker in the morning and have it ready exactly when you need it. It just simmers all day long and the flavors blend nicely after all that time. And there is no need to sauté things first. That’s what I like.

But there is an order to it that is important. Here’s how I made it today, with just the things I had on hand.

Slow Cooker Chili

  • 1 yellow onion, peeled and chopped
  • 1 pound leanest ground beef (must be leanest!)
  • 1 28 oz can chopped tomatoes, with liquid
  • 1 can black beans, drained
  • 1 can cannellini beans, drained
  • 1 Tbsp ground cumin
  • 2 Tbsps chili powder
  • 1 Tbsp balsamic vinegar
  • Cayenne pepper to taste

Place chopped onion in a layer on the bottom of the slow cooker. Break up the ground beef with your hands and layer it over the onions. Then layer the tomatoes, then the beans, and finally the herbs. You can gently stir the herbs into the top layer of beans, but do not disturb the layers of onion and beef and tomatoes. Cover and cook on low for 8 to 10 hours, or high for 6 to 8 hours. Shortly before serving, stir in the balsamic vinegar and cayenne and let cook for a few more minutes.

Add ins: A few minutes before serving, if I have time, I like to sauté up some veggies, like perhaps some chopped zucchini or bell pepper, so they get a nice grill to them and intensified flavor, and add them to the chili when I add the balsamic vinegar. It takes about ten minutes. You can also just use those sautéed veggies as toppings. You can add whatever you like, or nothing at all.

Toppings: Grated cheese, raw onions, avocado slices, fresh cilantro, sautéed veggies… whatever you have on hand!

Tip! I don’t enjoy chopping onions (sorry!), but when I do, I chop more than one, and put any extra in bags in the freezer. That way, when I have a recipe that calls for chopped onion, chances are I can just grab some already chopped out of the freezer. It comes in really handy when I am in a hurry in the morning, and frozen onion works just fine for slow cooker recipes. Bon apétit!


Posted in Busy-day meals, Comfort Food, Crock Pot Recipes, Gluten-Free | 3 Comments

Oatmeal Chocolate Chip Cookies

Warning!

This recipe requires making the dough a day in advance and freezing it for best results. Or at least two hours in advance. And these cookies may be addicting. Now keep reading.

I have to write about these cookies right away, before I forget everything. My neighbor Shannon told me about a recipe she had tried that had a ton of stuff in it, like walnuts, coconut, chocolate chips, rolled oats, and even flax meal (her addition to the recipe). I told her that it sounded kind of like my favorite cookie at Specialty’s – the Oatmeal Wheatgerm Chocolate Chip Cookie – and she said that was kind of what she was going for. But hers became hard and dry the next day, so I asked her to send me the recipe so I could try it out and tweak a few things.

IMG_1986

And I did make some changes. And here are a few tips if you are trying to achieve a specific type of texture, amount of baked-ness, etc. Or really, just follow these tips every time you try a new recipe:

  • Only make a half batch. Really. What if you don’t like it? And for goodness’ sake, write out the entire halved recipe before moving forward; don’t try to do it in your head, or you might forget partway through and end up with a disaster!
  • At first, bake only a few (maybe 6) cookies at a time. (6 because everyone in your family, and even a neighbor or two, might want to be involved in the taste testing.) That way you can adjust bake time or oven temperature with each mini batch without ruining an entire batch (or half batch) of cookies.
  • Trust your instincts. For example, if the recipe doesn’t call for salt, but you like a bit of salt in your cookies, by all means, add a little salt. Experiment!

By the way, I wasn’t trying to achieve the exact Specialty’s cookie experience, but just a few things about the Specialty’s cookie that I like, like a tall cookie, crisp on the bottom, and still a bit gooey in the middle. And lots of flavors and textures.

The recipe called for walnuts and coconut and rolled oats. I like all these things, but I didn’t really want chunks of any of the above in my cookies, so I decided to give them all a spin in my Vitamix blender, so that I would have all the flavor, but a finer, more grainy texture. I didn’t turn the oats into flour… that would be too fine. There were still a few whole rolled oats here and there.

IMG_1976

Rolled Oats after a spin in the blender.

And I didn’t turn the walnuts into walnut butter either. I put the walnuts and the coconut together in the Vitamix and pulsed it a couple of times.

IMG_1974

Walnuts and Coconut after a few pulses in the blender.

I also didn’t add flax meal, which can act as a binder and make the cookies harder. I added some flax seeds instead.

And too many oats can dry out a cookie, so I reduced the amount.

I also took out the baking powder, because I wanted these gooey and moist.

Oh, and I added cinnamon, because everything is better with cinnamon.

Another thing I wanted was the tall cookie, consistent in size, so I used a cookie scoop (1.5 Tablespoon size). You really need one of these if you don’t have one already. I have been known to give them as gifts.

IMG_1963

This will change your life. And ignore the dough in the bowl. It’s snickerdoodle dough.

I then scooped out the dough onto wax paper, and flattened each ball only just a teeny tiny bit. Remember, I want them tall. I also want the cookies to look kind of like a hockey puck a thick galette, not rounded mounds. At this point, I froze these little discs of cookie dough (this helps with the tall part and the gooey part). I believe that this part is essential. I’ve tried just refrigerating the dough, and it does not have the same effect. FREEZE PLEASE. Once the discs of dough are frozen, put them in a freezer bag and store them in the freezer until you are ready to bake. At least twenty-four hours is good. I suppose if you are in a hurry you can skip the freezing part (cookies will not be as tall, and may spread out), or just freeze the dough for a couple of hours. Just freeze the dough.

IMG_1979

These ones might even be flattened a bit too much, but you get the idea.

Now, I also wanted the crisp on the bottom, so these cookies get baked at 360°, give or take a few. But there’s something else I am doing lately, and it’s probably not necessary, but if you can do it, you should try it. I put my pizza stone in the oven before preheating. Then when everything is ready to go, I slide the parchment paper and cookies directly onto the hot pizza stone, kind of like when you use a pizza peel. I have a couple of cookie sheets that have always annoyed me because one of the sides does not have a rim, but now I am so happy that I didn’t get rid of them, because they are great both as a pizza peel and for sliding my cookies onto the baking stone.

IMG_1967

Baking sheet: notice no rim on the right side.

IMG_1968

Cookies on parchment paper on a baking stone. Sorry, they are snickerdoodles. Don’t be confused.

So, after several batches of 6 cookies each, I figured out that the cookies were perfect baked at 360° on the center rack of my oven for about 10 minutes if I used the 1.5 Tablespoon scoop, plus an extra teaspoon of dough. Ugh. I know, I know. But it’s true. I only found that out because the last batch I only had enough dough for 4 cookies, plus a bit extra, so I just smooshed the extra onto each cookie ball before slightly flattening them, and those ones were by far the best. Exactly how I wanted them to turn out. Crisp bottom, tall, and a bit gooey in the middle, but not raw. So if you are using a 1.5 Tablespoon scoop, make it a hearty scoop!

IMG_1987

Hello, gorgeous.

If you hear of where I can find a 2 Tablespoon cookie scoop, please let me know.

Sorry for all the chit chat. Here is the recipe, (adapted from Heather Carter’s Loaded Oatmeal Cookies), which makes about 3 dozen, plus a few extra.

Oatmeal Chocolate Chip Cookies

  • 1 cup (2 sticks) room temperature unsalted butter
  • 1 cup brown sugar, packed
  • 1/2 cup white sugar
  • 2 large eggs
  • 1 teaspoon vanilla extract
  • 1 1/3 cups (6 ounces) flour
  • 1 tsp salt (or a tad more)
  • 1 teaspoon cinnamon
  • 1 teaspoon baking soda
  • 3 cups rolled oats (not quick cooking), chopped up a bit in blender
  • 1 cup shredded coconut, chopped up a bit in blender (optional)
  • 1 cup walnuts, chopped up in blender (optional)
  • 1 teaspoon flax seeds (optional)
  • 1 cup semi-sweet chocolate chips (or more if you like)

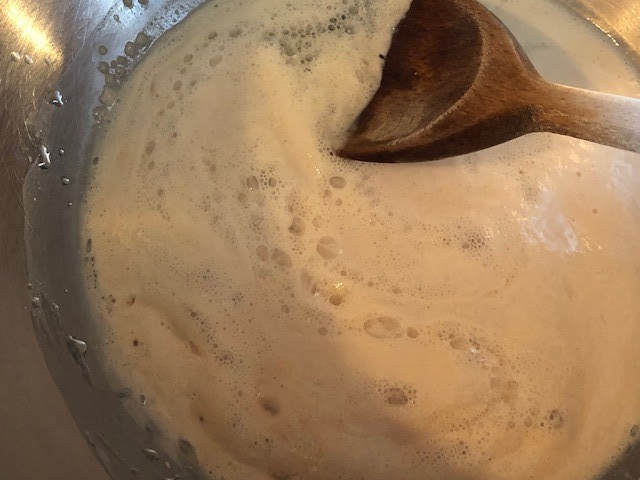
Beat butter and sugars until light and fluffy, about 3 minutes or so.

Add eggs and vanilla, and beat until light and fluffy, again, about 2 minutes, scraping down the sides and bottom of bowl.

Whisk together the flour, salt, cinnamon, and baking soda. Add flour mixture to the butter mixture and beat on low speed just until barely blended. Do not over mix!

Add oats and mix until just barely blended.

Add walnuts, coconut, and flax seeds, mixing until barely blended.

Fold in chocolate chips.

Line baking sheet or cutting board (needs to fit in your freezer) with wax or parchment paper and scoop balls of dough (a hearty 1.5 Tablespoons). They can be close together.

Flatten ever so slightly with your fingers. Place tray of dough in freezer and freeze for two hours. At this point you can bake the cookies, or place the frozen discs in a freezer bag and bake them a day later, or up to a month later. (I find it very handy to always have frozen cookie dough ready to be baked. You never know when a friend is going to drop by and you want to make something lovely, or you forgot about that potluck or bake sale.)

Preheat oven to 360°

Place frozen dough discs on parchment paper lined cookie sheet about two inches apart.

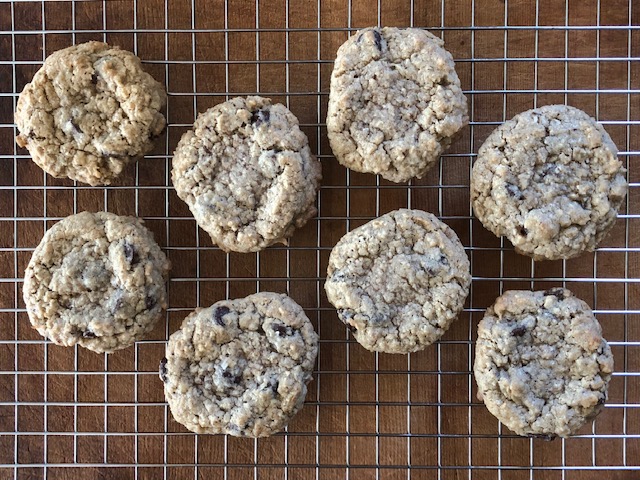
Bake on center rack of oven for about 10 minutes, or until edges start to brown but the top is still light in color and still glistens a teeny bit. That part is important. All ovens are different, so keep an eye on your cookies!

Cool on baking sheet for a few minutes before transferring to cooling rack.

Store in an airtight container.

Great thing about these cookies: If you do it right, these cookies will still be delicious and gooey/chewy the next day, and even the day after, if they last that long…

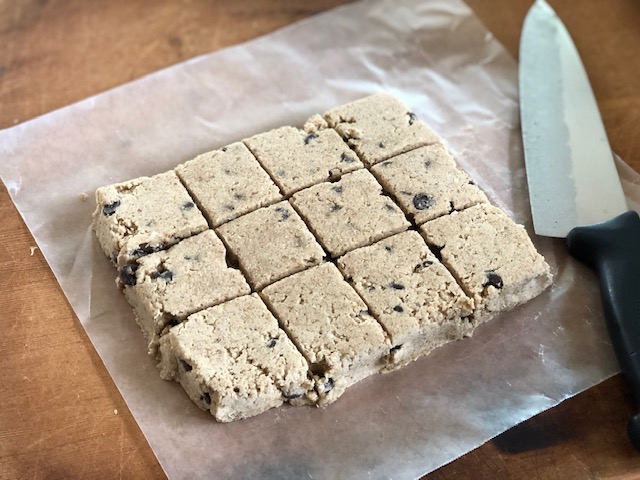
Oh, and if you really really want a cookie that looks and acts like a Specialty’s cookie, try this: take you cookie dough and spread it out about 1 inch thick onto a sheet of wax paper on a small tray or cookie sheet.

Then cover it with wax paper and smooth out all edges; top and sides, and put in freezer for a couple of hours. You can use a rolling pin to get the top nice and smooth, but just one or two swipes will do. Don’t agitate the dough!

After an hour or two, cut into squares. This is a half batch, and it makes twelve square cookies…

Separate squares, cover, and put in freezer until you are ready to bake, at least 2 hours, but longer is fine, if not better. If longer, store squares in a freezer bag.

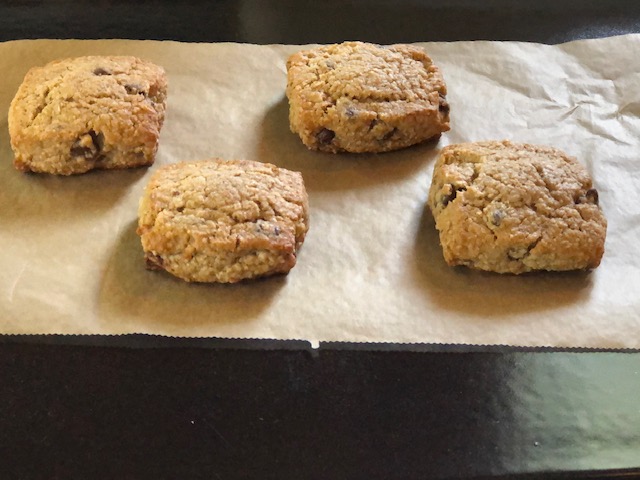
Bake the same way as you would the round cookies, using parchment paper. Because of the square shape, you will get more gooey center, and more crisp edges.

Whichever way you make them, I hope you like them! Enjoy!


Posted in Comfort Food, Cookies, Fun in the kitchen! | 2 Comments

Café au lait

IMG_1943

I’m not really wanting to give a recipe for café au lait. I just feel a great urge to talk about it. Yesterday while I was heating up milk to make yogurt, I noticed that that skin was developing on the top of the hot milk. I skim it off so the texture of the yogurt stays smooth. As I skim, I hear a voice saying “J’aime la peau”. This happens every time. And no, I’m not hearing voices. It’s a memory. The first time I went to France, I was 18, and had just graduated from high school. I stayed with a family in the suburbs of Lyon. When I say suburbs, I mean really old suburbs, like hundreds of years old. Hard, working class suburbs. The girl that was closest to my age was 16, and her name was Cathy (pronounced Kah-tee), short for Catherine.

IMG_1951

Me on the left, Cathy on the right, and one very cool car, in the courtyard.

I fell in love with France, and with that family. I was enchanted with every detail. One thing I found funny (at the time), was how they drank coffee. This is not news to most of you, but I’m going to talk about it anyway. After dinner, they would serve very very strong coffee (not espresso, just strong coffee made in a drip coffee maker) in teeny tiny cups, with sugar cubes. The kids liked to dunk the sugar cubes into the coffee and eat them like candy. I still remember exactly what it tasted like. Bitter, strong, and sweet.

In the morning, the coffee pot still had leftover cold coffee in it from the night before. This is the part that surprised me most. They didn’t make fresh coffee in the morning. That first morning, Cathy got out a pot and poured some milk into it. She heated it up to almost a boil. While the milk was heating up, she got out some bowls, and poured what was left in the coffee pot into the bottom of the bowls. Maybe about a quarter cup or so. All I could think was, “I want a LOT more coffee than that!”. She then got out a strainer thingie… looked like this one:

IMG_1952

For straining the milk. But I don’t strain it.

She asked me, “T’aimes la peau?” In English, do you like the skin? Meaning the skin that develops when you heat up milk. She was offering to strain the milk for me. And then she said, “Moi, j’aime la peau”. Me, I like the skin. I guess a lot of people don’t like the skin to go into their coffee. As you pour the milk, suddenly a big chunk of skin will plop down into it. It has texture to it. Kind of creamy and filmy, kind of chewy. Barely chewy. And the flavor, extra sweet. I had to try it. When you are drinking your coffee, the skin will surprise you. You won’t know when you’re going to get it. It’s unpredictable. (If this sounds yucky, keep in mind that I am a texture girl. I love oysters, mussels, eggplant…. all that gooey stuff. )

I loved that they served their café au lait in bowls. They would take the leftover baguette from the day before (there was always leftover baguette), cut it in half lengthwise, slather unsalted butter and jam on it, and dunk it in their coffee before eating. Nothing was wasted. And everything was delicious.

And for the record, J’aime la peau.

IMG_1947

Posted in Comfort Food, Musings | 3 Comments

Sesame Noodle Salad

IMG_1913

Every year at my daughter’s elementary school, they have a festival called “International Night”. All the kids (and sometimes the parents and teachers) perform dances, there is a big potluck of the most amazing food, and of course, a bake sale. This year I taught the third graders a Rumba to perform, and I danced Sevillanas with one of the dads… it was kind of spur of the moment, because my original partner got sick. He was a great sport!

IMG_1920

¡Olé!

I also made white chocolate macadamia nut cookies for the bake sale. I am working on perfecting that recipe, so I will be posting soon about that. In all the chaos of trying to find a dance partner, I panicked when I realized I hadn’t thought about a potluck dish. Then DING! I remembered my default potluck dish – sesame noodle salad. I got this recipe from my friend Monica. It is so simple and delicious, so much so, that there are never any leftovers when I make it. It’s fast and easy, and makes a LOT.

IMG_1916

Delish!

You don’t really need a lot of fancy ingredients, but there are few that you might not have on hand. Mainly, the sesame oil and chili oil. I now keep those handy for making sushi and fried rice, and this noodle dish, of course. They add such great flavor.

IMG_1929

Some things you will need. Those are sesame seeds on the left.

I changed the recipe just a bit. Here it is:

Sesame Noodle Salad

  • 1/4 cup Sesame Oil
  • 1/4 cup Black Soy Sauce
  • 2 Tbsp Granulated Sugar
  • 2 Tbsp Hot Chili Oil
  • 2 Tbsp Balsamic Vinegar
  • 1 1/8 lb Thin Spaghetti
  • 1/2 cup Toasted Sesame Seeds
  • 1/2 cup Chopped Cilantro
  • 1/2 cup Shredded Carrots

In a large bowl, whisk together sesame oil, soy sauce, sugar, chili oil, and vinegar.

Cook spaghetti (or vermicelli) in boiling water until barely tender. Drain, rinse with cold water, and drain again.

With your hands, immediately toss the pasta with the dressing, making sure pasta is completely and evenly coated. Add seeds and continue folding dressing through the pasta, literally “wiping” the bowl with the noodles.

Remove to a shallow platter, top with cilantro and shredded carrots, and serve at room temperature.

Note: The original recipe calls for thinly sliced green onions, but I’m not a fan, so I use cilantro and carrots. Either way, add the cilantro and carrots (or green onions) only shortly before serving. Enjoy!

IMG_1913


Posted in Busy-day meals, Comfort Food, Fun in the kitchen! | 2 Comments

Quick and Delicious Tomato Sauce

IMG_1849

I make this pasta sauce frequently, and some of my favorite things about it is how quick it is to make, it only requires three ingredients (tomatoes, butter, and onion), and it is delicious! This recipe comes from Marcella Hazan’s Essentials of Classic Italian Cooking cookbook.

IMG_1853

Matthew and I received this book as a wedding gift from our friend Dave, who is now a piano tuner extraordinaire in the heart of the Midwest, in Indianapolis. His inscription reads: Wishing you many, many joyful meals together! Nothing can replace good old cookbooks that fall open to your favorite recipes, pages warped from spilled ingredients of years gone by. I often look up recipes online, but my tried and true cookbooks are like old friends; there is history there.

When you are pressed for time, and need to make something just a little extra special, I say this is the ticket. Homemade pasta sauce. I am going to tell you how to make it just the way I make it. From memory. Hehe. It’s so easy.

Get out your dutch oven or heavy bottom pot. Open a 15.5 oz can of very good tomatoes (the San Marzanos, please), and pour tomatoes and juices in the pot. Crush up the tomatoes with your hand; it’s easier and quicker that way, and you will feel rustic while doing so.

IMG_1846

You must use good tomatoes!!!

Now peel a medium yellow onion, cut it in half, and put both halves cut side down in the tomatoes. Add a chunk of unsalted butter… 5 tablespoons, but sometimes I go crazy and just throw in an entire cube.

IMG_1847

I am just noticing that this looks like a face with googly eyes and a scared mouth.

Bring the sauce to a very slow but steady simmer. Let the sauce simmer uncovered for at least 45 minutes. I like to let it simmer for longer if possible. Stir it every now and then without breaking up the onion. You’ll notice it changing color a bit, and the butter separates a little from the tomatoes.

IMG_1848

Now the googly eyes are getting a bit scary.

The nice thing about this is that you can just go about your business and do other things. As long as the sauce is at a slow simmer, nothing will burn. At your leisure, when it suits you, you can make a little tossed salad and get some pasta into boiling water, all the while knowing your sauce is simmering and doing its thing. Now, when the sauce has been simmering for at least 45 minutes, and you are ready to put your dinner together, drum roll please: … for people like me who don’t like biting into onion chunks, this is so great: remove the onions and discard. Gosh, I love this recipe. Now give it a final stir and it’s good to go. The sauce is deliciously sweet and fresh tasting, and just perfect for an easy meal with a touch of homemade love.

IMG_1849

Fresh and delicious.

It is also wonderful with freshly grated Parmesan or Romano cheese.

IMG_1850

I had to take a bite.

Feel free to add salt and cracked pepper to taste, or throw in some fresh basil at the last minute. The simplicity of this sauce is its secret, so don’t overdo it. I add nothing, because I like the sweetness of the tomatoes, just the way they are. You might just want to dip bread into the sauce and eat it that way…Buon Appetito!

Tomato Sauce with Onion and Butter

(recipe from Marcella Hazan)

  • 1 15.5 oz can of San Marzano tomatoes, including the juices
  • 1 medium yellow onion, peeled and cut in half
  • 5 Tablespoons (or a bit more) unsalted butter

Place the tomatoes in a dutch oven or heavy bottom pot and crush the tomatoes with your hands, or a wooden spoon. Add the onion halves, cut side down, and the butter. Bring to a slow simmer and let cook uncovered for 45 minutes or longer, stirring occasionally without breaking up the onion halves. Remove onion halves and discard, and give a final stir before serving. Enjoy!

Tip: I sometimes use the leftover sauce to cook frozen meatballs. I like the Trader Joe’s “Party Size Mini Meatballs”. I put the leftover sauce in a sauce pan, add frozen meatballs and stir to coat. Then cover and let simmer for about twenty to thirty minutes. The result is so so good! And again, quick and easy!

IMG_1849


Posted in Busy-day meals, Comfort Food, Fun in the kitchen! | 2 Comments

Arepas, Take Three!

IMG_1789

If you read my last post, Arepas, Take Two!, you will know that I’m feeling a little obsessed over these things. Since making them, I have been wanting to try another version. Several lifetimes ago, I waited tables in a French restaurant in St. Louis: Bernard’s Bar & Bistro.

Yes, that’s me! (about a million years ago)

The chef, Bernard, used to make fried polenta as a side dish for some of his meals. One time, in the kitchen, our manager Susan was having some as a snack, with raspberry jam. I remember thinking that it was a terrible idea, but one bite and I was sold. Polenta, crispy on the outside, creamy on the inside, ever so slightly salty, with a dollop of raspberry jam on top was just about the best thing I had ever had in my life.

Now here I am, having fun with Arepas, and knowing that I can come pretty close to that experience from so many years ago. Making them is pretty much exactly the same as making the other arepas, with just a few minor tweaks. Instead of the Mexican cheese blend, I used Queso Fresco, which you can find at your local Mexican grocery store. And I fried them in unsalted butter. That’s it! They make a wonderful after school snack, especially at my house, because my kids aren’t convinced this combination is a good idea, so I get to eat almost all of them myself. Relax. I halved the recipe. You can still make them this way for a savory snack or breakfast side, by the way. These are the ingredients you’ll need, plus a good raspberry jam (I like the raspberry jam from Trader Joe’s. It’s SO good.), and maybe even some plain yogurt.

IMG_1736

All you need: pre-cooked yellow corn meal, queso fresco, salt and water.

Arepas con Queso Fresco

  • 1 cup Precooked Yellow Cornmeal flour (Masarepa or P.A.N.)
  • 1 tiny pinch salt
  • 3/4 cup shredded Queso Fresco
  • 1 cup plus 2 Tablespoons water
  • Unsalted butter for the pan

Mix the first three ingredients in a glass bowl, then add the water, mixing with your fingers until there are no cornmeal lumps. Let the cornmeal rest for about 5 minutes to allow the cornmeal to set. It will feel wet, and that’s okay.

Put a goodly amount (1 Tablespoon?) of butter in a skillet over medium heat.

When skillet is hot and butter is sizzling, make golf-ball sized balls of dough, flatten them in the palm of your hand to about 1/2 inch, and fry them in the unsalted butter, about 5 minutes on the first side, and about 5 minutes more on the second side.

Makes about 8 arepas.

Enjoy with raspberry (or strawberry) jam. And maybe a dollop of plain yogurt.

IMG_1791

Posted in Comfort Food, Fun in the kitchen!, Gluten-Free | 6 Comments

Arepas, Take Two!

IMG_1757

Sometimes, and for me, quite often, I have to do things wrong before I can do them right. This is a gross understatement. Anyway, my first attempt at making arepas was successful, and my family loved them, but it wasn’t what I was looking for. I kept remembering a thick, yellow corn tortilla that I once had in Panama for breakfast. It was crispy, lightly salted, and soft on the inside. And it was served with a sweet café con leche, oh my.

After having a conversation with my sister Jane (via text!) while making a couple of different versions, she mentioned how she remembered them being grilled in butter. Well, darn it if everything isn’t just a lot better grilled in butter. So today, when I got home from running errands, I whipped up another batch, just the way I wanted to, with wild abandon. Nobody was home.

Let me tell you, I was not careful. I was in a hurry. My kitchen was a mess because I had been making yogurt and straining it, and my counter was full of stuff. I threw some ingredients in a bowl, in the way I imagined these things should taste. I even let the butter almost burn before grilling them, and they came out perfectly.

Here is what you’ll need – yellow precooked cornmeal flour (Masarepa, or P.A.N.) that you can find at your local Latin American grocery store, water, salt, cheese, and perhaps some spices.

IMG_1736

This picture shows queso fresco, but I actually used a Mexican shredded cheese blend.

Here’s what I did: I put one cup of the cornmeal flour in a glass bowl, added a pinch of salt, and about a half cup of grated cheese… you can use any kind you like. I actually used Trader Joe’s Mexican Style Cheese Blend, even though it’s just queso fresco in the picture above. I mixed it up with my hand, and poured in a cup of cool water and a little bit more. So maybe one cup plus two tablespoons.

IMG_1750

I then mixed it up really well with my hand, kneading it and squishing it through my fingers (sorry, but it’s true) so that it was nice and smooth. The dough was very wet, but it started to firm up pretty quickly.

Then I added a dash of cumin and a dash of oregano, because I felt like it.

IMG_1751

I then did a bit more kneading and squishing. Like I said, the dough was wet, but firming up quickly. I put some butter in a nonstick skillet and heated it up on medium high heat, which took a few minutes. Which was perfect, because the dough needed just a few minutes to sit and firm up. When the butter started browning, I panicked and quickly made golf-ball sized balls of dough, flattened them to about 1/2 inch, and put them in the skillet, thinking I had blown it because of the butter turning brown. Sizzle sizzle. But when I flipped them after about three minutes, I was so happy to see how beautiful they looked!

IMG_1752

Not the prettiest picture, and they are not uniform. But this is not about being perfect.

This was exactly what I was going for! And they not only looked like the arepa that I had in Panama, but they also looked like the arepa that I had recently had in Oregon. Really, butter solves so many problems. But if you are vegan, you can skip the cheese and fry in oil, and I think they would still be delish.

After flipping, I cooked them for another 2 to 3 minutes, and then put them on a plate with a paper towel. When I finished making the second batch, while the pan was still good and hot, I made a couple of scrambled eggs for my lunch. Now, this whole process probably took less than 15 minutes. LESS THAN 15 MINUTES. I served the eggs with an arepa, topped with roasted tomato salsa and greek-style yogurt. Heaven.

IMG_1760

Oh my, so good!

I then had to have a couple more arepas, to make sure they really were exactly how I wanted them to be. And they were.

Yellow Cornmeal Arepas

  • 1 cup Precooked Yellow Cornmeal flour (Masarepa or P.A.N.)
  • Dash salt
  • Pinch of Oregano
  • Pinch of Cumin
  • 1/2 cup shredded cheese of your choice
  • 1 cup plus 2 Tablespoons water
  • Butter for the pan (salted is fine)

Mix all the ingredients well, kneading with your hand (just use one hand, you’ll need the other hand to be clean!).

Put a goodly amount (1 Tablespoon?) of butter in a skillet over medium high heat.

When skillet is hot and butter is sizzling, make golf-ball sized balls of dough, flatten them to about 1/2 inch, and fry them in the butter, about 3 minutes on the first side, and about 2 minutes on the second side. Or if you prefer to not risk burning them, you can heat the pan on medium heat, and fry them for 5 minutes each side. They will still come out golden and crispy, with no hint of burn.

Makes 8 or 9 arepas.

Enjoy!

IMG_1757

Posted in Busy-day meals, Comfort Food, Fun in the kitchen!, Gluten-Free | 4 Comments

Arepas!

For Spring Break this year, we went to the Oregon Coast. It’s a magical place. Matthew and I went there for our honeymoon, as it was a favorite place of both of ours, and we were so excited to finally introduce our girls to it.

IMG_1700

My clan at wonderful Cannon Beach.

I was a little nervous about not getting to eat decent food for several days in a row, which often happens when we are on vacation, so I packed a ginormous cooler full of meals to prepare. Turns out I got a break from cooking, because we found many great restaurants, and a fantastic bakery! I keep thinking I am going to tackle learning how to make croissants, and that that will be my next blog post, but then I get distracted and have to obsess over something different. So here it is this time: Arepas!

IMG_1732

My first attempt at arepas.

I’m not going to give you the history of these things, because I don’t know it, but what I do know is that we ate at a little café near the place we were staying, and with their breakfasts, they served these amazing little cornmeal cakes called “Arepas”.  One bite and I was sold. It reminded me of something I had had in Panama for breakfast one time (tortilla de maíz), made for me by my Tía Lema, but it wasn’t quite the same. Nevertheless, I was in heaven, and couldn’t wait to get back home and do some research.

IMG_1735

Special corn meal flour needed.

Arepas are easy to find in Venezuela or Colombia, but if you’re just sitting at home in your American kitchen, you might want to try making them yourself. You need a special “precooked” corn meal flour to make these. I went to Plaza Latina in Shoreline just north of Seattle to find this specialty item, and I wandered the aisles staring at everything and thinking I really need to learn how to make posole. And that is how easily I get distracted. In fact, I am distracted by this idea right now.

Back to Arepas. I looked at about a million recipes. They are all similar, and I found one on Epicurious that I liked. They are stuffed arepas. The ones that I had in Oregon had goat cheese mixed into the dough (heavenly), but no filling, but I liked the idea of stuffed arepas. They are actually pretty simple to make. The only tweak I did to the recipe I found was that I added a bit of oil to the dough. Here is what I did:

I mixed 3 cups precooked white corn meal, 2 cups very warm water, 1 cup very warm chicken broth (you can just use 3 cups water if you want this to be vegan/vegetarian), 1 teaspoon salt, and about 1 tablespoon canola oil in a glass bowl with a wooden spoon.

IMG_1722

Once everything was well combined, I got my hand in there and kneaded the dough until the dough was smooth and there were no more lumps. This part is important, so don’t skip it.

IMG_1724

At this point I let the dough rest for a few minutes. While the dough was resting, I got my filling ingredients ready to go. I chose refried beans (homemade, of course), slow cooked shredded beef (recipe included below), and cheese.

IMG_1725

Once I got that done, and maybe had some tea, the dough had rested for at least 5 minutes. I didn’t cover the dough, but I suppose that would have been a good idea if it had taken me more than 5 minutes to get things prepped. You don’t want the dough to get dry. Next I made 12 balls out of the dough. I then made an indentation in the middle of the ball with my thumb. You want to be able to fit about two heaping teaspoons of filling in it.

IMG_1726

Oh my goodness, my kitchen is a mess!

I made two different kinds: one with beef and cheese, and the other with beans and cheese. Just one generous teaspoon of each kind of filling.

IMG_1727

I put more cheese than this, but I wanted you to see the filling below.

I then pinched the dough together to completely cover the opening.

IMG_1728

Then I rolled it back into a ball and flattened it to about 1/2″ thickness, pressing in the sides if they looked like they were going to crack. The dough shouldn’t be dry. (In fact, if it cracks too easily, you should probably add a bit more liquid to the dough. If it is too sticky, add a bit more corn flour.)

I then placed the filled, flattened cakes on my electric griddle preheated to 350°. I let them cook for about ten minutes… when I touched the top of the cake, it was warm. I then flipped them and let them cook for ten more minutes, if not a bit more.

IMG_1731

The ones on the right have been flipped. The ones on the far left have not.

Initially I started with a 325° griddle, and it wasn’t quite hot enough. You want to have some golden spots here or there. But too hot, and they cook too fast, not completely cooking through on the inside, and burning on the outside. So 350° was about right. Medium heat. When the first batch was done, I put them in the oven to keep them hot – again, 350°.

IMG_1732

I don’t know if these are an acquired taste. I grew up eating things like this, so I adore them. Here’s the good news: my family adored them as well. Even my 8-year-old. I served them with Trader Joe’s Fire Roasted Tomato Salsa, which was as close as I could get to chiltomate , which is the ridiculously delicious salsa of roasted tomatoes and peppers they served them with at the Osprey Café in Seaside.

IMG_1734

Notice the empty platter!

This was mine before I added the salsa:

IMG_1733

Are you getting hungry yet?

Stuffed Arepas

(adapted, just a bit, from Victoria Granof’s Arepa recipe on Epicurious)

  • 3 cups precooked white corn flour (P.A.N. brand recommended)
  • 3 cups very warm water (can substitute chicken broth for flavor)
  • 1 1/2 teaspoons salt (or just 1 scant teaspoon if you use chicken broth)
  • 1 scant Tablespoon vegetable oil

Preheat griddle and oven to 350°.

Mix all ingredients together with a wooden spoon, then knead with your hand until there are no more lumps and dough is smooth.

Let dough rest for 5 minutes while you prepare the fillings. Cover dough with a barely damp tea towel.

Divide dough into twelve balls.

Make indentation in balls with thumb, fill with about 2 teaspoons of filling of your choice. Pinch dough to cover filling, and roll back into a ball. Flatten to about 1/2 inch thickness.

Place on ungreased, nonstick griddle at 350° or medium heat (you can also use cast iron, which would probably be better!) and cook on each side for ten minutes. Place in oven to keep hot.

Makes 12 arepas.

Enjoy with salsa of your choice!

P.s. Here’s how to make the shredded beef – so easy! Get a chuck roast, put it in your slow cooker and pour in about a cup of your favorite salsa and coat the meat. Put the lid on. Turn your slow cooker on low and set for twelve hours. When the twelve hours are up, let the beef cool down, shred it with two forks, and store it in your fridge. Use it for enchiladas, tacos, or….. Arepas!

P.p.s. I had leftover dough, so the next day I made some more arepas, and while I was making them, the dough was cracking, but I just shrugged it off. Bad idea! The arepas that my daughters were fighting over the first day, were dry and tough the next; nothing like the deliciousness from the day before, so pay attention to that dough!

IMG_1732


Posted in Fun in the kitchen!, Gluten-Free | 6 Comments

Hamburger Buns

IMG_1603

Last week, I wanted to make smashed burgers for dinner, but realized we didn’t have any hamburger buns. Not wanting to run out to the store, I decided to find a recipe and make them myself. Why not, right? So I found a 40-minute Hamburger Buns recipe on the Taste of Home website. Perfect! 40 minutes!

My assistant and I got busy right away. Based on some of the reviews, there were only a few tweaks that I made to the recipe. This is what we did:

First, we mixed 2 Tablespoons dry active yeast (that’s right, it’s a lot of yeast!) in 1 cup plus 2 Tablespoons warm water… about 110°. Then we added and stirred in 1/3 cup canola oil and 3 Tablespoons granulated sugar, and let the mix sit for about 7 minutes. When the time was up, and I put a wooden spoon in to move the mixture around, it looked like this:

IMG_1592

Bubbly and lovely!

Then we added 1 large egg at room temperature and 1 teaspoon salt, and about 3 cups (13.5 ounces) of all-purpose flour, mixing until everything was combined. The dough was wet and shaggy. Looked like this:

IMG_1593

Normally I would be tempted to add more flour, but I didn’t. Many of the reviews said their buns came out too dense, and I didn’t want that to happen. We scraped the dough out onto a floured surface (probably used about a half cup of flour on the pastry board) and kneaded the dough for about 5 minutes, until it was smooth and elastic.

IMG_1594

My helper

Oh, and ignore that bag of bread flour in the picture. We used all-purpose, I promise. Once the dough was smooth and elastic, I cut the dough into 8 even pieces with my bench scraper (but a sharp knife would do just fine as well), and shaped them quickly into balls.

IMG_1596

We then transferred the dough balls onto two large cookie sheets lined with parchment paper, and slightly flattened each ball with our hands.

IMG_1597

You can flatten them more if you like…

These did not spread, so it is important to flatten them to the size you want, but don’t go crazy with flattening! At this point, we covered the buns with a tea towel, preheated the oven to 425°, and let the buns rest for ten minutes or so. We had two trays, so we got to experiment with the timing of the resting time. After ten minutes, we stirred up 1 egg and brushed the tops of the buns with the egg, then put them in the oven, center rack. We let them bake about ten minutes, until they were golden brown.

IMG_1603

Oddly delicious!

When we pulled them out of the oven, we then brushed the second tray of buns with the egg wash and put them in the oven (they had been resting for 20 minutes). For something that was so easy, it was crazy how delicious these buns were! They tasted like brioche buns! The second batch came out slightly fluffier and lighter in texture, so I would probably advise to let the buns rest for 20 minutes. Either way, they were delicious! Warning: these buns are not as light as the store-bought kind, but here is the real warning: these buns are so delicious you will start making up reasons to have them at every meal.

IMG_1604

So good!

We loved these so much, the girls want me to make them, but smaller, for rolls for our Thanksgiving dinner. I’ll add that to my list.

Hamburger Buns in One Hour!

(Adapted from Jessie McKenney’s 40-Minute Hamburger Buns)

  • 2 tablespoons active dry yeast
  • 1 cup plus 2 tablespoons warm water (110° to 115°)
  • 1/3 cup vegetable oil
  • 3 Tablespoons sugar
  • 1 large egg at room temperature, plus 1 more for egg wash
  • 1 teaspoon salt
  • 3 to 3 1/2 cups (13.5 ounces plus more) all-purpose flour


  1. In a large bowl, dissolve yeast in warm water. Add oil and sugar; let stand for 7 minutes. Add 1 egg, salt and about 3 cups flour – dough will be shaggy and sticky.
  2. Scrape onto a floured surface; knead until smooth and elastic, about 5 minutes. Do not let rise.
  3. Divide into 8 pieces; shape each into a ball. Place 4 per baking sheet lined with parchment. Flatten a bit lightly with hands to size you prefer.
  4. Preheat oven to 425°
  5. Cover and let rest for 20 minutes. If you are short on time, 10 minutes is fine.
  6. Beat the remaining egg and brush onto the tops of the buns and bake at 425° for 8-12 minutes or until golden brown. Remove from pans to wire racks to cool.

IMG_1603

Posted in Busy-day meals, Comfort Food, Fun in the kitchen!, Yeasty Things | 4 Comments

Smashed Burgers (Midwest Style)

IMG_1479

Okay, I kind of can’t believe I’m going to write a post about this. But for a long time now, I have not really enjoyed eating burgers at restaurants. They are always too big, too thick… too something. As long as I can remember, I have been telling dear husband about the burgers they used to make at Steak ‘n Shake when I was a kid. The patties were flat and crispy – YUM!!! The only thing that comes close is the the mini burger at Kidd Valley. That’s my favorite.

So about a month ago, I looked up online “make crispy edge burgers like Steak ‘n Shake“, or something like that, and sure enough, I am not the only one hankering for a flat and crispy burger! In fact, it’s a thing. And it’s been a thing for a while. People actually get really excited about it. There’s an art to it. And there are several other places that make their burgers this way that I never heard of, like Shake Shack and In-n-Out Burgers, to name a few.

The trick is this: the burgers are smashed down the second they hit the hot pan, and the pan has to be very hot. The first time I tried making these, I used my cast iron griddle on my stove top, because cast iron can get good and hot. The burgers were fabulous, however, they didn’t have quite the crisp that I was going for. My cast iron doesn’t like it when I heat it up too hot on a burner, so I had to try something different. And I did. And it worked.

Here is what I did. First I put my cast iron griddle in my bbq grill and sprinkled some salt on it.

IMG_1473

I then closed the lid and let the bbq heat up to about 500°.

IMG_1472

Getting close to temp. Do you like my shadow?

Now, the burgers are small, about 3 oz. each. So I got 12 oz. of ground beef – 85%/15% – and made 4 small balls.

IMG_1474

The kitchen is a mess, and it’s about to get messier.

I then pre-flattened them, but you don’t really have to do that. I just had a feeling that it would be helpful. And I think it was.

IMG_1475

I then toasted the hamburger buns in butter, face down on my electric griddle, so I could do them all at once. I’ve read that you should use just plain old hamburger buns, nothing fancy, but we used whole wheat brioche buns, and there were no regrets. Hey, we didn’t have fries or shakes. Just burgers. So good.

IMG_1471

Do you like my state-of-the-art, vintage 1962 stove top? They don’t make ’em like that anymore.

While the grill outside was heating up, I got everything else ready, including preparing the individual buns and slicing cheese. It’s really important, because the smashing and baking is done in less than two minutes. Everything needs to be ready to go.

IMG_1476

IMG_1477

Unfortunately, I couldn’t take a picture and do the smashing technique at the same time, so I’ll have to describe it to you. You want a very sturdy spatula that has no holes in it. Not something that is bendy or flexible. Heavy duty please. I found this one at a restaurant supply store. It’s not super big or anything, but it worked!

IMG_1487

They say 5 inches wide is ideal. This one is not that, but it still did the job.

I opened the lid of the bbq grill (leave the lid open for the rest of the time) and put the first burger on the griddle back left. I immediately smashed it down with all my might and without letting up on the pressure, slid the spatula toward me to remove it. I then smashed and slid again to make sure that the entire burger was smashed flat. This took about 4 seconds total. I then put the second one on the griddle back right (location is important for the sliding off part) and did the double smash. Then the third burger front left double smash and slide, then the fourth, same thing. (The slide part is important, because if you lift the spatula off, it will take part of your burger with it. Smash and slide, please.)

I let the burgers cook for about 40 seconds or so, keeping in mind that the first burger would be on there for probably a total of 60 seconds. Did I do that math right?

IMG_1478

I’ve never gotten steam like this before!

Then I flipped them. Important! Flip them in the same order that you put them on the griddle, and make sure that you scrape underneath all the crispy grilled part to get all the good stuff. You don’t want it to get left on the griddle! No more smashing. You only smash at the very beginning.

IMG_1479

Look at that seared perfection!

As soon as I flipped them, I put the cheese slices on and let them cook for about 15 seconds more.

IMG_1480

I then put them on a plate, and then immediately onto the prepared buns; this all happens very fast! My family absolutely loves these burgers. I took a picture of Millie’s burger (below). She asked me to text the picture to her. When I asked her why, she said, “Because it’s the perfect burger”.

IMG_1484

The perfect burger.

Smashed Burgers (Midwest Style)

What you will need:

  • Cast iron griddle
  • Skillet or electric griddle to toast the hamburger buns
  • BBQ Grill
  • Stiff, heavy duty metal spatula without holes
  • 3 oz. ground beef (80%/20% or 85%/15%) per hamburger
  • Hamburger buns, butter, salt and pepper, and whatever else you like on your burgers, but don’t pile them up too high with stuff. Flatter is better.

How to make them:

  1. Place cast iron griddle on your BBQ grill, sprinkle salt (and pepper if you wish) on the griddle. This will season the beef. Turn on to high, and close the lid.
  2. Divide ground beef into 3 oz balls, and pre-flatten if you wish.
  3. Grill your hamburger buns in butter.
  4. Prep buns with condiments so they are ready to go.
  5. Open BBQ grill and leave open. Place burgers on griddle one at a time, smashing each burger twice. Use the smash and slide technique.
  6. Let burgers cook for about 45 seconds.
  7. Flip burgers, making sure to scrape the crispy stuff with the burger, and place cheese on burgers, if desired. NO SMASHING THIS TIME.
  8. Let cook for 10 to 15 seconds more.
  9. Remove burgers from the griddle, place in buns, and enjoy!

IMG_1480


Posted in Busy-day meals, Comfort Food, Fun in the kitchen! | 5 Comments