
Lately I have been making my sourdough bread in a loaf pan, and we are all loving it! So many reasons why. It makes great uniform slices for sandwiches, toast, french toast… and the crust, while crispy, is a little softer on the sides and bottom, making it easier to get thin, even slices. All the while having that fantastic sourdough flavor. I’m sold. Now don’t get me wrong. I still feel all dreamy when I make a free form loaf, and it looks like something that just came from a French bakery.

The recipe is the same. The baking vessel is different. That’s it! So I’m going to share with you my latest favorite recipe. I use three different kinds of flour, but it works just fine using only unbleached all-purpose flour (King Arthur Flour please!!!!) or mix of all-purpose and bread flour. I tend to experiment all the time, but I like this one so much that I actually wrote it down.
All of the flours that I use are King Arthur flours. The results are consistently wonderful (which is shocking!). I highly recommend using King Arthur flour if it is available where you are. A secret ingredient when using whole grain flours in your breads is diastatic malt powder. I only use a small amount (1 teaspoon), but I believe it helps with the rise, and adds to the flavor of the bread. It’s optional, so if you don’t have it, no big deal. No need to replace it with something else, but if you feel so inclined, you can use a teaspoon of honey or molasses during the water/starter mix. Or nothing at all. The magic of sourdough bread is that all of that deliciousness is just flour, water, and salt… and starter, of course.

Okay, get ready, because here is how to make this bread. Don’t panic that it has two overnight rests in the fridge. I designed it that way to suit my schedule. In fact, the first time I did it, the first overnight in the fridge was a mistake, but it worked so well for my schedule that now I do it almost every time. And those two overnight rests will improve the flavor of your bread! I will include a picture tutorial at the bottom of the post.
Sourdough Sandwich Bread
(Can take up to 36 hours or longer, but with very little hands-on time)
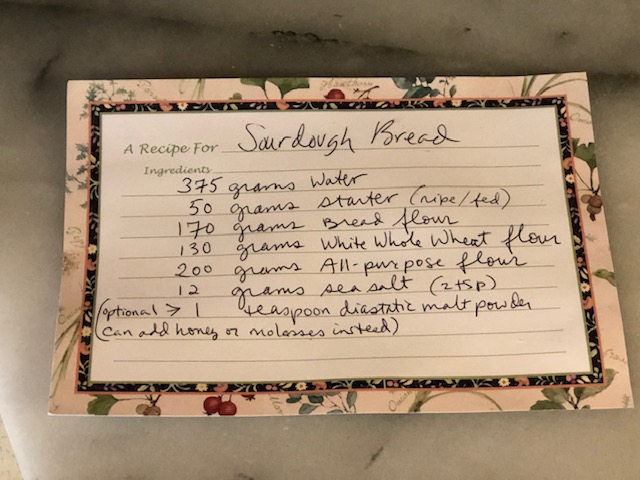
- 375 grams (filtered if possible) room temperature water
- 50 grams ripe (fed) starter
- 170 grams King Arthur Bread Flour
- 130 grams King Arthur White Whole Wheat Flour
- 200 grams King Arthur Unbleached All-Purpose Flour
- 12 grams (2 teaspoons) fine sea salt or kosher salt
- 1 teaspoon diastatic malt powder (optional)*
- Unsalted butter for buttering the pan
Day #1:
- In the morning, feed your sourdough starter. If you keep your starter in your refrigerator, you may want to start feeding it a day or two before to get it nice and active, and leave it on your counter between feedings.
- Once your starter has just about tripled in size (this can take a while… 6 to 8 hours, and it’s okay if you wait a little longer to use it), in a medium bowl, whisk 375 grams water and 50 grams starter together until well combined and milky in color. You can use a fork or a dough whisk for this.
- Add flours**, salt, and malt powder, if using.
- Mix (I like to use a dough whisk) until all the flour is incorporated and you cannot see any dry bits. Dough will look shaggy and messy.
- Cover bowl with plastic wrap (or something similar) and let sit for an hour. This resting period is called the autolyse. (a true autolyse would not include salt or malt powder, but after forgetting to add those later a couple of times, I decided that it works just fine to combine everything together in the beginning.)
- After an hour, mix the dough until it is smooth and cohesive. Using a wet hand (I keep a bowl of water handy), grab the dough from the side of the bowl and press it into the center. Rotate the bowl and continue to grab and press until you’ve gone around a couple of times. This should take maybe 30 seconds. Flip the dough over in the bowl, cover the bowl with plastic wrap, and put it in the fridge to rest overnight. You are just putting things on hold until the next day, while developing flavor in the dough.
Day #2:
- The next day, in the morning, pull the dough out of the fridge. It will look pretty much the same way it looked when you put it in the fridge. Give the dough one set of stretch and folds, then cover and repeat 30 minutes or so later, always covering the dough between sets. Repeat again two more times, so that you will have done 4 sets total of stretch and folds over the course of two to three hours. Normally it’s within the first two hours, but since the dough is so cold, I find I have more wiggle room. To do a set of stretch and folds, wet both hands with water and grab the dough from the side of the bowl that is farthest away from you. Stretch it straight up, and then fold it all the way to the other side of the bowl. Turn the bowl half way around and repeat. Turn the bowl a quarter turn and repeat. Then turn the bowl half way around and repeat. This is one set of stretch and folds. Warning: since the dough is very cold, it will feel more like pulling taffy than working with a slack dough, which is fine. It’s actually easier. When you have completed your sets of stretch and folds, leave the dough in the covered bowl on your kitchen counter for about ten hours, or until it has doubled in size, is jiggly, billowy, and has a bubble or two on the top. (Note: if you only have time or patience to do one or two sets of stretch and folds, that’s fine as well. But if you can, do all four.)
- About ten hours later, once the dough has doubled in size and is jiggly, gently scrape the dough out onto a lightly floured work surface using a spatula or bowl scraper. It is time to preshape your dough. Take your fingers and slide them under the sides of the dough and gently stretch the dough out a little bit to make a large circle. Fold the sides of the dough into the center, starting at one side and continuing until you have gone all the way around. Flip the whole thing over with the assistance of a bench scraper or bowl scraper. The dough will be “smooth side up”. Let rest for 10 minutes. While the dough is resting, butter a 9″ x 5″ loaf pan. Mine is non-stick. If yours is not non-stick, butter the pan, then place a piece of parchment paper on the bottom of the pan and butter it as well.
- After the ten minutes is up and you have prepared your pan, it’s time for the final shaping of your dough. Flour the top of the dough and flip the dough over. Gently pull the sides of the dough to shape it into a rectangle with the short side facing you. Fold the right side into the middle, then the left side, overlapping just a bit. Take the short side that is farthest from you and start to roll the dough toward yourself, tucking it under itself as you go. Roll it all the way so that it looks like a cinnamon roll. With cupped, floured hands, draw the dough towards you so that the seam come together underneath the roll, and you create tension on the outside of the dough. Do this a couple of times until you feel the dough has adequate tension. Don’t go overboard. If you like, gently pull each side of the dough down and tuck underneath to cover the spiral.
- Using your floured hand and a bench scraper or bowl scraper, pick up the dough lengthwise and plop it into your prepared loaf pan seam side down, pulling the scraper away quickly so you don’t get tangled up in there. Cover with plastic wrap and let sit on your kitchen counter for 45 minutes to an hour. Place in fridge and let rise overnight.
Day #3
- It is Day #3 and you are ready to bake! You can start anytime you like, but I prefer to bake in the morning. Preheat your oven to 500°. Take your loaf out of the fridge (it should have risen significantly) and leave on the counter, covered, for one hour while the oven preheats. Yes, one hour. A few minutes before the hour is up, uncover your dough, sprinkle it lightly with flour and, using a sharp knife or razor blade, make a cut lengthwise across the dough, about 1/4 inch deep (this is called scoring). If you like, you can cut some designs into the dough with very shallow cuts, but don’t let those interfere with the larger cut.
- Pull out a turkey roaster – the one I use is 14 1/4″ in length and 6 inches tall – and pour a tablespoon or two of water into the bottom divots of the roaster. Place your loaf into the roaster, put the lid on the roaster, and put the whole thing in the oven. IMMEDIATELY turn your oven temperature down to 450°. Bake the loaf covered for 20 minutes. Take the cover off, turn the temperature down to 435° and bake for another 25 minutes. Remove the loaf from the oven (it should register around 205° on an instant read thermometer) and take it out of the pan. If you turn the loaf upside down and tap on the bottom, the loaf should sound hollow. Let the bread cool on a cooling rack for at least two hours before cutting into it.
- To store bread, once it has completely cooled, keep in a plastic bread bag. Bread will stay fresh for two to three days this way.
Notes:
*If you choose to replace the diastatic malt powder with either honey or molasses, add it in with the water/starter mix. This is optional, and I only recommend it when using whole grain flours.
**If you don’t have all three types of flours, you can make this bread with just all-purpose flour, or a combination of bread flour and all-purpose flour. Or all bread flour! Just make sure the total weight of flour is 500 grams, and if you are using a whole grain flour, only have it be up to 1/3 of the total weight. Up to one half is fine, but your bread will start to be a little dense. And stick with King Arthur flours if at all possible for best results.
***Most of my inspiration comes from Emilie Raffa, of The Clever Carrot. Her book, Artisan Sourdough Made Simple, is really wonderful for walking you through the process and making it all very accessible. She includes lots of fun recipes, and they are all so very good! I turn to her book again and again for new ideas that don’t overwhelm.
Picture Tutorial!

50 grams of ripe starter floating in 375 grams of water. Yes, the starter looks like that.

Mix until milky.

Add flours – 170 grams bread flour, 130 grams white whole wheat, 200 grams all-purpose.
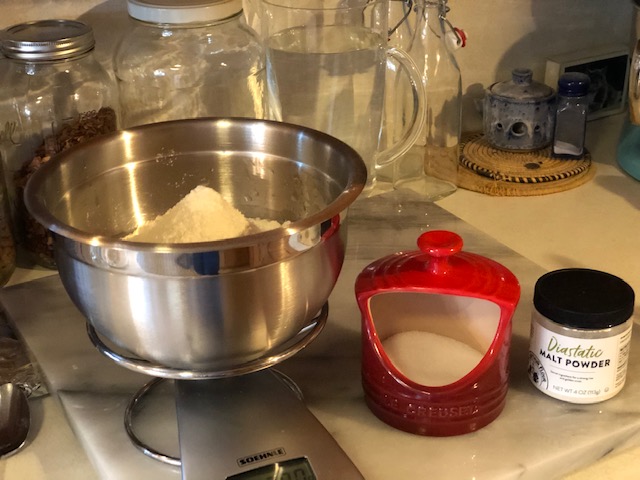
Then add 12 grams salt and 1 tsp diastatic malt powder (optional).
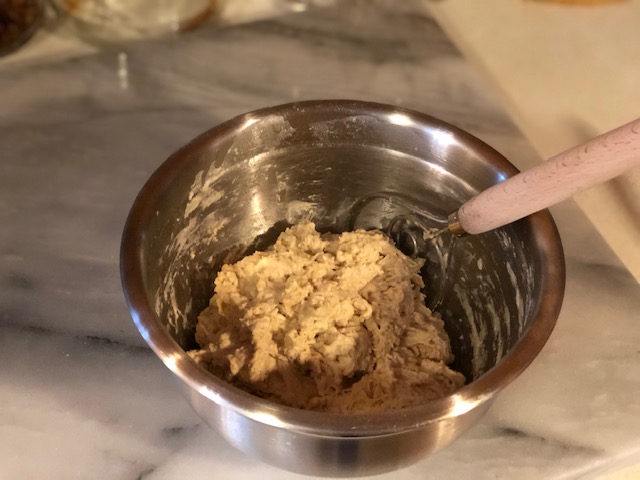
Mix until flour is incorporated. This is good enough.

Cover with plastic wrap (or other) and let sit for one hour (the autolyse).

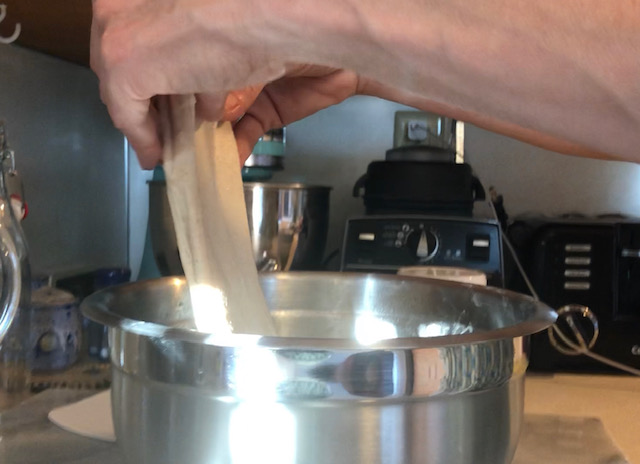
After 1 hour rest, mix dough until smooth, using wet hand – video here: https://youtu.be/lV7eorybckc
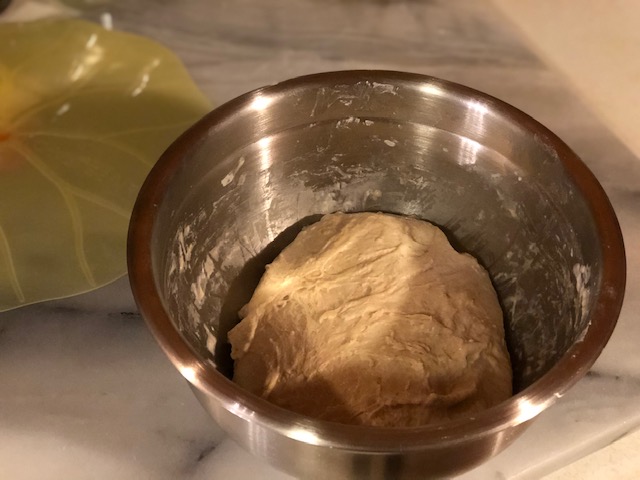
Should look something like this. Cover and put in fridge overnight.

Take dough out of fridge the next morning. Dough has relaxed a bit.
Do a set of stretch and folds every 30 minutes or so. This is the stretch.

This is the fold, bringing the dough all the way across. One set = four of these.

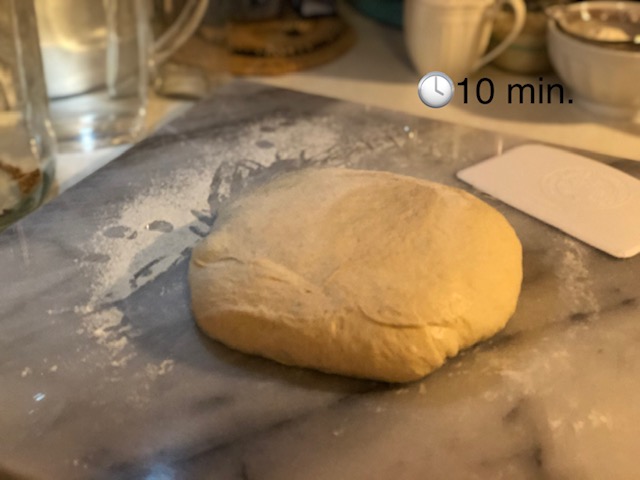
Looks like this after four sets of stretch and folds. Cover and let rise on your counter.

About ten hours later this dough is jiggly and ready to be shaped.

Scrape onto floured work surface.

Using fingers, gently stretch the sides of the dough to make a large circle.

Fold edges of dough into the center.

Work your way all the way around.

Here is a video of the preshape I made for my friend Sandy: https://youtu.be/Jkn54efAqD4

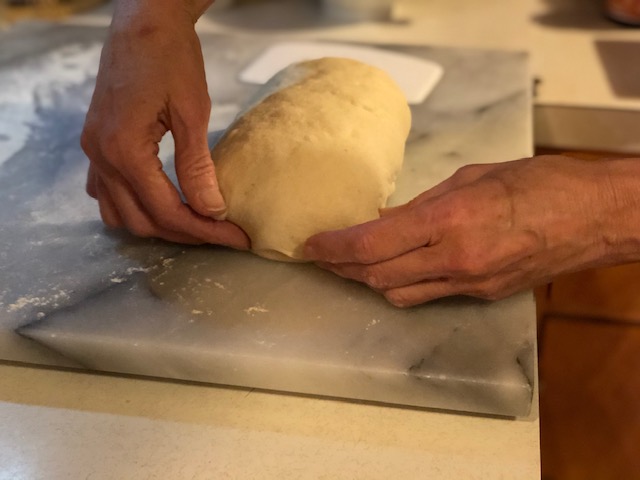
Flip the dough over. Editing courtesy of my photographer. She is ten.

Tuck the edges of the dough under just a bit so it is kind of a rectangle.
Let dough rest for ten minutes.

Butter your 9″ x 5″ loaf pan with unsalted butter.
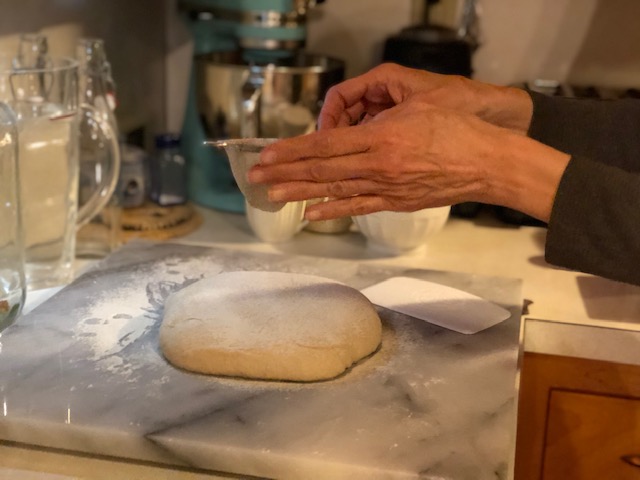
After ten minute rest, lightly flour the top of your dough.

Flip the dough over so smooth side is down. Stretch out to a rectangle.

Fold right side over.

Now fold left side over.
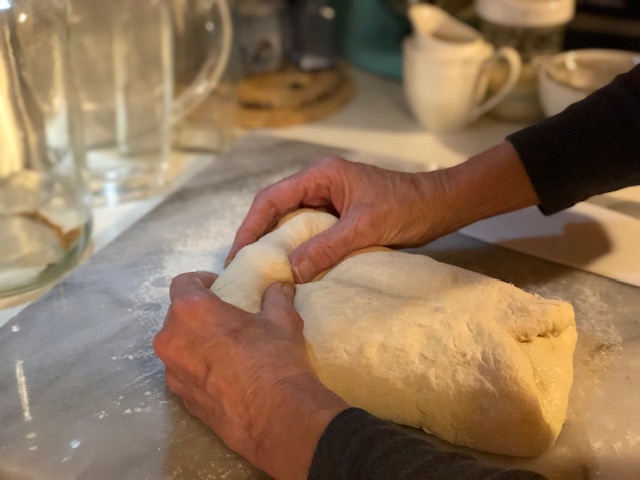
Starting at the top, start to roll the dough toward yourself.

Keep rolling, tucking dough gently into itself.

Looks like a cinnamon roll.
Pull top of dough over to cover the spiral.

Using cupped hands, draw dough toward yourself to bring seam together at the bottom and create tension in dough.

You can also do this with a bowl scraper or bench scraper.

Here’s a video I made for my friend Sandy for the final shaping: https://youtu.be/-eHX08X6VGI

Plop the loaf into the pan *smooth side up*.
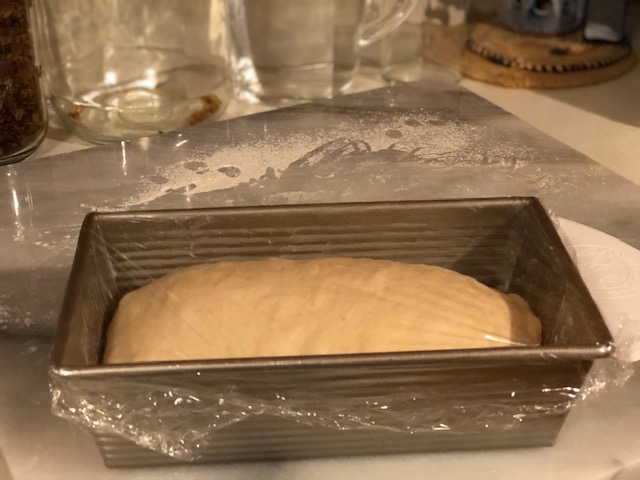
Cover and let sit on your counter for 45 minutes or so, then put in the fridge for an overnight rise.

The next morning the dough has risen! Preheat oven to 500° and let dough sit on counter for one hour.

Lightly flour top of dough. This makes the scoring (cutting) easier.

Using a sharp knife or razor blade, make a 1/4″ deep cut all the way across.

Looks like this.

You can add designs with shallow cuts if you wish.

Pour a tablespoon or two of water into the divots on bottom of turkey roaster.

Place loaf in roaster.

Really.

Put the lid on! Then the whole thing goes into the oven covered. TURN OVEN DOWN TO 450°!!!!!!
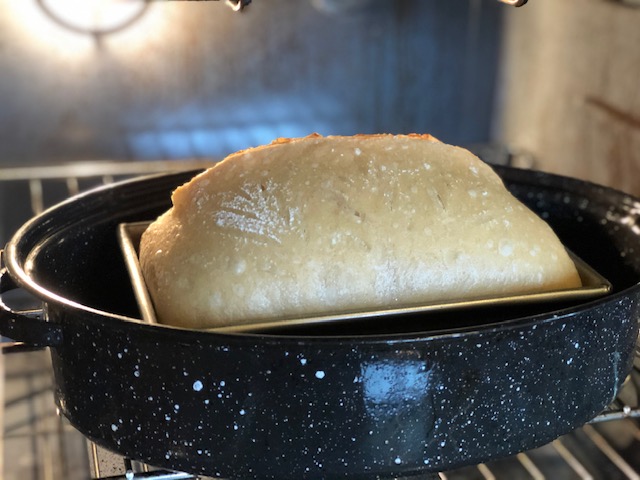
After 20 minutes, remove the lid and turn oven down to 435°. Bake for another 25 minutes uncovered.

Take loaf out of oven and check temperature. Should be between 205 and 210….
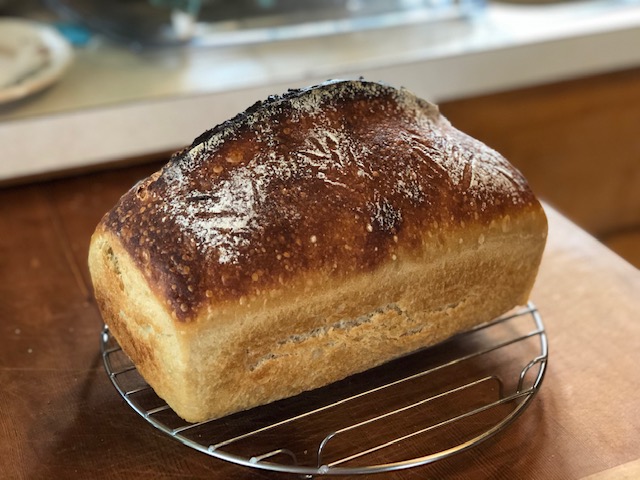
Let bread cool on rack for at least two hours. Enjoy!
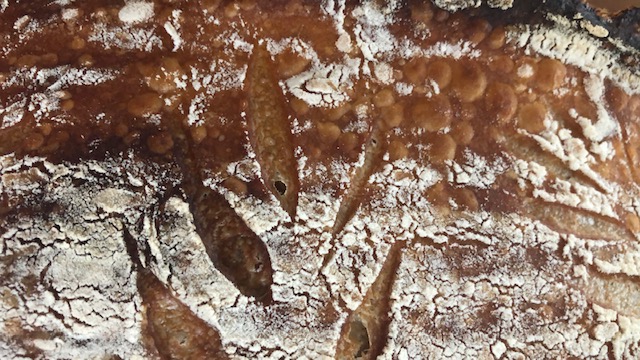
Beautiful blistered crust.
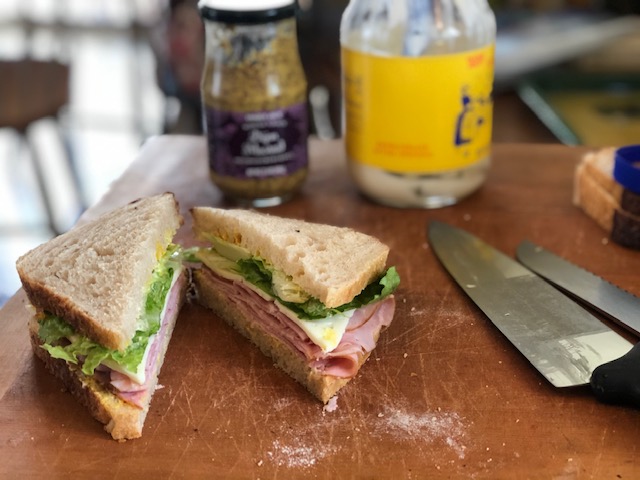
Perfect for sandwiches!

And toast!
Enjoy!

Pingback: Sourdough: Part Two! | and everything nice
Thanks for inspiring us all with these posts. Thanks to your tutorials, I’m hooked on “loaf-shaped” loaves now. 😊
I’m so glad!! I’m hooked on the loaves now too! Today I almost made a “boule”, but then just couldn’t do it. Gotta have the loaf!! Thanks for reading :).