The other day, Matthew and I were having fried eggs and toast, and I looked at him and asked if this should be our “forever” sourdough sandwich bread. I’m pretty sure he said yes, but that he knows as soon as I say something like that, I will go ahead and change it the very next day. BUT, I have experimented a lot with trying to get just the right everyday bread, and I think I have found it. I think so because I have been making this for a while now, and it just keeps on being so good. The flavor has a lovely tang, but not overwhelmingly so. The crust is thin and easy to slice through, and the bread toasts up to a delightful crispiness, while still maintaining that lovely, custardy sourdough interior. We use it for sandwiches, toast, french toast, strata… well, everything.

Nice even crumb… light, crispy toast!
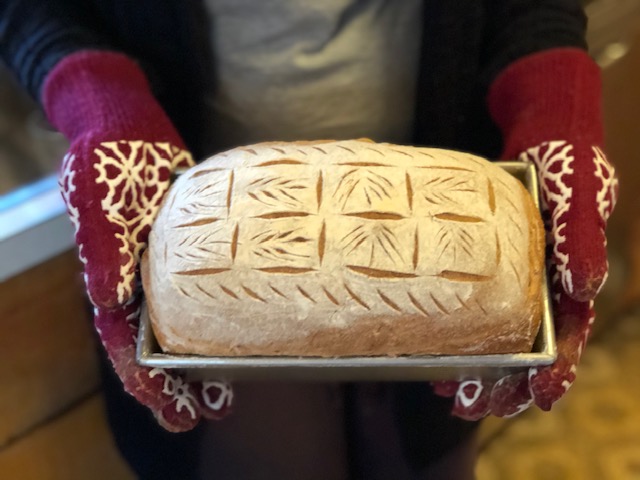
I have a lot of fun with scoring designs on the bread, but it’s not even really necessary for this particular recipe, like it is for other types of bread. But I especially love to score a nice design if I am giving the bread as a gift.
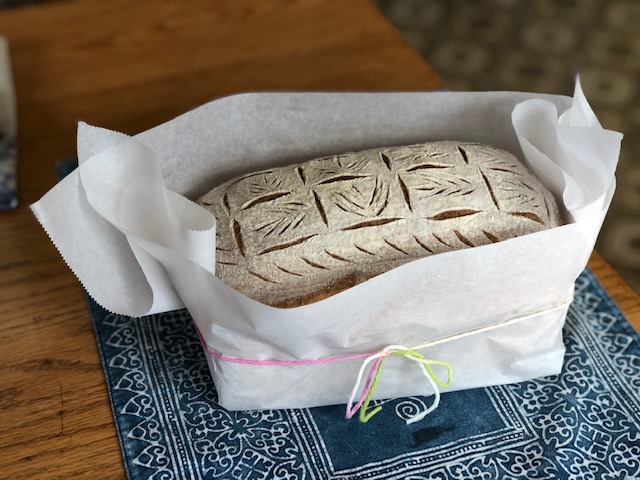
I love gift-wrapping bread in parchment paper.
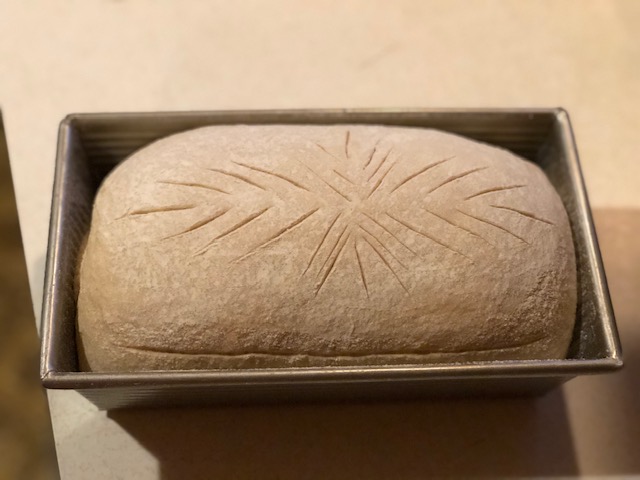
The most important score (cut) is a deeper slash along the side of the loaf that helps the bread to rise nicely and in a more uniform manner.

Loaf ready to go into the oven. See the cut along the left side?
Okay, so my recipe is loosely based on Emilie Raffa’s Country Farmhouse White bread recipe that you can find in her book, Artisan Sourdough Made Simple. I would highly recommend getting her book; I love love love it. She truly does make the whole process very simple.

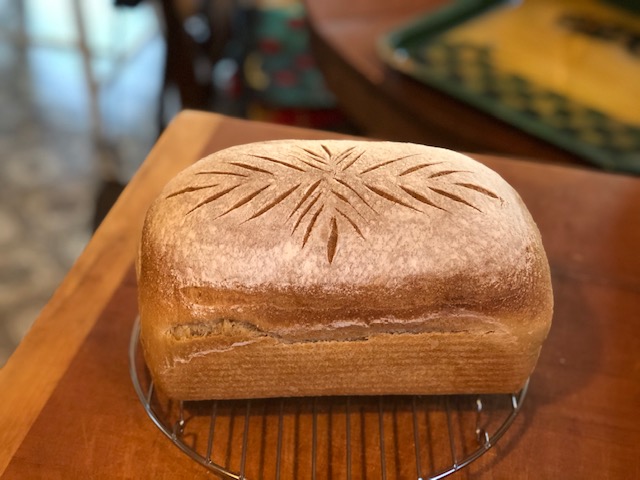
A simple but pretty design.
I should have called this the “Working Girl’s Sourdough”, because all of the work is done later in the evening or early in the morning, making it possible to work this bread into your daily routine, and it works nicely around a work schedule!
White Whole Wheat Sourdough Sandwich Bread
(Adapted from Emilie Raffa’s recipe, in her book Artisan Sourdough Made Simple)
- 330 grams room temperature water
- 80 grams active, bubbly sourdough starter (100% hydration)
- 1 tablespoon granulated sugar
- 2 tablespoons olive oil
- 150 grams King Arthur Unbleached All-Purpose Flour*
- 100 grams King Arthur Bread Flour
- 250 grams King Arthur White Whole Wheat Flour
- 9 grams kosher salt or sea salt
Day #1
- Whisk together in a medium bowl the water, starter, sugar, and olive oil until the mixture is milky and slightly frothy. (You can do this step any time during the day, as long as your starter is active and ready to go.)
- Add flours and salt, and mix until all the flour has been incorporated and you cannot see any dry bits.
- Cover and let rest for 30 minutes to an hour.
- After the dough has rested, mix the dough until it is smooth and cohesive. Using a slightly wet hand (I keep a bowl of water handy), grab the dough from the side of the bowl and press it into the center. Rotate the bowl and continue to grab and press until you’ve gone around a couple of times. This should take maybe about a minute. The dough will become more elastic and springy rather quickly. Flip the dough over in the bowl, cover the bowl with plastic wrap or similar covering, and put it in the fridge to rest overnight. You are just putting things on hold until the next day, while developing flavor in the dough.
Day #2
- In the morning, take bowl out of fridge. Using a bowl scraper or spatula, scrape all along the side and bottom of the bowl to make sure the dough isn’t sticking. With wet hands, scoop up the dough from the middle, letting the dough hang and stretch. Gently release the dough into a pile and rotate the bowl one quarter turn. Repeat, scooping up the dough and letting it hang and stretch. I sometimes jiggle it to encourage it to stretch a bit more. Do a few more times (optional), then cover the bowl and leave on the counter. These are called coil folds**, and they will help develop the gluten in the dough, giving the finished bread a nice structure. Leave the dough in the covered bowl on your kitchen counter for about ten hours, or until it has doubled in size, is jiggly, billowy, and has a bubble or two on the top.
- About ten hours later (more or less, depending on the strength of your starter and the temperature of your kitchen), once the dough has doubled in size and is jiggly, gently scrape the dough out onto a lightly floured work surface using a spatula or bowl scraper. It is time to preshape your dough. Take your fingers and slide them under the sides of the dough and gently stretch the dough out a bit to make a large circle. Take your finger tips and, acting like you are playing the piano, gently dimple the dough. This helps to minimize large holes in your bread. Fold the sides of the dough into the center, starting at one side and continuing until you have gone all the way around, brushing off any excess flour as you go. Flip the whole thing over with the assistance of a bench scraper or bowl scraper. The dough will be “smooth side up”. Let rest for 10 minutes. While the dough is resting, butter a 9″ x 5″ loaf pan***. Mine is non-stick. If yours is not non-stick, butter the pan, then place a piece of parchment paper on the bottom of the pan and butter it as well.
- After the ten minutes is up and you have prepared your pan, it’s time for the final shaping of your dough. Flour the top of the dough and flip the dough over (smooth side is down, sticky side is up). Gently pull the sides of the dough to shape it into a rectangle with the short side facing you. Fold the right side into the middle, then the left side, overlapping just a bit. Brush off any excess flour. Take the short side that is farthest from you and start to roll the dough toward yourself, tucking it under itself as you go. Roll it all the way so that it looks like a cinnamon roll. With cupped, floured hands, draw the dough towards you so that the seam comes together underneath the roll, and you create tension on the outside of the dough. Do this a couple of times until you feel the dough has adequate tension. Don’t go overboard. If you like, gently pull each short side of the dough down and tuck underneath to cover the spiral. Don’t worry; I will include pictures.
- Using your floured hand and a bench scraper or bowl scraper, pick up the dough lengthwise and plop it into your prepared loaf pan seam side down, pulling the scraper away quickly so you don’t get tangled up in there. Cover with plastic wrap, place in fridge and let rise overnight.
Day #3
- (I usually do this first thing in the morning so that the bread is cooled and ready to eat by lunch time, but you can bake it later in the day if you like.) Preheat oven to 375°. Remove loaf from fridge and let it sit on counter for half an hour while oven is preheating. The loaf should have risen overnight, maybe about an inch above the loaf pan.
- After a half hour, remove plastic wrap from loaf. Sprinkle loaf with flour and spread with your hand to form a very thin layer. The flour is optional, but it does make the next step a bit easier, and if you want to make a design in the bread, you will need the layer of flour in order for the design to show up.
- With a sharp knife or razor blade, make a long cut along the edge of the loaf lengthwise. The cut should be about 1/2″ deep. It doesn’t have to be perfect. It will just help your loaf to rise evenly. You can do a cut along the other side as well if you like. You can also make a pretty design in any way you like, making shallow cuts.
- Place loaf on middle shelf in preheated oven and bake the loaf for 45 minutes. Top of loaf should be nicely browned, and internal temperature of bread should be somewhere between 200° and 210°. Anywhere in that range is fine.
- When bread is done, place on cooling rack and let cool for ten minutes in pan. Then remove loaf from pan and let cool completely before slicing.****
Note:
*I use all King Arthur brand flours for this bread. It is worth it. I get consistently wonderful results when using their flour.
**About the coil fold: normally this technique is used for high hydration doughs, and this dough is lower hydration and somewhat of a stiff dough by comparison, but I use the coil fold anyway, because it works for me, and I believe that the extra gluten development helps create a really nice texture in the bread.
***This is a big loaf of bread, so that is why I use a 9″ x 5″ loaf pan. If you only have an 8 1/2″ x 4 1/2″ loaf pan, you will have to either reduce the recipe by a bit, or remove some of the dough for a roll or two. But I strongly recommend the 9″ x 5″ size because it is perfect for hearty sandwiches, toast, etc.
****This bread is easier to slice for sandwiches the day after it has been baked, or at least after it has cooled for several hours. Store the completely cooled bread in a plastic bag. It will stay fresh for several days.
Pictures of the process!

Starter, water, sugar and oil.
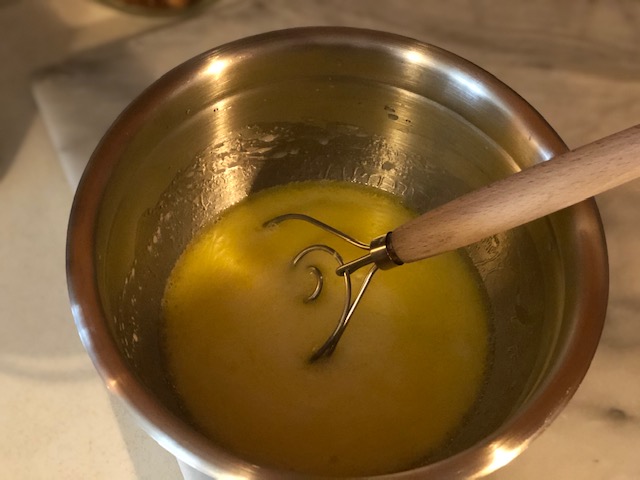
Mix well, being sure to break up the starter.
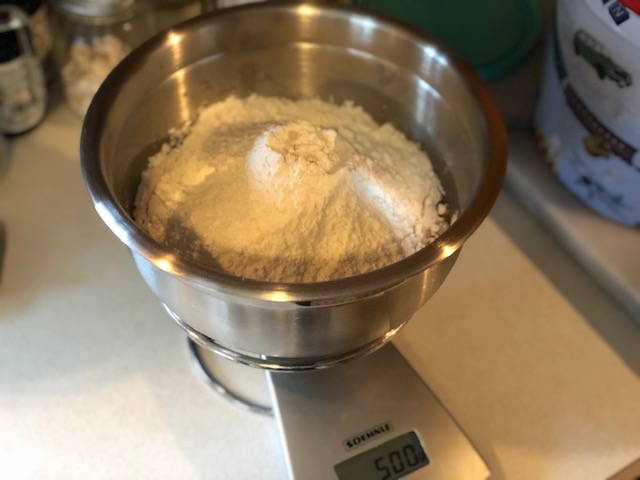
Add the flours. I like to make a mountain so I can remove some if I add too much.
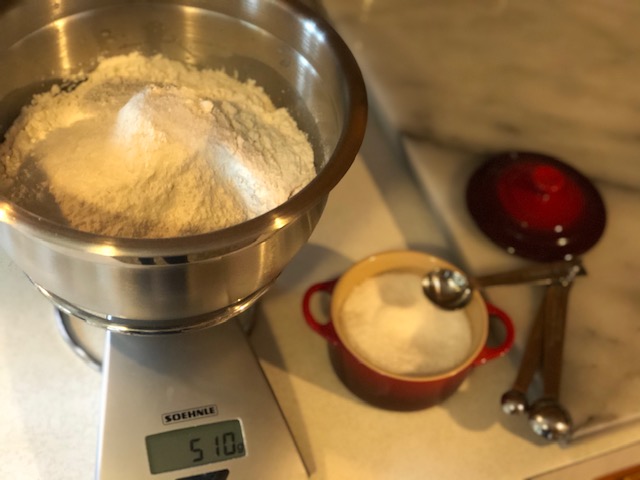
Don’t forget to add the salt!!!
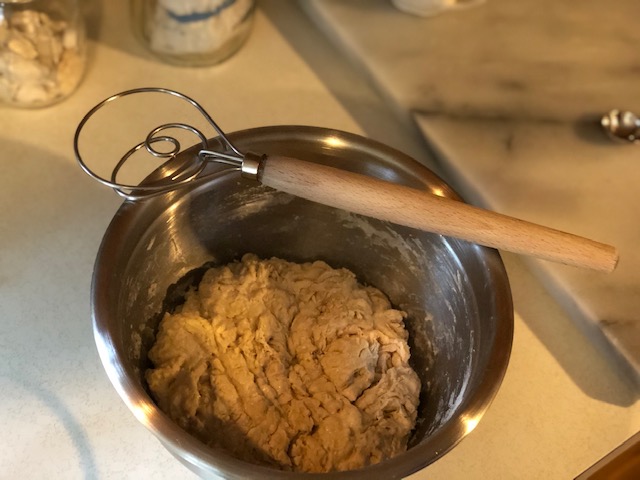
Mix until there are no more dry bits. Dough will be stiff.

Cover and let rest for 30 minutes to an hour.

Mix by pulling up the sides of dough and pressing into the center.
Flip dough over, cover, and put in the fridge overnight.

Next morning, take dough out of fridge (it will look the same) and scrape down the sides.

Reach down and pull the dough up from the center.

Let it hang and stretch. Release, rotate bowl 1/4 turn, and repeat. Do a few more times (optional).
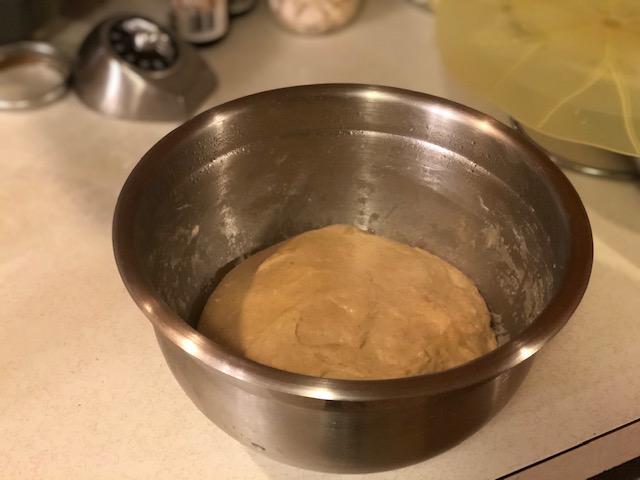
Your dough should be much rounder, and stand a bit taller.
Cover and leave on counter for 9 to 10 hours, until dough has almost doubled in size.

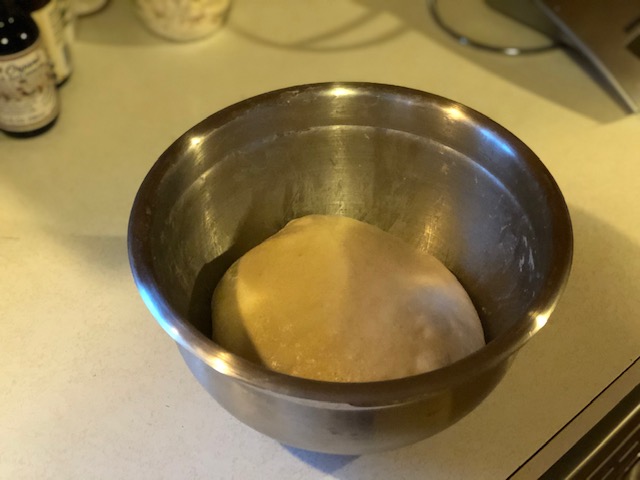
About ten hours later, dough has almost doubled in size, and has some bubbles on top.

Scoop out onto floured work surface.

Stretch out from the edges to make a large circle. It’s at this point that you can “dimple” the dough.
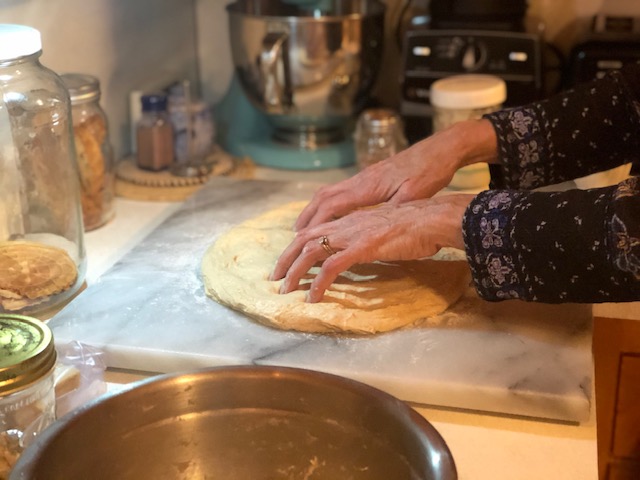
Dimple the dough.

Fold edges into center, all the way around.

Should look something like this.

Flip it over and let it rest for ten minutes.

While dough is resting, butter or oil your pan.

After ten minutes is up, flour the top of dough and flip back over. Stretch dough into rectangle.

Take right side of dough and fold it into the center.

Fold the left side into the center, overlapping a bit.
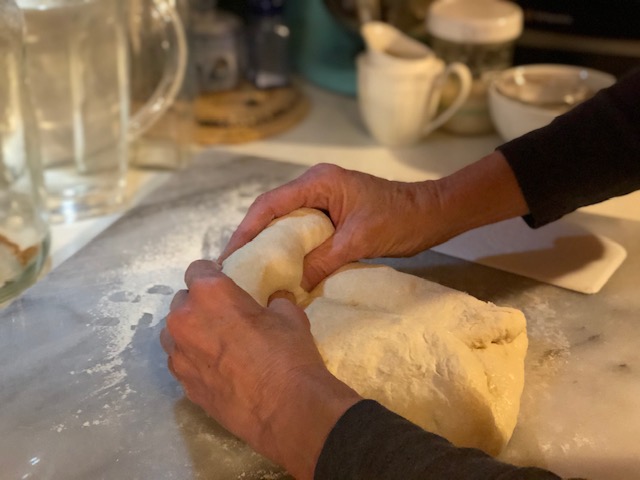
Brush off excess flour, then start rolling the dough towards yourself, tucking it under as you go.

It should look kind of like a cinnamon roll.

Or a weird blob.
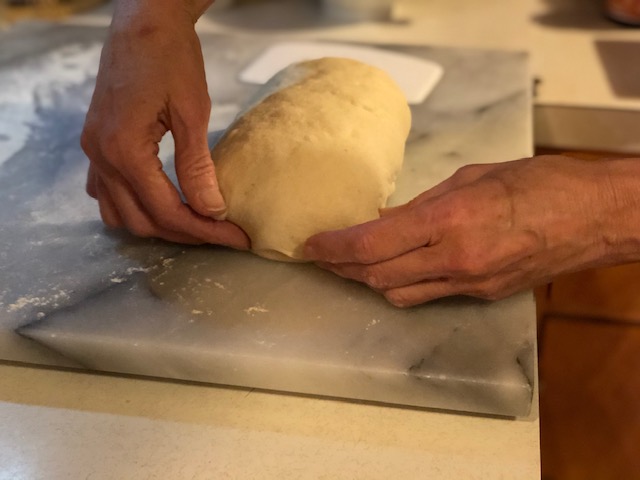
Optional – pull the ends over to cover the spiral. This step is not necessary!

Cup your hands and draw the dough toward yourself, creating tension in the dough and sealing the seam underneath.
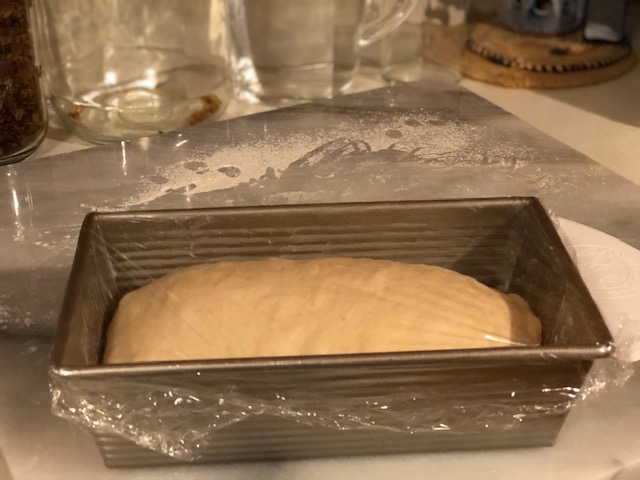
Put in loaf pan seam side down, and cover with plastic wrap. Place in fridge overnight.

Next morning remove loaf from fridge. Preheat oven to 375°. Wait for a half hour.

After half hour, remove wrap and sprinkle top with flour and smooth it out with your hand (optional for design).
Make a cut along the length of the loaf (about 1/2″ deep), and if you like, make shallower cuts for a design. Place into preheated 375° oven.

Bake for 45 minutes, then remove loaf from oven, marvel at your creation, and let it cool in the pan for 10 minutes.
After 10 minutes, remove from pan and let cool completely before slicing.
Yum! You will never go back to store bought again!
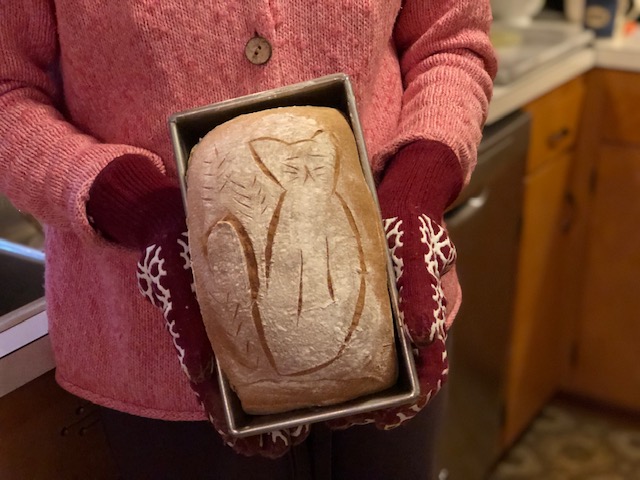
Fun with scoring.

More scoring.

Keep bread cut side down until you are ready to store it in a plastic bread bag.

This is a great tutorial, Angela! I love the pictures, as it helped me better understand the ‘coil fold.’ I’ve never tried that kind of stretch/fold exercise. Thanks for putting this into the world. Peace, love and bread. XO
Thanks Jill! I actually added a new note to the post regarding the coil fold. Technically, from what I understand, the coil fold is used for higher hydration doughs, and this one is definitely a lower hydration dough. But, I still like to use it here so I can gently increase the gluten development, and it works for me! Thanks for reading, and thanks for your kind words.
This looks lovely, and your instructions are great!
Thanks Dorothy! My head is still spinning from writing out all the details! But really, it’s an easy bread to make. I would have never thought that we would switch completely to homemade bread in our household – it’s a victory! Now I just need to find a good, grainy bread that comes out consistently good. That one is a little tricky for me. Working on it!
Good luck on your amazing bread journey!
Pingback: White Whole Wheat Sourdough Sandwich Bread — and everything nice | My Meals are on Wheels
Hi… I’m SUPER new at this. I’m on my 3rd loaf. This will be my 1st white sourdough loaf.
My question is why are you using both King Arthur Bread and All purpose flour together. Would this work with just KA bread flour as well. If not, why.
Thanks
photoguy57, that’s a good question. I just really like the texture of the bread when there is a mix of bread flour and all purpose (and the white whole wheat flour, which adds a lovely flavor). The all purpose softens it a bit. I experimented quite a bit with different flour combinations, and this one just did the trick for me. Using just bread flour will also definitely work, no problem, but you’ll have to maybe add a teeny bit more water, since bread flour is a thirstier flour than all purpose. Good luck, and if you make this loaf, let me know how it turns out!
Pingback: Soft Whole Wheat Sourdough Loaf | and everything nice