
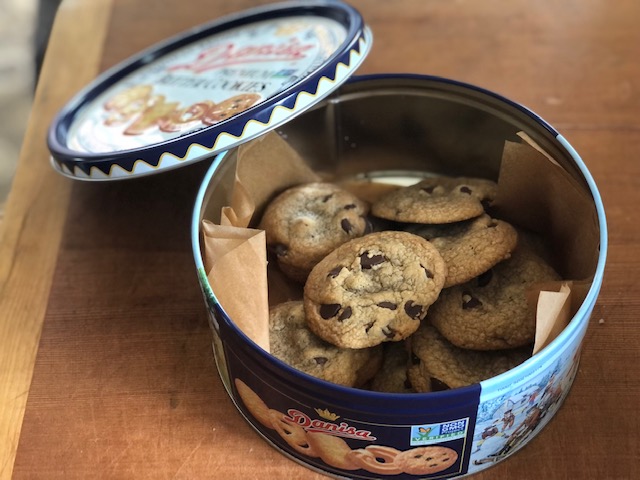
There are several cookie tins on top of our fridge, and one of them almost always contains these chocolate chip cookies. This recipe is Alton Brown’s “The Chewy”. There was a lot of excitement over this cookie several years ago. As is often the case, I am late to the party. But I am also here to tell you that these cookies are pretty darn near perfection.
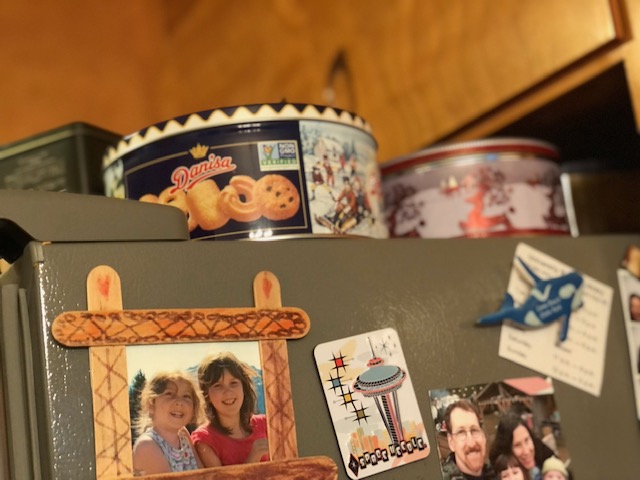
The chocolate chip cookies go in the Danish Butter Cookie tin. Doesn’t everyone have one of those?
They are Alton’s take on the traditional Toll House chocolate chip cookies. What are some of the differences? Well, you use bread flour instead of all-purpose flour. You use one egg and one egg yolk instead of using two eggs, adding a bit of whole milk to make up the difference. You use melted butter instead of room temperature butter. You use a lot more brown sugar than granulated. You bake the cookies at a higher temperature. All of these changes equal a chewy cookie. The day they are made, they are crispy on the bottom, soft and slightly gooey in the middle, and not flat at all, which was always my issue with the Toll House cookie, but maybe I was doing something wrong? Who knows. It has been a while. In any case, these are perfect straight-up chocolate chip cookies that are bakery delicious on the first day, and then still yummy on day two, or even day three if they stay around that long.
Hello, my lovelies.
So why am I writing about this when you could just go to Alton’s recipe? Well, there is some confusion if you look at the recipe and then watch the video. Some of the measurements are different. SO, I made the cookies for myself to see what worked best for me. I followed his recipe almost exactly, with only a few changes to how I make them; the recipe is the same. Well, almost the same. Instead of regular granulated sugar, sometimes I use toasted sugar (recipe here from Stella Parks), which imparts a wonderful yet subtle caramel-y flavor to the cookies. But sometimes I don’t, and the cookies are still really really good. If you feel the urge to make that toasted sugar, make a big batch and it will last you a very long time. I keep mine in a jar on my counter. I think I have enough for a gazillion more batches of cookies, so I’m good for a while.

Toasted sugar is on the right… just a bit darker than regular granulated.
Another thing I recommend is to scoop out the cookie dough using a standard 1 1/2 Tbsp cookie scoop. Using a cookie scoop will ensure your cookies are all the same size, meaning they will all bake up beautifully. Scoop the dough as soon as it is made (the dough will be very soft, but that’s okay; it’s too difficult to scoop out the dough once it’s cold) and place the dough balls on a cookie sheet lined with parchment paper. It’s okay if they are very close together, because this is just for chilling purposes.

Ready to go in the fridge or freezer. They are only this close for chilling!
Put the tray with all the cookie dough balls in the freezer for several hours, until completely frozen. Once frozen, place the dough balls into a freezer storage bag, pressing out as much of the air as possible, and store in the freezer so you can make small batches whenever the mood strikes.

Frozen cookie dough ready to bake!
And here is the truth: the cookies bake up better from frozen. You can bake the cookies a tad longer, making for a nice dark bottom, without risking an over-baked, cakey cookie. The cookies are tall and still gooey on the inside. Hubby likes the bottoms of the cookies almost scorched, so to be able to attain this while not ruining the rest of the cookie is quite a feat.

On the left baked from frozen; on the right baked from refrigerated. They are both good!
So, if you like softer, flatter cookies, then bake from refrigerated. If you like taller cookies with a crisper bottom, bake from frozen. And here’s an idea: after making the dough, scoop out and refrigerate eight (or however many you like) cookie dough balls, and scoop out and freeze the rest. Wait an hour, then bake the refrigerated cookie dough balls. Then you will have the rest to bake from frozen. You can decide what you like best! Either way, you will need to watch like a hawk to not over-bake them. Bake until the edges have started to brown but the tops still look slightly under-done.

Left: baked from frozen. Right: baked from refrigerated.
As an aside, Matthew and I have different ideas of when the cookie is at its best. Matthew likes the cookies straight out of the oven, while the chocolate is still melty (he says “it’s an event!”), or he likes them a day or two after being baked. I, on the other hand, prefer my chocolate chip cookie after it has been sitting on the cooling rack for an hour or two, so the bottom is still crispy, but the cookie itself has settled a bit, and the chocolate is no longer melty, but the inside is still gooey. What is your chocolate chip cookie sweet spot?
Alton Brown’s “The Chewy” (Matthew’s Favorite Chocolate Chip Cookie)
- 2 sticks (1 cup) unsalted butter
- 2 3/4 cups* (340 grams) bread flour (I use King Arthur brand)
- 1 tsp kosher salt
- 1 tsp baking soda
- 1/4 cup (50 grams) granulated sugar
- 1 1/4 cup (227 grams) light brown sugar**, packed
- 1 egg
- 1 egg yolk
- 2 Tbsp whole milk
- 2 tsp vanilla extract
- 1 bag (12 oz/340 grams) semi-sweet chocolate chips
*If you do not use a kitchen scale to weigh your flour, you will want to aerate you flour first by stirring it with a spoon, then sprinkle your flour into your measuring cup and sweep the top with the straight edge of a knife to level the flour. It’s worth the extra time to get an accurate measurement.
**If you use dark brown sugar, the cookies will be a bit denser and chewier. I prefer light brown sugar for a lighter texture and more subtle flavor.
- Melt butter in heavy bottomed sauce pan on low heat. Remove from heat when the butter is almost completely melted. Stir until all butter is melted (this should only take a few seconds) and set aside to cool.
- In medium bowl, whisk together flour, salt, and baking soda. Set aside.
- In bowl of stand mixer, pour in butter and sugars. Beat on medium speed for 2 minutes. You can also use a large bowl and a hand mixer for this, but a stand mixer makes the whole process easier.
- Turn mixer to low speed and add the egg, egg yolk, milk and vanilla. Mix until incorporated.
- Turn mixer to “stir” (lowest speed) and add flour mixture one large spoonful at a time. Stir until just combined, scraping down bowl as necessary.
- Stir in chocolate chips by hand, setting aside about 1/4 cup of the chips for later.
- Line a large cookie sheet with parchment paper. Using a 1 1/2 Tbsp cookie scoop, scoop cookie dough, fitting as many cookies as possible on the sheet (this is for chilling, not baking!!). As you get near the end, add the last 1/4 cup of chips to the remaining dough (this takes care of the problem of those last cookies not having enough chips) and finish scooping cookies. (I find that I can fit about 35 on a cookie sheet, which is about how many this recipe makes.)
- Chill scooped cookies for at least one hour in the refrigerator before baking (for softer, flatter cookies), or freeze for several hours until completely frozen. Transfer frozen cookie dough balls to a freezer storage bag and keep in your freezer for spur-of-the-moment freshly baked cookies.
- When dough has chilled for at least one hour, preheat your oven to 375°. Make sure to preheat your oven for at least 15 minutes to ensure an even bake.
- Line a new cookie sheet with parchment paper and place up to twelve chilled or frozen cookie dough balls on sheet, spacing 2 inches apart.
- Bake on center rack of oven for 10 to 11 minutes***, or until edges have started to brown, but tops still look a bit underdone. For best results, bake one sheet at a time.
- Remove from oven and let cookies rest on cookie sheet for 3 to 4 minutes (NOT LONGER) before transferring to cooling rack to cool completely. If you forget and let the cookies rest on the cookie sheet for too long, you may end up with soggy bottoms.
- These cookies store quite nicely in an airtight cookie jar for several days. Only on the first day will they have the crisp bottom, but the following days, they will still be chewy and delicious.
***All ovens are different, some running hotter, some running cooler. I like to keep a couple of oven thermometers (what if one stops working?) in my oven to make sure I have heated my oven to the proper temperature before baking.
And here’s what really prompted me to write this post. Matthew’s brother Ben was in town this past weekend, and we got to spend time with him and Barb – my mom-in-law and Matthew and Ben’s mom. We talked about all kinds of things, including the cookie tins on top of our fridge and how one of them always has chocolate chip cookies in it for Matthew. Barb’s chocolate chip cookies are something that Matthew still remembers and talks about. I know I can never compete with a memory, but one of the things he liked about those cookies, aside from the fact that his mom made them, was that the bottom was baked very well… read: almost scorched. So it makes me happy to be able to come up with something similar at our house.

Front row: Matthew on the left, Barb in the middle, Ben on the right. Top row: me, Millie, and Mara.

They are the best cookies. And you bake the bottoms to the perfect level of doneness.
YOU are the best cookie :-).
GET A ROOM, you two. 😉
We’ve got a whole house!
This is fun! Didn’t know you have a website.❤️
Thank you Martha! ❤
Although the cookies are different, at least the can still contain cookies! There’s a running joke here in the Philippines that those cans of Danish butter cookies would contain sewing implements.
Hahaha those tins are very good at containing sewing implements!
I just used your commentsand recipe to make a wonderful batch of these!
That is great, Laura! I’m so glad you liked these! Thanks for your comment and for reading my post :).
Pingback: Millie’s Fruit and Oat Cookies | and everything nice
Pingback: Chocolate Chip S’more Cookies | and everything nice