I recently got together with my friends Jill and Deb for dinner, and we each made a part of the meal. I got to bring dessert – yay!

Deb and Jill in my kitchen, from a pie crust extravaganza a few years back.
A while ago, Jill mentioned that she didn’t like cheesecake, and I was convinced that she just hadn’t had the right cheesecake. Then later she told me that she tried a chocolate cheesecake at a local restaurant, and was pleasantly surprised at how much she liked it! I knew then and there that I had to make my favorite chocolate cheesecake for her to try.

Not a conventional way to make cheesecake, but it’s great for a smaller group!
This recipe comes from one of my absolute favorite cookbooks, The Vegetarian Epicure Book Two, by Anna Thomas. I’ve had it (as well as the first volume) since my college days, when I was actually a vegetarian. All of the recipes in Anna Thomas’ book are absolutely wonderful, and made me seem like such a good cook back in those days. All I had to do was follow the directions, and voilà! I’d end up with something delicious!
A water bath makes for even baking.
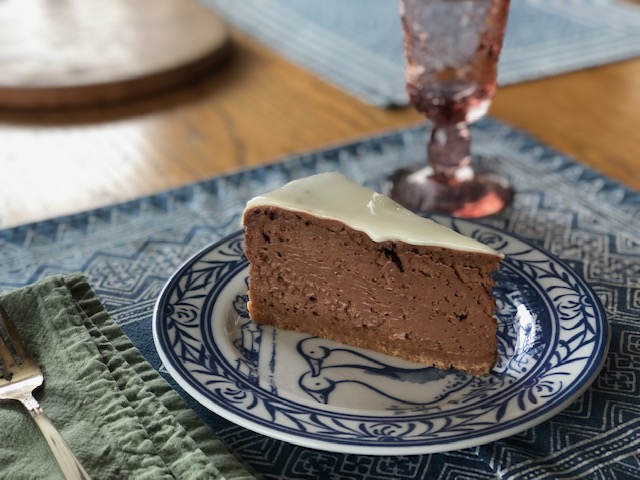
It had been so very long since I had made this cheesecake (at least 20 years) that I was a little concerned about how it would turn out, but I am now convinced that you can’t really mess this one up, which is a huge advantage: it’s easy to make, and difficult to screw it up. And you end up with a silky smooth, rich and delicious cheesecake! And it’s a tall cheesecake! I like my cheesecake to be tall. I just do.
I mean, look how tall it is; it’s practically levitating.
So here is what I did. Since I didn’t want to make the full recipe in a large spring form pan that serves a million people, I made 2/3 of the recipe, and I followed different baking directions (from this recipe) to accommodate a 9″ x 5″ loaf pan size. That makes a water bath a lot easier, since there is no leaking when using a loaf pan. And the cool thing is, you can still cut the cheesecake to make the pieces look like they are from a traditional round cake. I really don’t want my cheesecake to be any other way. I need a wedge.
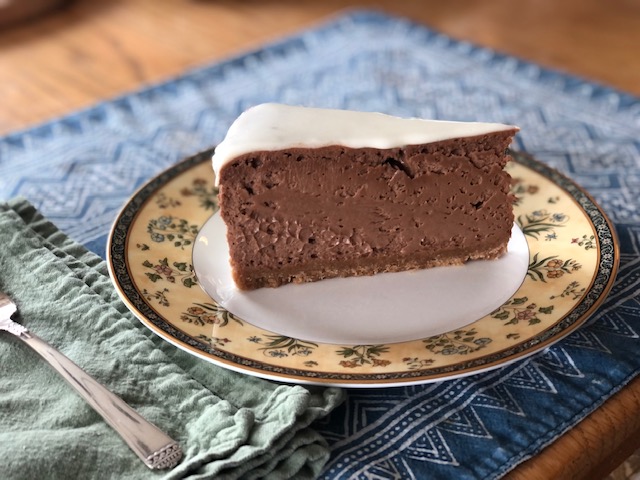
Yet another shot of this tall wedge of cheesecake! Different plates, same slice!
And here is a diagram of how to slice so you end up with 8 beautiful wedges, plus two extra small weird edge pieces. Somehow I sliced the pieces extra large for our girls’ dinner, so I didn’t end up with 8 pieces. Oh well. Nobody suffered.
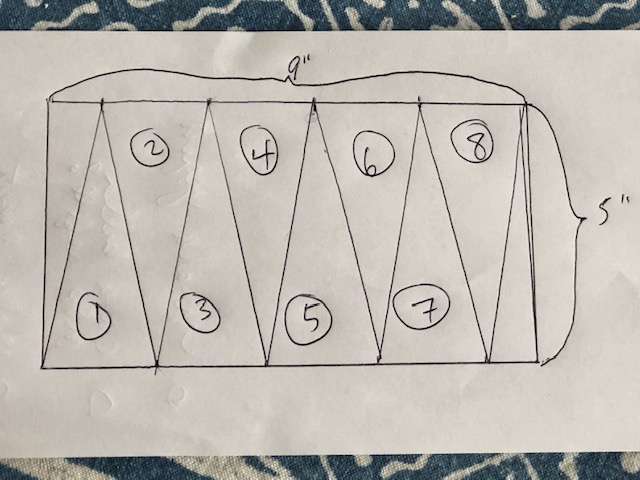
Each piece should be 2 inches wide at the back.
Jill and Deb both loved the cheesecake and asked me for the recipe just as I made it in the 9″ x 5″ loaf pan, so here it is, with only a few minor changes. This cheesecake is best when made one day in advance.
Chocolate Cheesecake
(Adapted from Anna Thomas’ recipe)
For the crust:
- 1 heaping cup fine graham cracker crumbs (about 10 whole graham crackers)
- 2 tablespoons granulated sugar
- 1/2 teaspoon cinnamon
- 1/8 teaspoon kosher salt
- 5 tablespoons unsalted butter, melted
For the cake:
- 1 pound cream cheese (2 – 8 ounce packages) at room temp
- 1 1/3 cup granulated sugar
- 2 large eggs at room temp
- 1 cup (150 grams) semi-sweet chocolate chips
- 2 tablespoons heavy cream
- 2/3 cup sour cream at room temp
- 2 tablespoons dark rum
- 1/2 teaspoon cinnamon
- 1/2 teaspoon almond extract (optional, can also use less*)
For the topping:
- 2/3 cup sour cream
- 2/3 cup powdered sugar
- Preheat oven to 325° and line a 9″ x 5″ loaf pan with parchment paper, leaving some overhang on the long sides for easy cake removal.
- Stir dry crust ingredients together in small bowl, then add melted butter and mix until well blended. Press into the bottom of lined loaf pan as evenly as possible. Set aside. For a slightly firmer crust, you can pop it into the oven for 15 minutes, then remove and let cool for another 15 minutes.
- For the cake: in a large bowl, beat cream cheese on medium speed until fluffy. Gradually beat in the 1 1/3 cups sugar and eggs, stopping as soon as the mixture is perfectly smooth. It is important to not over-mix or use a higher speed, both of which can result in adding too much air to the batter, which will create bubbles and cause cracking. Set aside.
- Melt the chocolate with the heavy cream in a small saucepan, stirring until mixture is smooth. The mixture should not be hot, just warm enough to melt the chocolate. Mix this into the cream cheese mixture, along with 2/3 cup sour cream, on med-low speed. Add rum, cinnamon, and almond extract, if using. Mix for a minute or two more.
- Pour mixture into prepared loaf pan and smooth the top if necessary. Place loaf pan in a 9″ x 13″ baking pan, and fill the the baking pan with hot water about half way up the outsides of the loaf pan. Place the whole thing in your preheated 325° oven on the middle rack, and bake for approximately 55 minutes, until cheesecake is set. My cheesecake looked “set” after about 20 minutes, but I did let it bake for 55 minutes. With a full recipe in a round pan, the cake should jiggle just a teeny bit in the center if it’s done, but I’m not sure this applies to baking in a loaf pan. All I know is that 55 minutes was sufficient, and the entire top looked set, and the cheesecake was not overbaked! If your oven runs hot or cold, you’ll want to make adjustments accordingly.
- Once 55 minutes are up and cheesecake appears to be done, turn off oven, and leave cheesecake in oven for 15 minutes with door closed. After 15 minutes, take the whole shebang out of the oven, place on cooling rack, and let the cheesecake continue to cool in the water bath for another 30 minutes.
- Remove from water bath and let cool completely. Once completely cool, chill in the fridge, covered, for at least three hours, but for best results, chill overnight.
- When ready to serve, mix together the 2/3 cup powdered sugar with the remaining 2/3 cup sour cream until completely smooth. I recommend using a wooden spoon for this so you don’t end up with a lot of bubbles. Set aside.
- Remove cheesecake from pan by carefully lifting by the parchment paper. You may need to loosen the sides first by running a thin knife between the pan and the parchment paper. Peel down the sides of the parchment paper, and transfer the cheesecake (without the parchment paper!) to a serving plate using a long, thin spatula or a bench scraper. Spoon the sour cream topping on top of the cheesecake, trying to keep it just on the top. Some may drip over the sides, but you don’t want it overflowing.
- To cut the cheesecake, get a container of boiling hot water and a very sharp knife. Dip the knife into the hot water, dry it, and make your cut. Wipe the blade clean with a paper towel and dip it into the hot water again for every cut, cleaning the blade each time. If you like, you can decorate the top edge with a couple of raspberries or strawberry halves, but really, it is perfect just as is. Enjoy!
Notes:
*I found that the almond extract was a little strong, but Deb and Jill loved it. You decide. I think next time I will reduce it by half. I’m pretty sure that when I made it regularly years ago that I skipped it altogether.
**You can certainly make the original cheesecake. You won’t regret getting the cookbook; it is seriously wonderful. You’ll have to get a used copy, as I am pretty sure it is out of print. I have just become a little obsessed with making a smaller cheesecake. I do have a smaller 6″ springform pan, but then the pieces of cheesecake would be short, and that’s a no-go for me. When you use a 9″ x 5″ loaf pan, your slices of cheesecake are the same size as if you had used a 10″ springform pan. It’s worth it. Please don’t use an 8 1/2″ x 4 1/2″ loaf pan. I’m pretty sure your cheesecake will overflow, and you don’t want that.

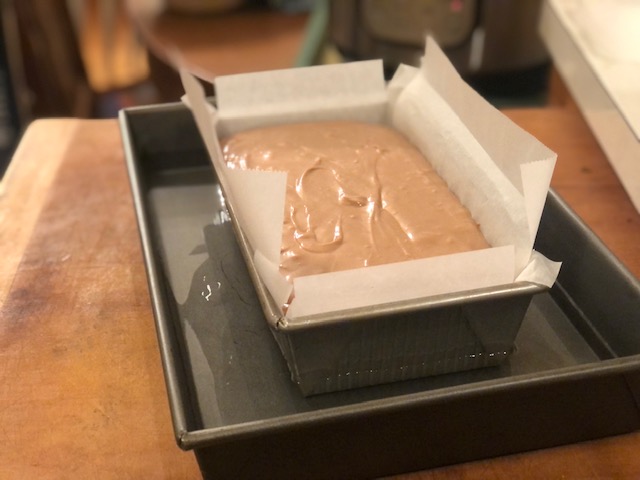
Sorry about the blurry photo! This is the prepared pan with crust.
Ready to go with water bath.
After baking and chilling. It’s a little cracked, but still so good!

Parchment peeled down. You can see there are some air bubbles. I’ll do better next time!

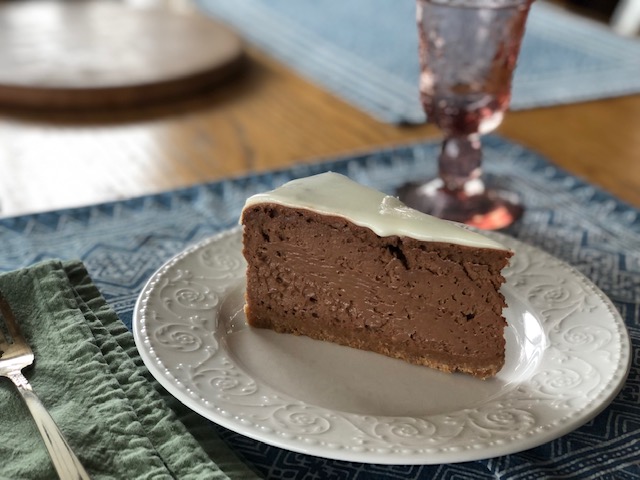
With the sour cream topping. I realized too late I should have moved it to a serving platter first!
So delicious! Still my favorite chocolate cheesecake.
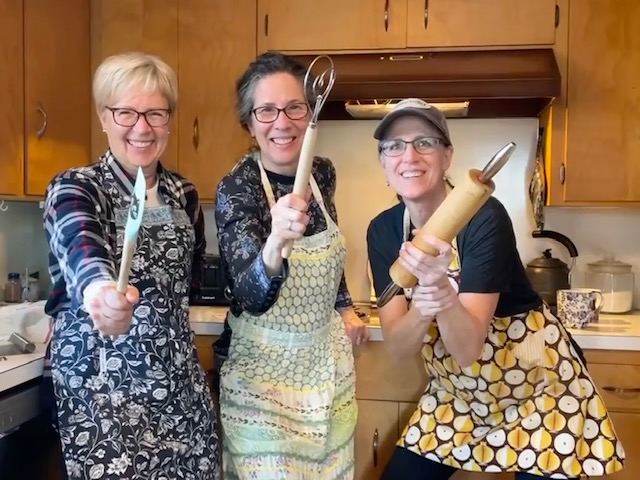
And just for funsies, me and Deb and Jill!

Came here to say “mission accomplished!” This cheesecake made me a cheesecake convert. Silky, smooth, and flavors that were perfectly balanced. Plus, I learned something about geometry too–that cutting technique was genius. 🙂
Is that geometry? I’m crushing it with the math!!! haha. I’m so glad you liked the cheesecake. Now if I could just get you to like nuts in desserts….
Yum all the way!
Happy Valentine’s Day! ❤️
Awwww, so sweet! Happy Valentine’s Day to you too, Dorothy! I know you will be celebrating with some divine creation in your kitchen!