I can’t believe I’m posting this recipe, since I give this granola as gifts every Christmas… anyway, if you have a couple of hours to spend in the kitchen, this granola is well worth your time. My entire family is obsessed with it, even my youngest, who enjoys it with yogurt and maple syrup. Who am I kidding? That is my favorite way to eat this granola as well… she got the idea from me :).

I found out about this granola from my friend Glyn, and she found out about it from the “MAKE-A-MIX COOKERY” cookbook. Glyn said the recipe was very forgiving, and I find that definitely to be true, so here is my version of this granola.

I hope you like the cat sticker, which hides an unsightly stain.
Oh, and I don’t use shredded coconut; I use coconut chips. And although there are sesame seeds and sunflower seeds in the recipe, I don’t use them. (The sesame seeds all fall to the bottom, and I’m not big on the flavor that the sunflower seeds add. ) The nuts are raw and the coconut chips are raw as well. Here are the first ingredients you’ll need if you make your granola as I do. Everything but the wheat germ can be found at Trader Joe’s, which I find very convenient. I got the wheat germ at my local health food store. You can probably just skip it if you can’t find any.

Front row is raw pecan halves, raw walnut halves and pieces, and raw almonds.
Preheat your oven to 300°. Put the oats, coconut chips and wheat germ in a very large bowl and set aside. Now, the fussy part. The nuts need to be chopped. If you buy them already chopped, they are ridiculously expensive, so I just buy them whole and raw. I use a cup each of almonds, walnuts, and pecans. I don’t like to chop nuts by hand, so here’s what I do: one cup at a time, I put the nuts in my blender (I have a Vitamix, but other blenders should work as well, or of course, a food processor, which I do not have.)
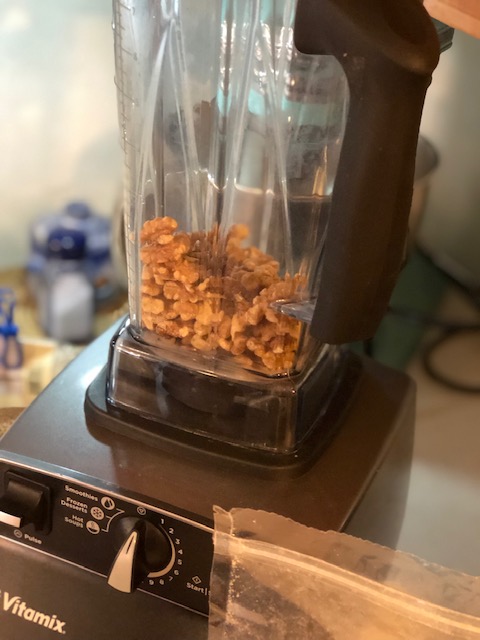
Just pulse a few times to get the nuts chopped as you like. Nobody in my family likes large pieces of nuts in their granola, so I go pretty fine.

Dump the cup of chopped nuts into the bowl with the oats, and then chop the next cup of nuts, etc. When done chopping the nuts, mix the oats, wheat germ, coconut, and chopped nuts thoroughly.

Set that big bowl aside again. Here are the rest of the ingredients you will need.

Now put the brown sugar, water, oil (I was low on canola oil this last time, so I added coconut oil as well and it came out great), honey, molasses (I use a bit less than a quarter cup… more like three tablespoons, and I find that black strap molasses is too strong a flavor, so I don’t use that kind), salt, cinnamon, and vanilla in a sauce pan on medium heat and stand there and stir until the sugar melts. Don’t let it boil! Don’t check your phone! Don’t do anything but stand there and stir. My assistant is helping me. Notice the bits of coconut oil that haven’t melted yet, but also notice the lovely color and smoothness of the syrup. It won’t look like this if you let it boil. Also, never forget the salt! Glyn said this recipe is very forgiving, which is true. But not if you forget the salt. Trust me, I know.

As soon as the sugar (and coconut oil if you use it) has melted, pour the syrup over the oat mixture and mix well with a large wooden spoon. The mixture will be wet and heavy.
Now you will need two large cookie sheets with sides. Don’t use nonstick. Divide the mixture between the two sheets and spread evenly with that wooden spoon.

My cookie sheets are very large – 13″ x 18″ – so I cook the granola one tray at a time. I suggest you do the same. Once I tried putting a tray on each rack in the oven, to save time. The granola did not cook evenly, and it was way more of a hassle trying to switch the trays to different racks, etc., etc., to try to get it to cook evenly, so don’t do that. You can’t be in a hurry when you make this. Another thing I tried once was putting all of the granola on one tray, to save time. That was a very bad idea. Don’t do that either. Now, write down what time it is on a piece of paper or sticky note somewhere, then put the first tray on the center rack in your preheated, 300° oven, and set the timer for 10 minutes.

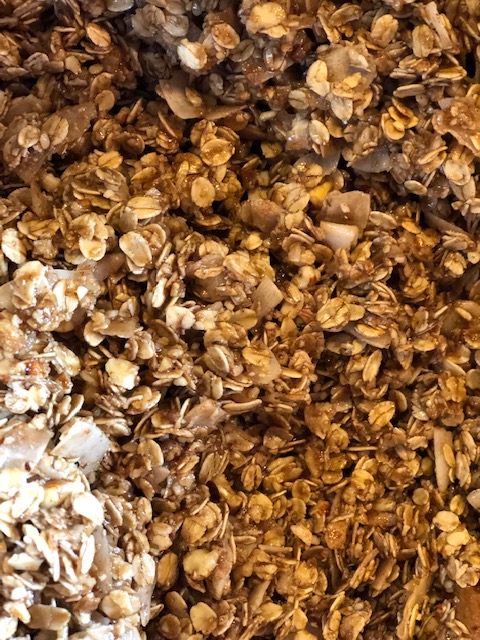
When the timer goes off, open the oven, pull the rack about halfway out, and stir the granola… go find that large wooden spoon you were using. Push the rack back in, close the oven, and set the timer again for ten minutes. Don’t forget to set your timer! When the timer goes off, stir your granola again, and set the timer for ten minutes again. By the time your timer goes off the third time (this should equal thirty minutes of bake time… if you are unsure, go walk yourself over to that piece of paper where you wrote down what time it was when you started this whole process), your granola should start to have golden edges appearing, and should look something like this:

Golden edges starting to happen.
Now, stir it again, and set the timer for 10 minutes. Be careful! I find that around 40 minutes or so makes the perfect granola for me – crispy, and deep golden brown. BUT, there have been times where I forgot that last timer, or even that I didn’t forget the timer, but wandered off to do something (which is fine!), but then when I heard the timer go off, I was distracted and waited a few minutes too long to get back to the kitchen. If you’ve ever tried toasting nuts in your oven, you will know that they can go from perfectly toasted to horribly burnt in a matter of minutes, and so it is with this granola. When the timer goes off, take a look. If you think it needs a minute or two more, set your timer for a minute or two more, and then stand there and wait. Srsly. When it looks right, don’t stir it, just take it out of the oven and set the tray somewhere to let it cool completely. It crisps up as it cools. It should look something like this:

This is perfect.
Now, write down what time it is on a little piece of paper or sticky note somewhere, set your timer for ten minutes, put the second tray in the oven, and do the whole thing over again. Yep, that’s right. 40 more minutes. You can do this. If successful, you will end up with about 10 cups of ridiculously delicious granola, and you will feel nervous when your family snarfs it down in a couple weeks time. Don’t they know how long it took you to make this?
Update: I have recently been baking both trays of granola at the same time, with better luck, and it makes the whole shebang much less time consuming. Just make sure that you rotate and switch pan positions every ten minutes for even baking, and don’t skip the stirring. When you place your trays in the oven, do it like this:

A few notes:
Make sure to let the granola cool completely before storing it, otherwise it will get mushy from condensation and be ruined. Store it in airtight containers, and it should last up to six months (!!!), but it never does at my house. Not even close.
Also keep in mind that some ovens run hotter than others, so your timing might differ from mine. Change your cooking times as necessary. I find it comforting to use an oven thermometer so I know what’s really going on in there.
If you want to add dried fruit, do this once the granola is completely cool and just before storing. And if you have lots of time to spare, you can, of course, double the recipe, which is how I used to make it, but I find the whole thing rather unwieldy and difficult with that much granola to mess with, so I just make it more often.
Put it in lovely, airtight containers and give as gifts. I do.


Pingback: Homemade Yogurt, Take Two! | and everything nice