

Imagine a hot croissant or brioche fresh out of the oven, bespeckled with bits of crispy, melt-in-your mouth sugar, and covered with crispy caramelized sugar in places, and you would be getting close.

My friends Cheryl and Brian recently sent me a fabulous waffle iron – best gift ever! So you know I just had to get to work doing some waffle research. By coincidence, I happened to notice these at the grocery store:
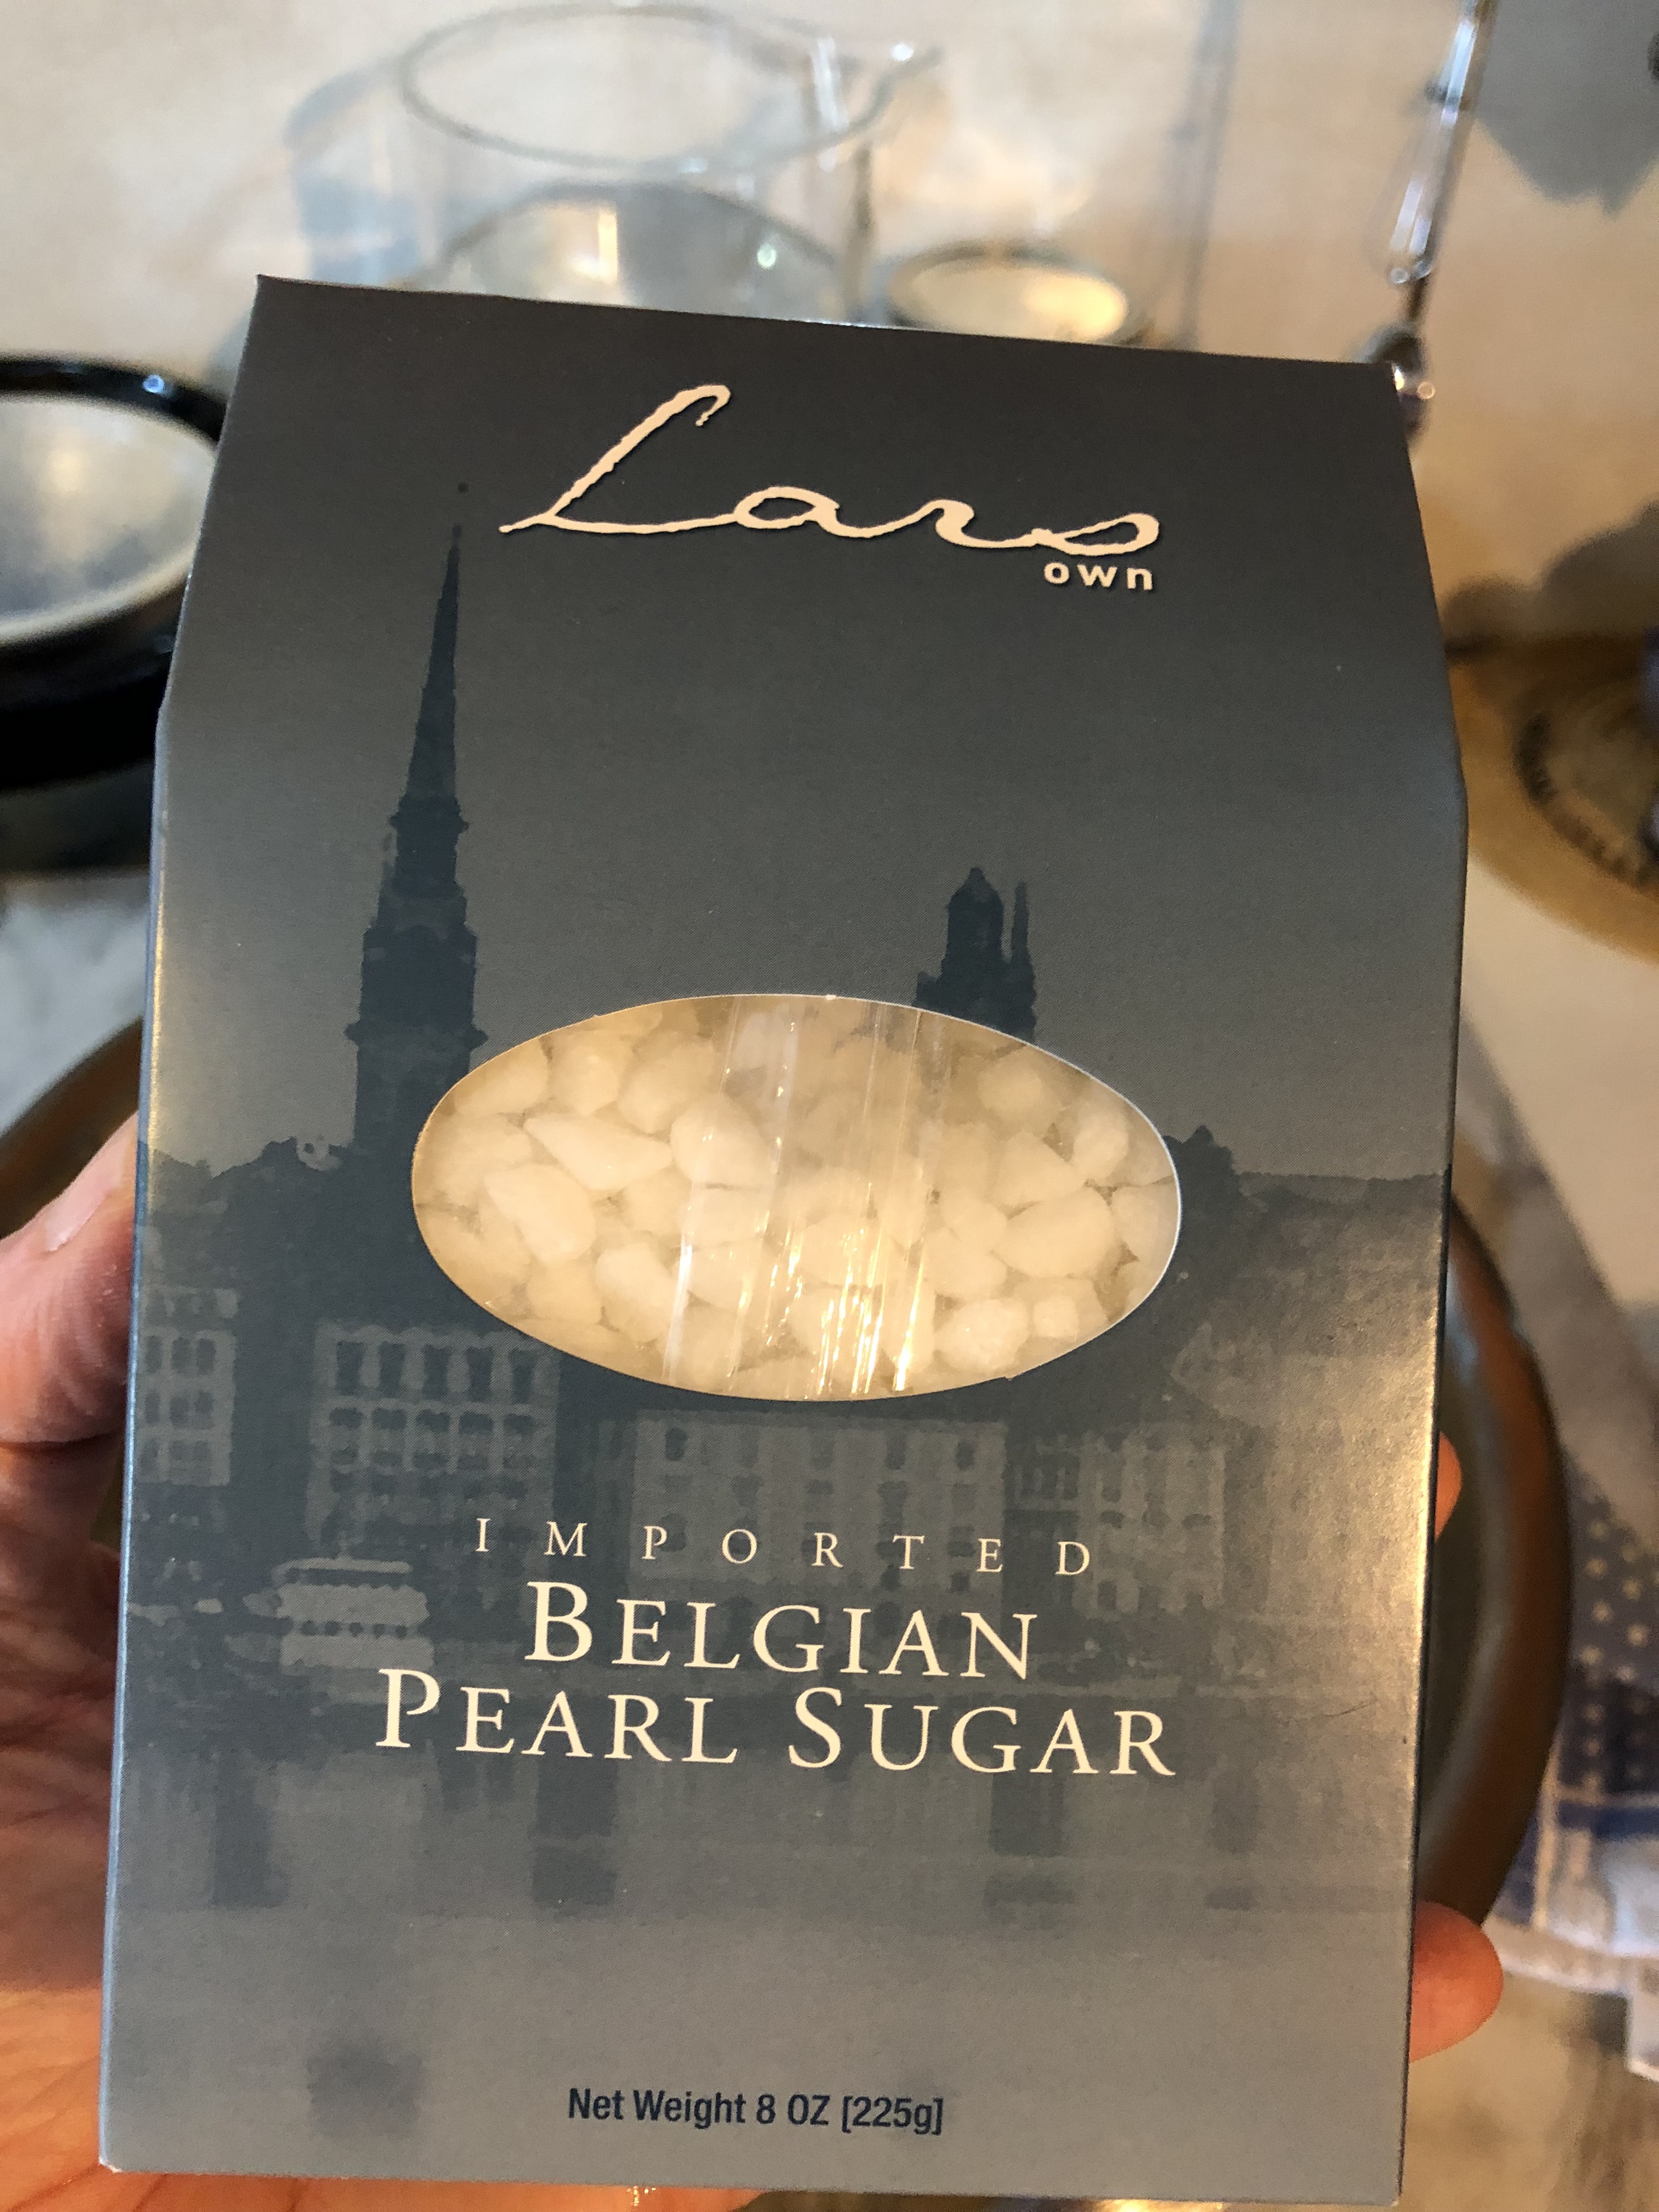
What perfect timing to notice these!
I noticed them by accident, and had no idea what they were for. I looked at the back of the packet, and found a recipe for Belgian Sugar Waffles!!! So now I was intrigued. I made the recipe as printed on the back of the packet, and thought they were really unusual and delicious, but a little too dense. So a lot more research happened, (we were having a “Snowpocalypse” in Seattle, where it rarely snows, and I had an unusual amount of time to putter in the kitchen).

We live on a steep hill!
Here is what I came up with, adapted from the recipe on the back of the Lars Belgian Pearl Sugar packet. It’s a lot of pictures and details. I need that with yeasty things.
Heat up one cup of milk to just 100°.
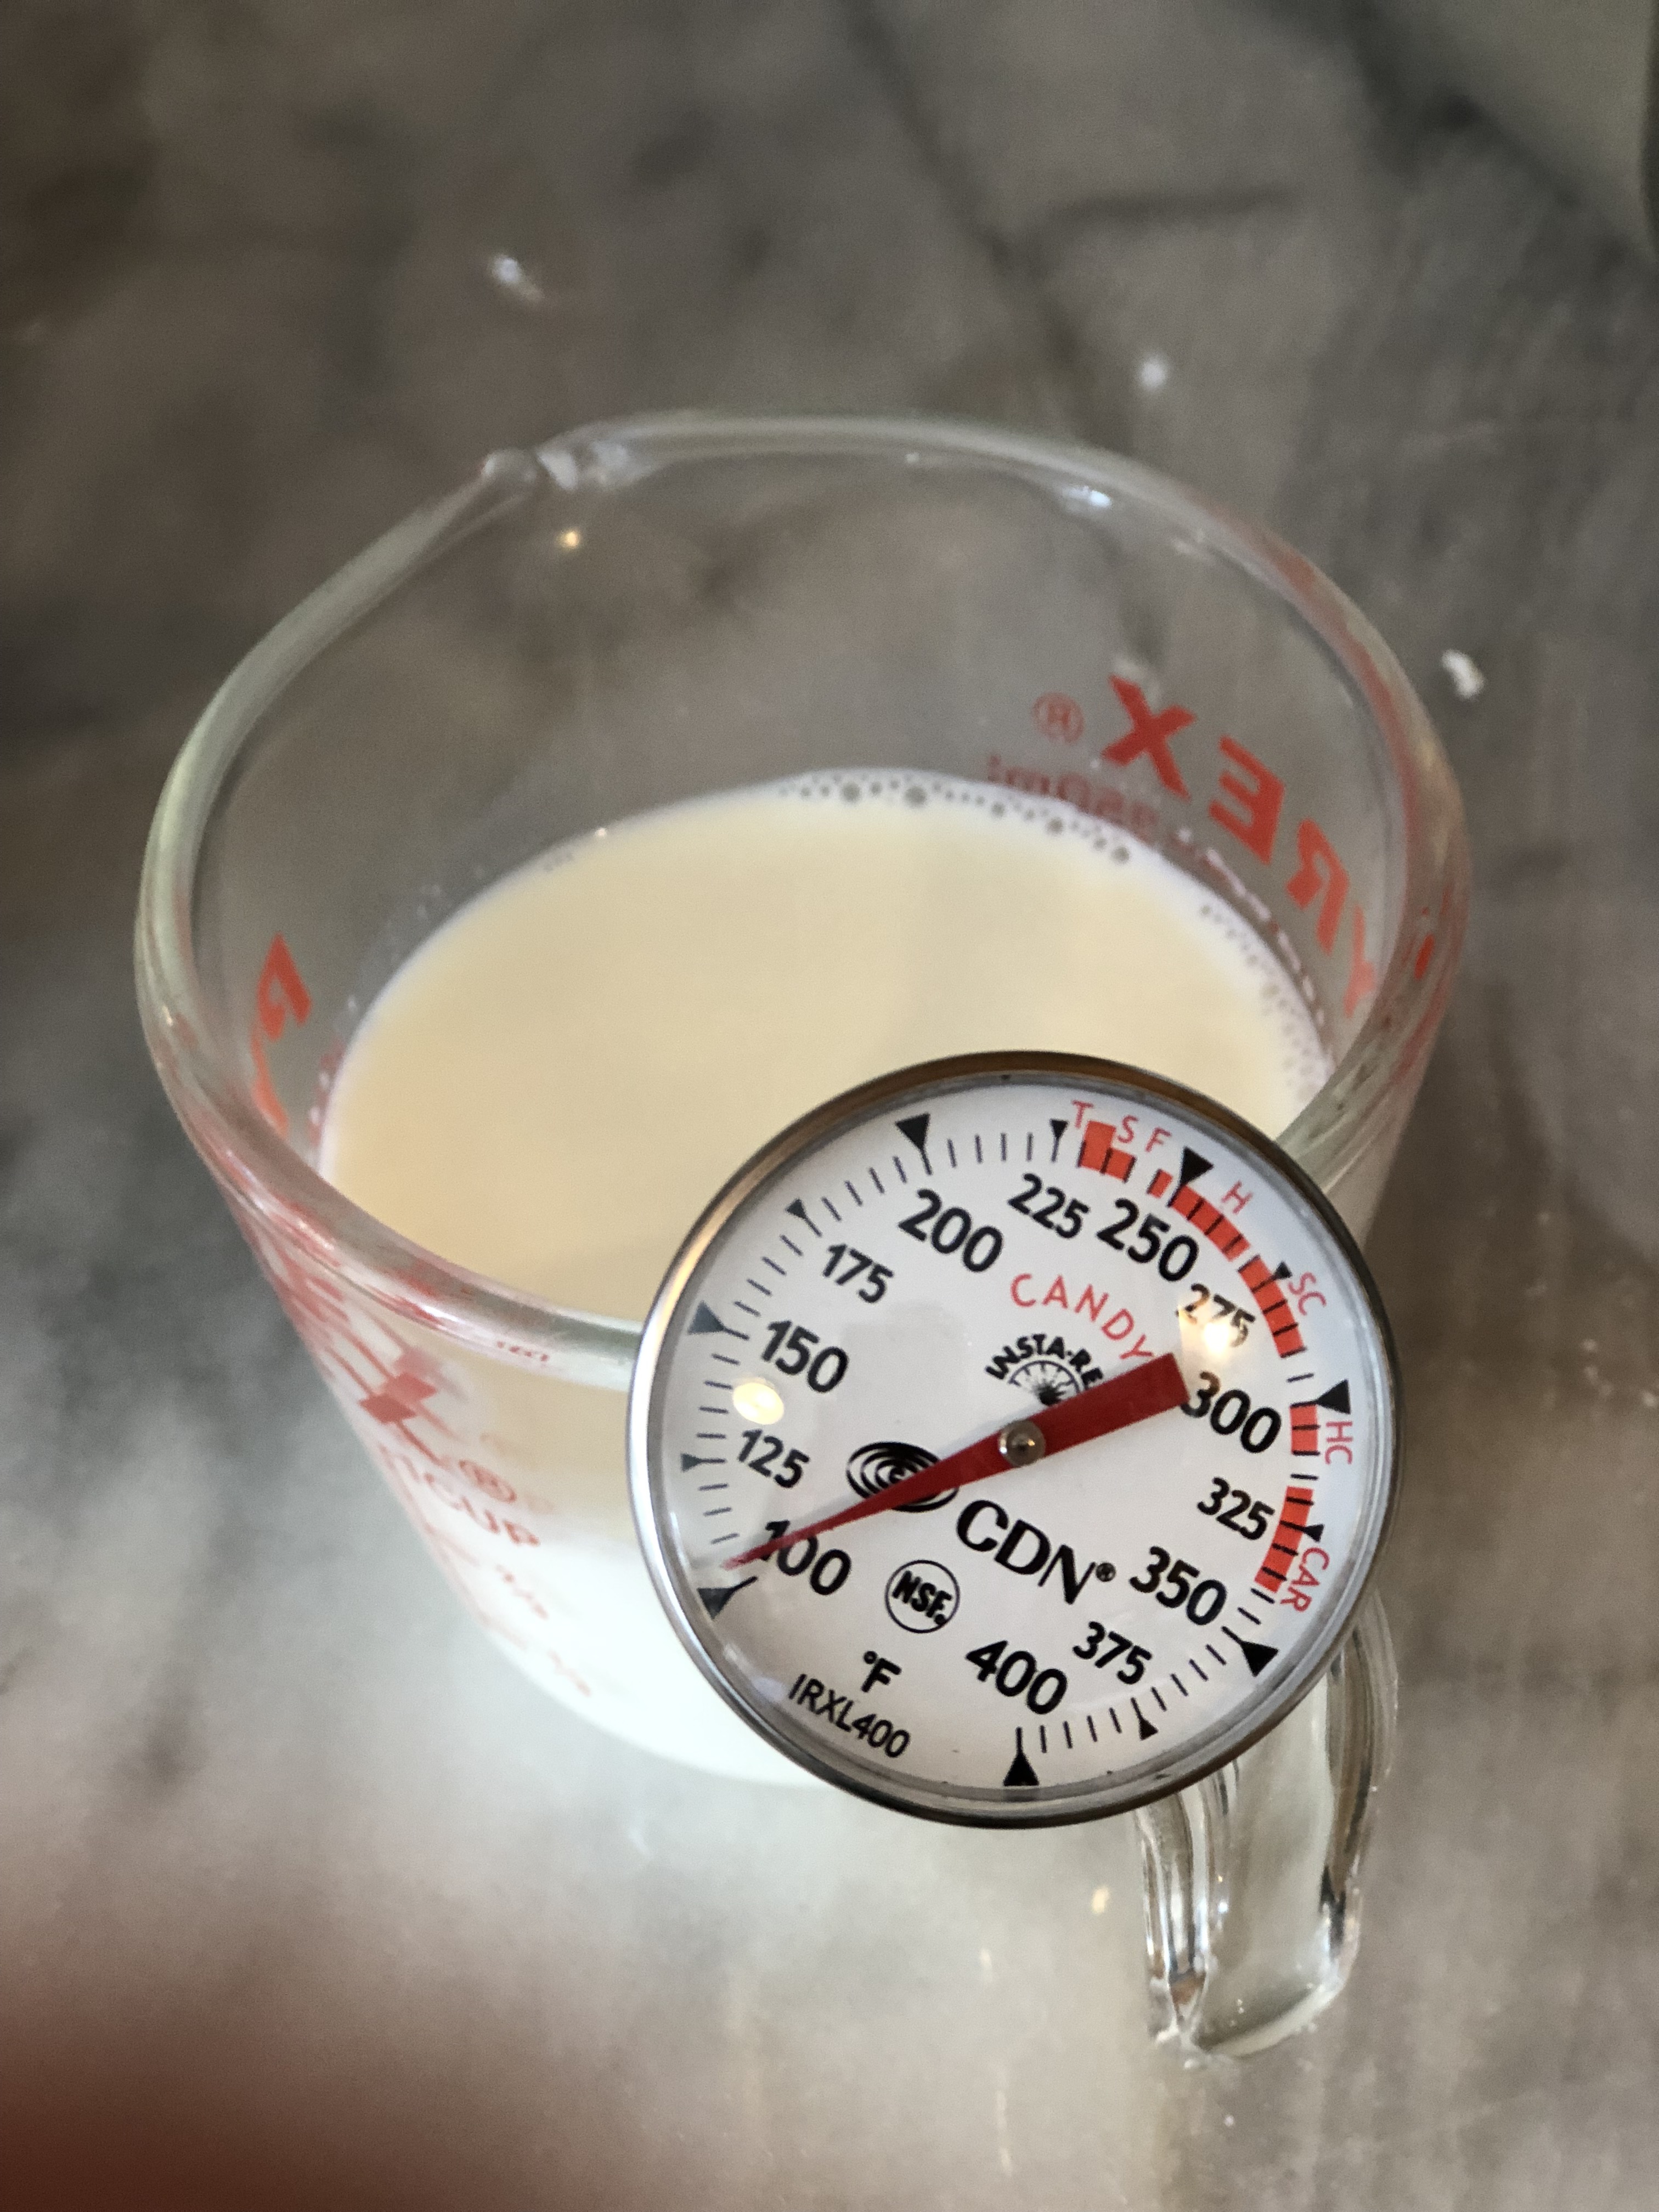
Still need to let it cool down five degrees.
Add 1 packet active dry yeast to the milk. Just sprinkle it on top.

Just sprinkle it on top.

Looks like this.
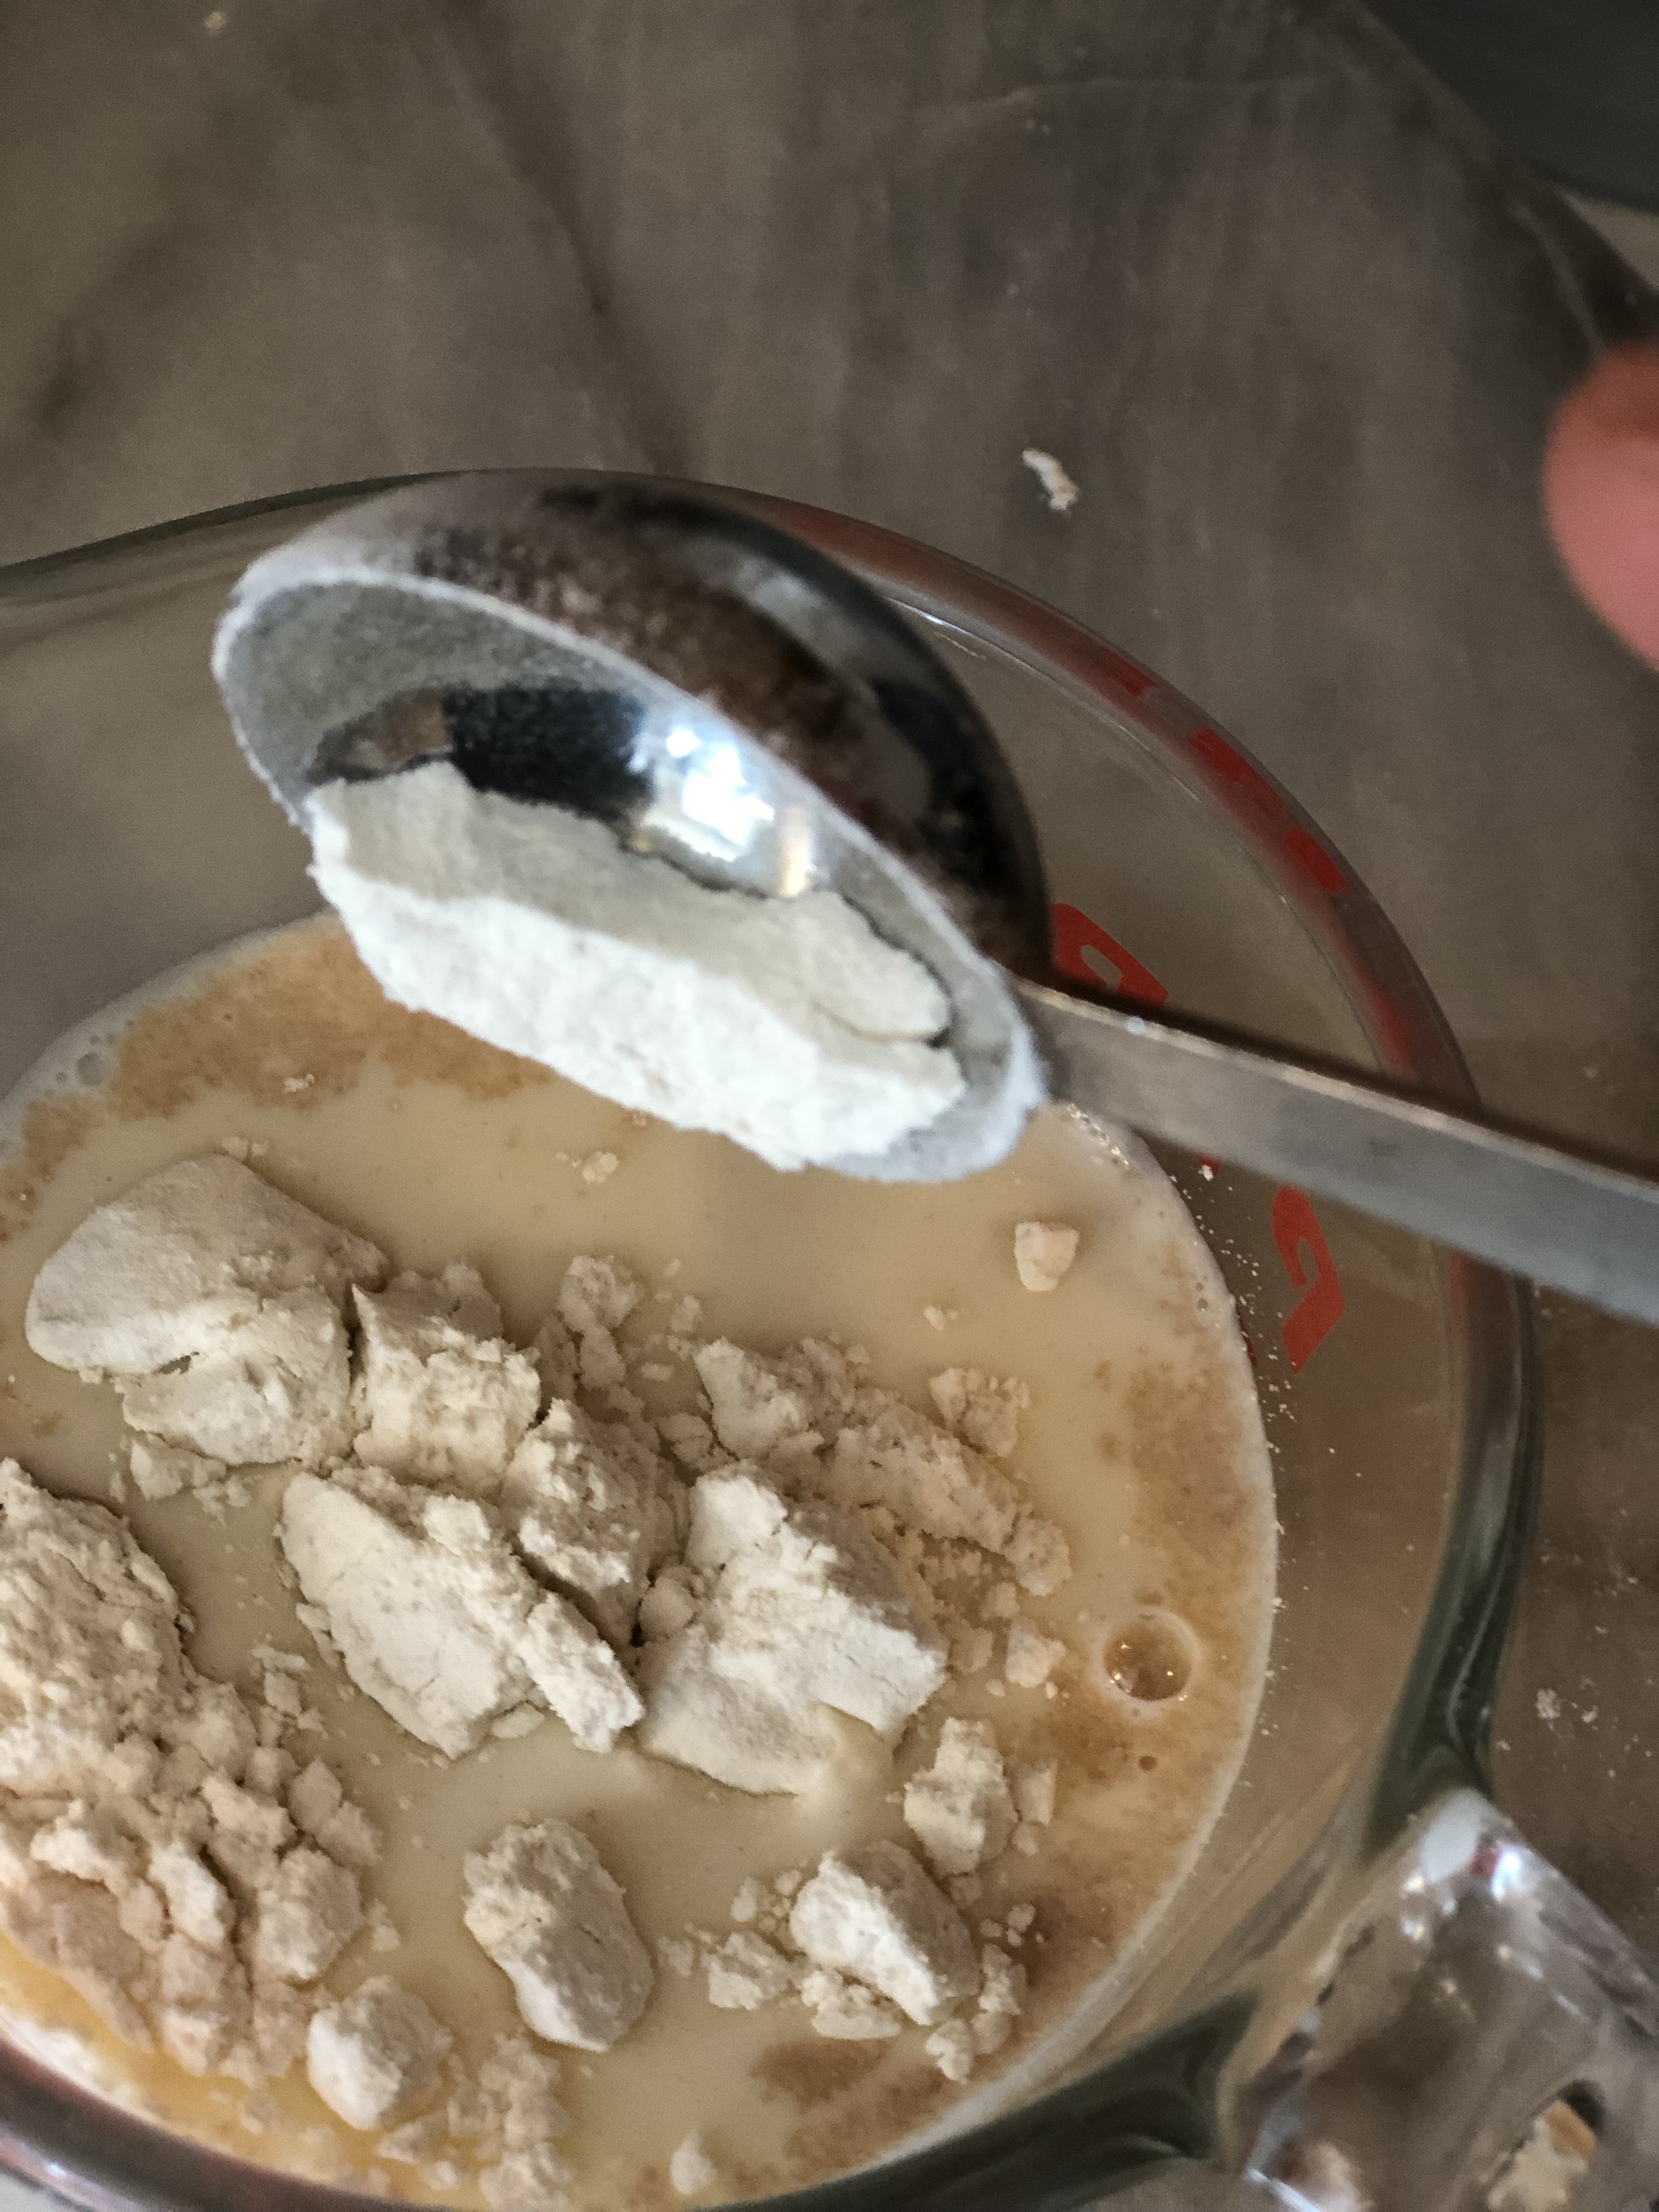
Now add 1 Tablespoon granulated sugar.

And add 1 Tablespoon all purpose flour. Stir it a little bit and let it sit for 5 to 10 minutes.
Now, the last time I made these, I followed these steps and waited, and nothing happened. No beautiful foam. Super disappointing. This is what the mix looked like:

No foam. Not good.
Well, I have read in other recipes that if the yeast doesn’t foam, pitch the whole thing and start over again. Now being that it was the Seattle Snowpocalypse, and we were running low on milk (grocery stores were out of everything!), I wasn’t willing to throw away a cup of milk, and I wouldn’t have wanted to do that anyway, so I just added another packet of yeast to the milk concoction (what’s the worst thing that could happen?), and this is what it ended up doing:

Success!
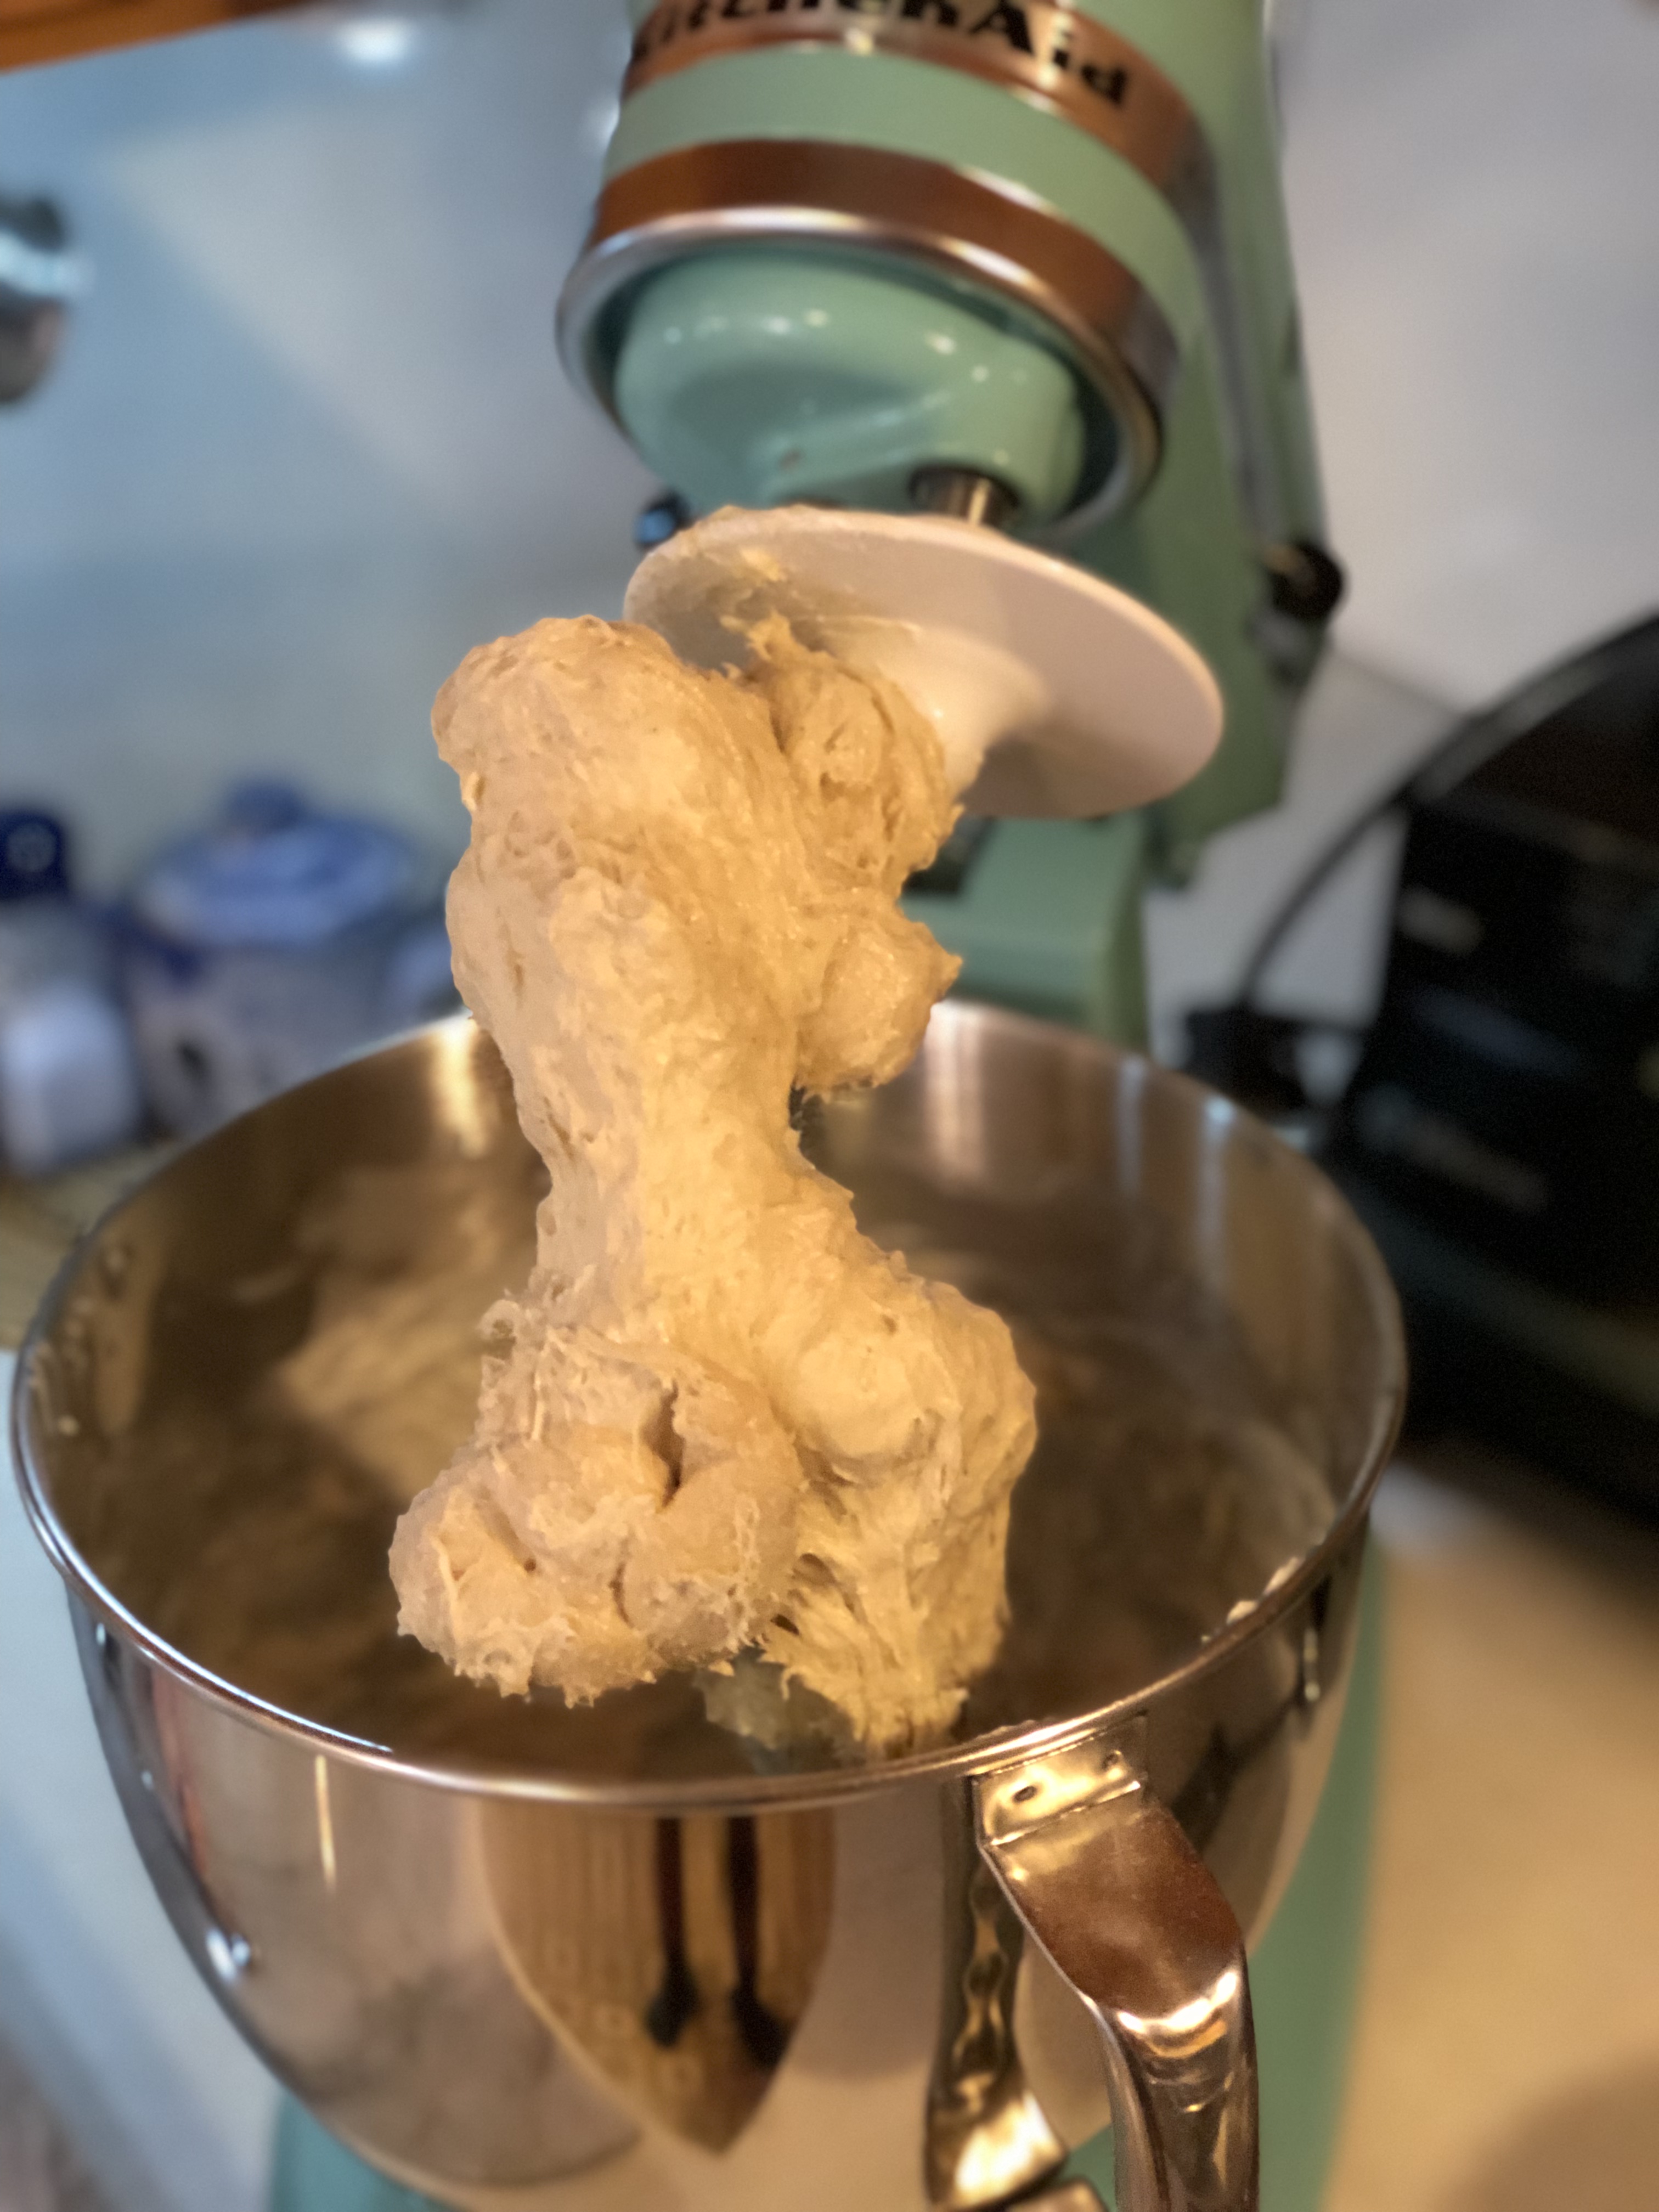
Now that’s what it’s supposed to look like. Kind of like a latté. I am only just getting to know yeast. As my friend Carol says, yeast is weird and unpredictable. But I know this, I wasn’t going to make an entire recipe and not know if the yeast was bad or good. I’ve done that before and regretted it. Make sure the yeast foams up a bit! Once you’ve gotten this far, put the milk/yeast/sugar/flour mixture into a large mixing bowl or bowl of your stand mixer (or to save time, do the whole thing in the mixing bowl to begin with. Then add 3 and 3/4 cups (17 ounces) of all purpose flour, 2 eggs at room temperature, 1 teaspoon salt, 1 teaspoon vanilla, and 1 teaspoon cinnamon. Just plop it all in there all at once.

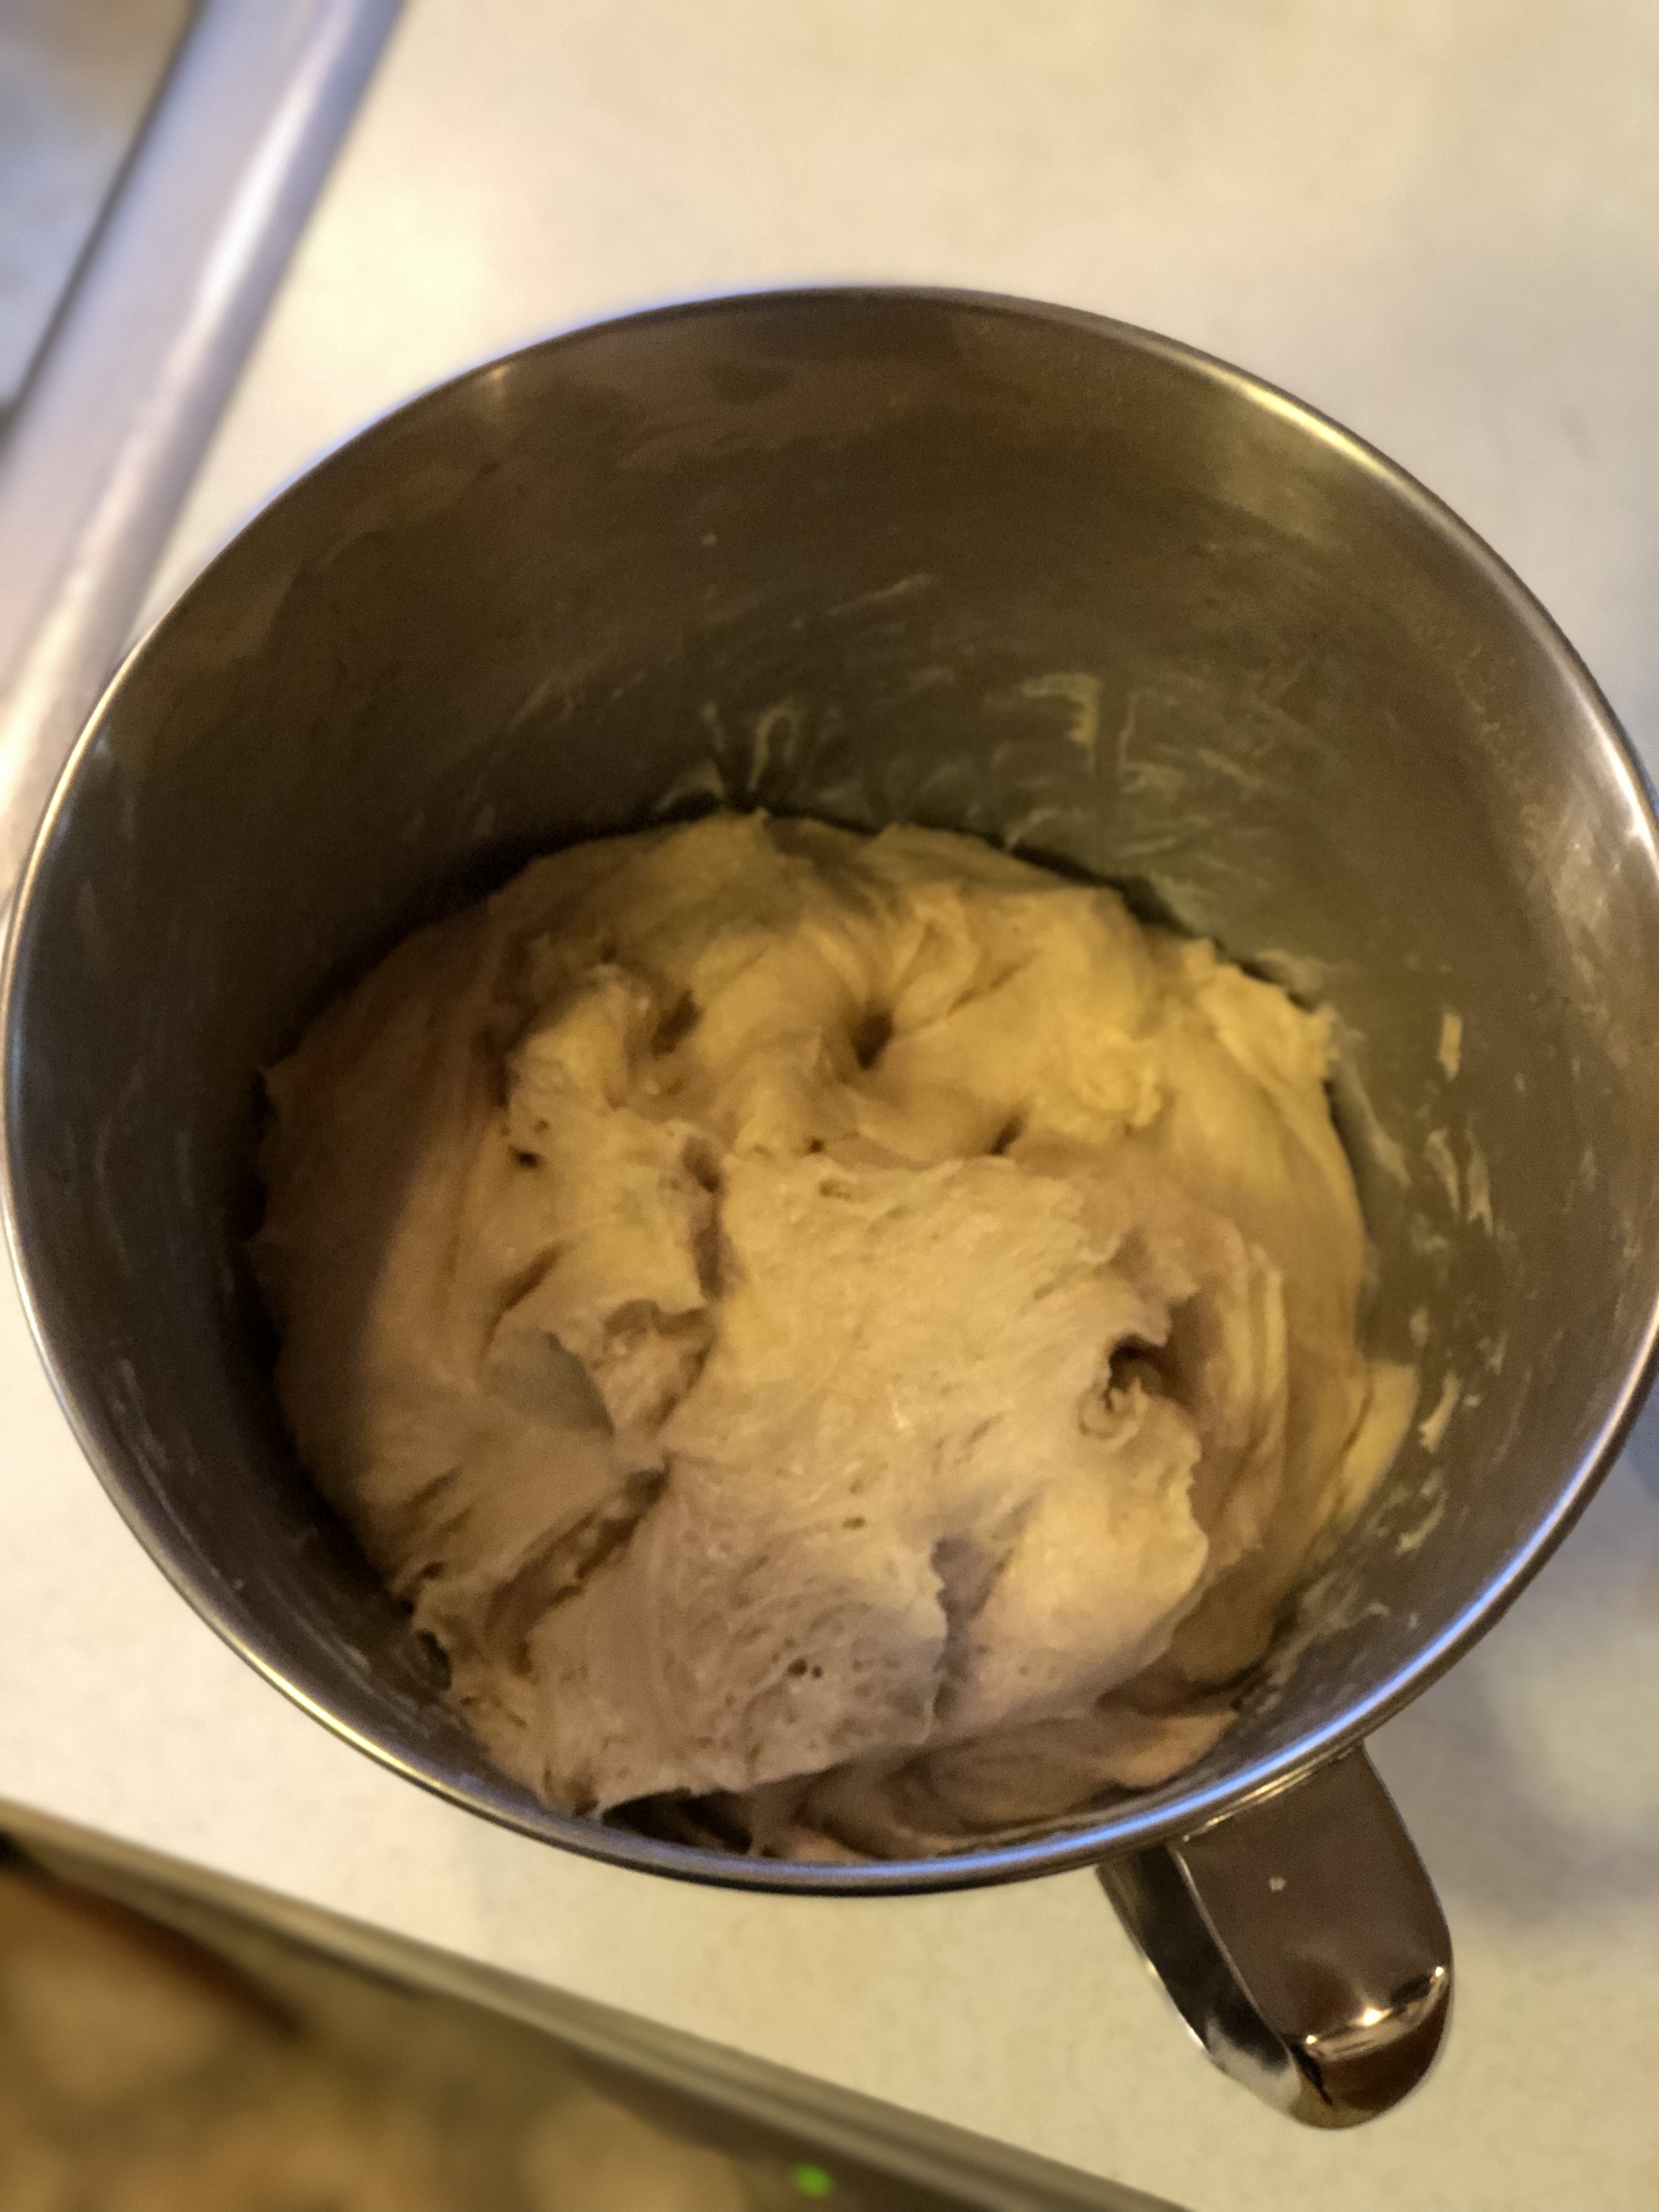
You can mix this by hand with a nice solid wooden spoon, or use the paddle attachment and mix it in your stand mixer. I’ve done it both ways, and I think it is a bit easier using the stand mixer. Either way, mix it well, until the dough becomes a bit elastic or stretchy. At this point you will want to add in the softened butter (1 cup, or 2 sticks, cut into pieces) little by little – switch to a dough hook! (By the way, if you are doing this by hand, mix everything at once, butter and all.) But back to the stand mixer. Add in the butter, using the dough hook, and mixing on a low speed, until all the butter is incorporated.
Eek! Don’t worry. It’s just dough.
This may take a while. Scrape down the sides of the bowl as necessary. When it’s properly mixed, the dough will be softer, and still a bit elastic.

Soft, but still stretchy.
Now scrape down the sides and cover your bowl of dough with plastic wrap and put it in a warm place in your kitchen, or at least an undisturbed place.

Before it has risen. Now cover that bowl!
Here’s a trick: turn your oven on to preheat to 350° for one minute, no longer. Turn the oven off. You are not trying to actually get your oven to heat up to 350°. You just want the oven to get a teeny tiny eensy weensy bit warm. I had to do it, because it is winter and right now my kitchen is cold! You can now put your bowl of dough that is covered in plastic wrap in a warm corner of your kitchen, on top of your fridge (it’s sometimes warm up there), or in the oven. Let it rest for at least a half hour, until doubled in size. Might take a bit longer.

Wow! That got big!
Now punch the dough down.
It got small again…
Ok, so the dough got smaller, but not as small as it was originally, and the texture should be soft and a little buttery (surprised?) and easy to handle. Now throw in about a cup and a half (or one entire package) of the pearl sugar. I know it looks like a lot. Don’t worry. It will be amazing!

Add the pearl sugar.
Sprinkle about a tablespoon or two of flour on top of that, and get your hand in there and mix the sugar with the dough, so that the sugar pearls are evenly distributed. It’s fun.

Now divide the dough into about two dozen balls and put them on a cookie sheet – they should be bigger than golf balls, but smaller than tennis balls.

These are way too big.
Cover with plastic wrap and let sit for about 15 minutes while you go have a cup of tea and get your waffle iron ready.
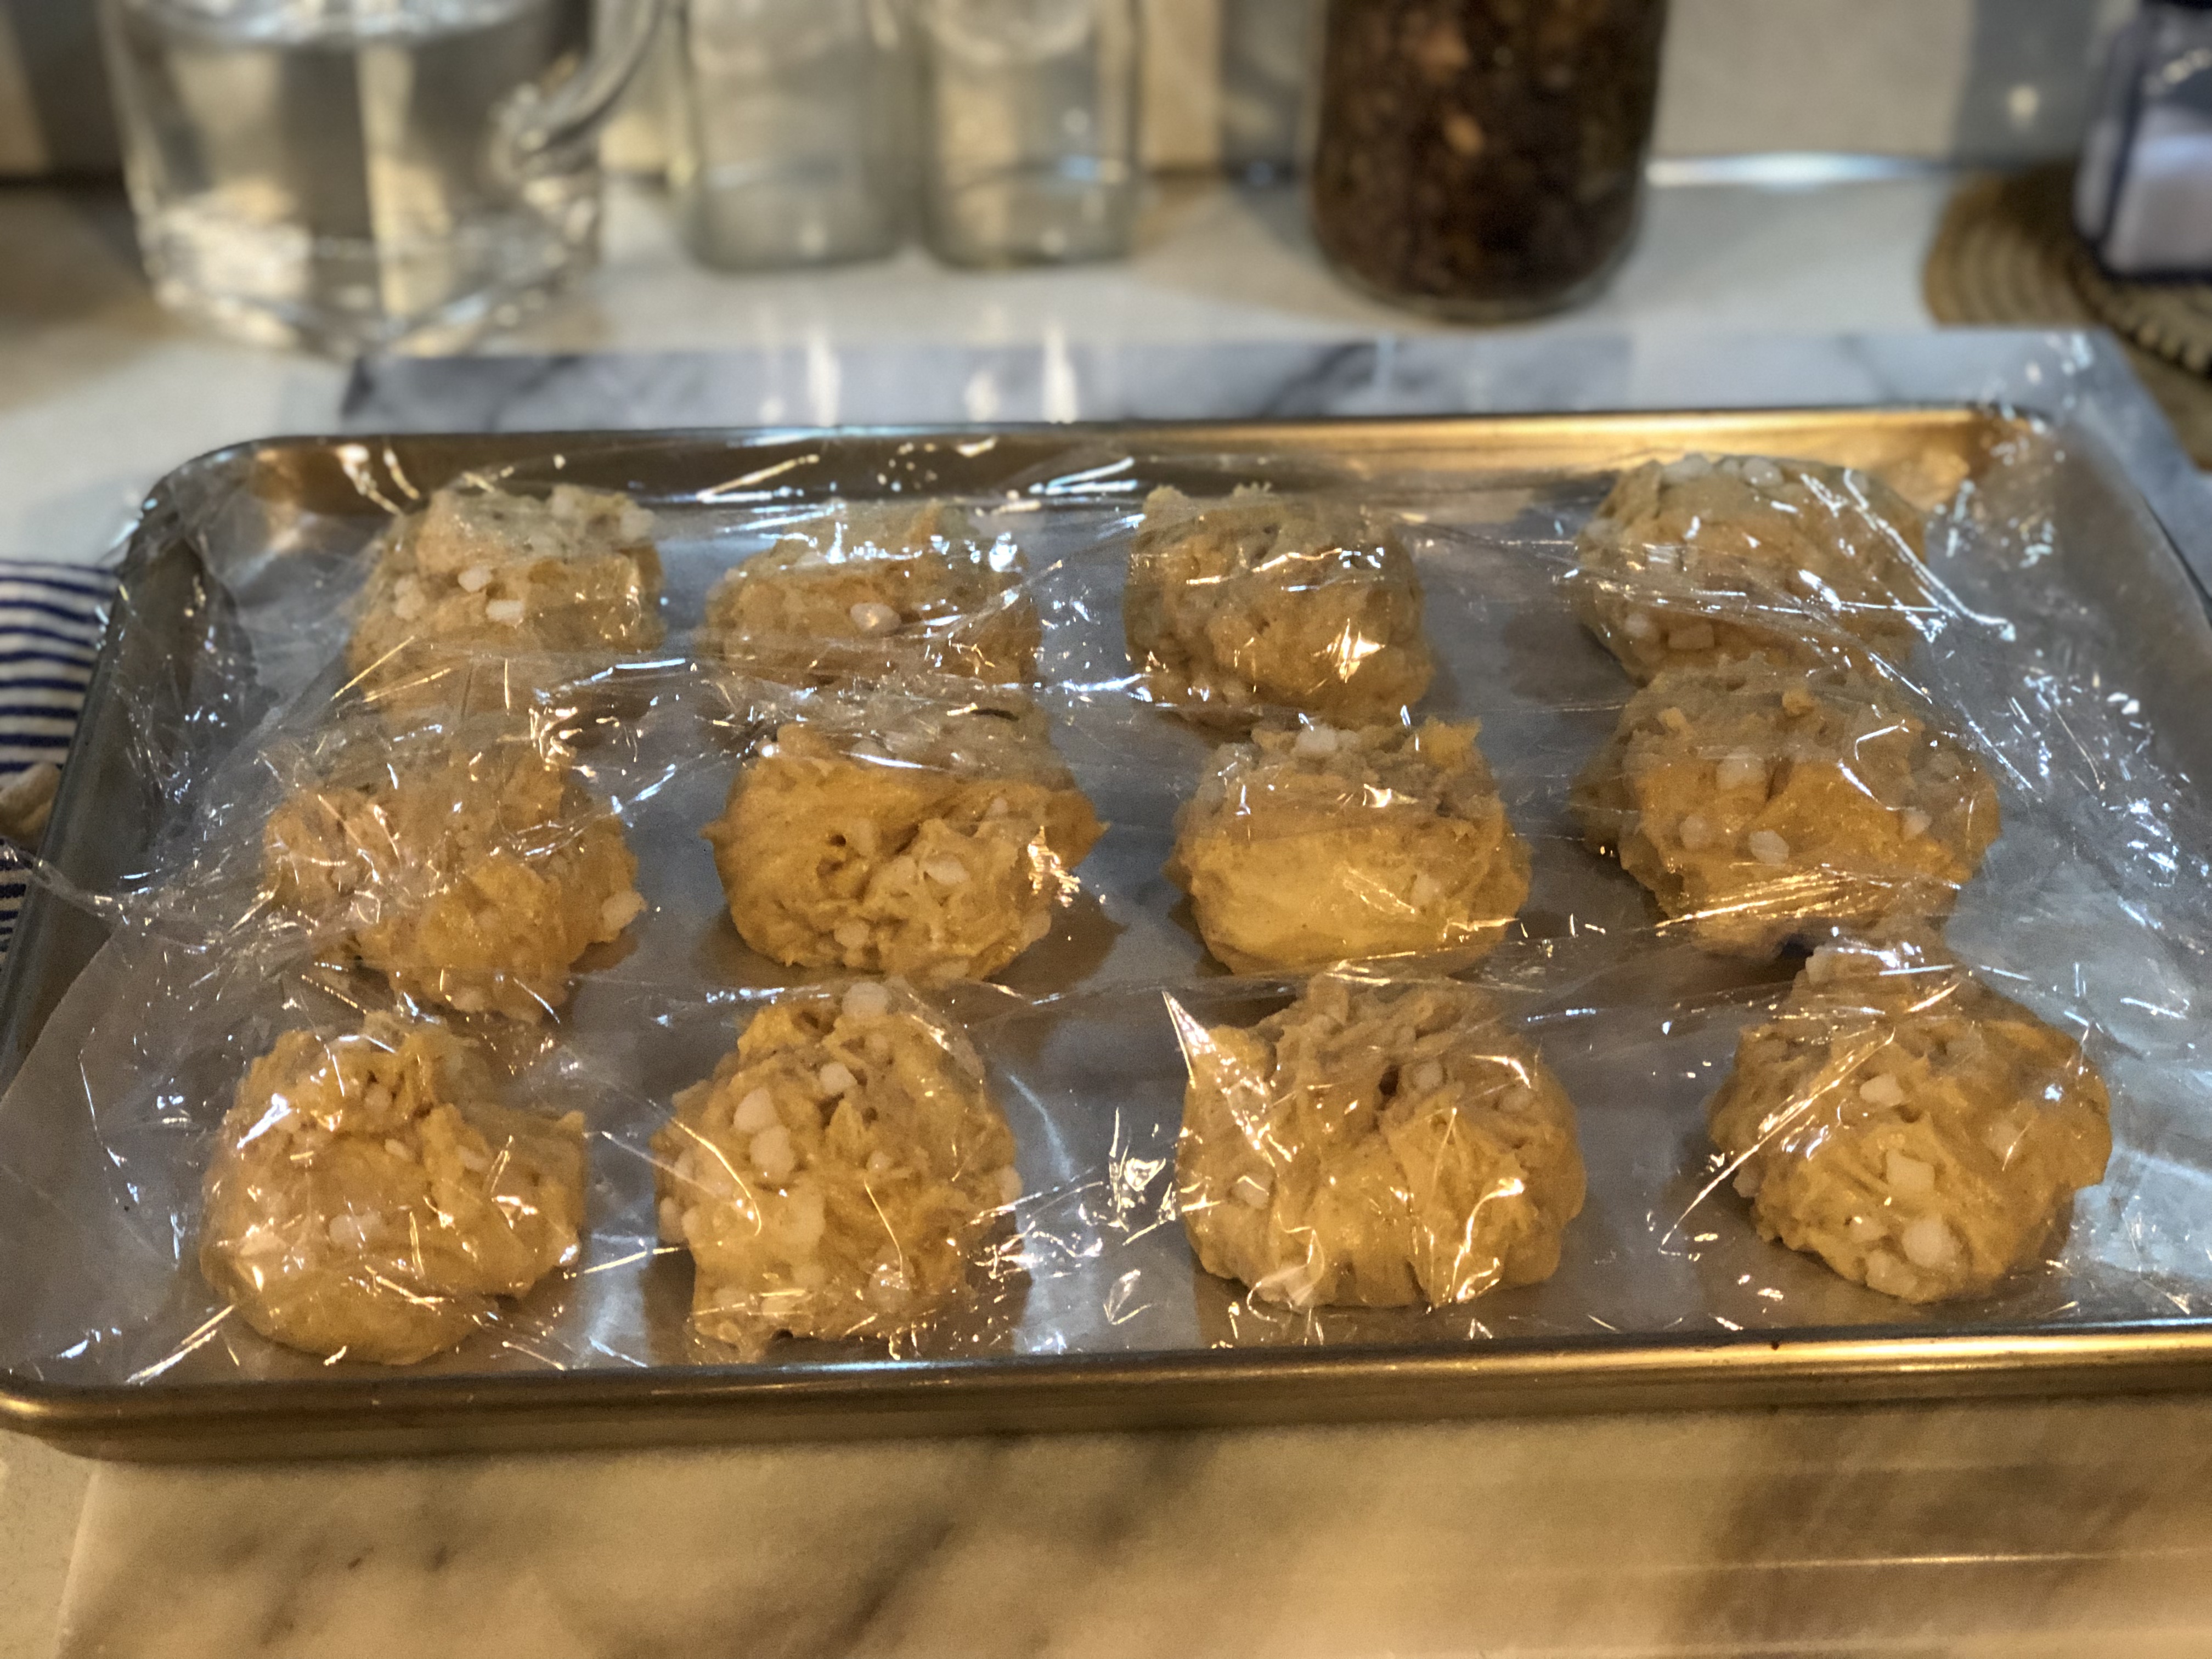
These are huge!
This batch for some reason I made only twelve balls, and they were ginormous, and got even more ginormous after sitting there for fifteen minutes, so I split each ball in half to make two dozen. Yes, this recipe easily makes two dozen waffles.

Ah, that’s better!
Once your waffle iron (Belgian waffle iron) is good and hot, place one ball of dough in each waffle square. No need to oil your waffle iron – these have lots of butter in them and they shouldn’t stick!
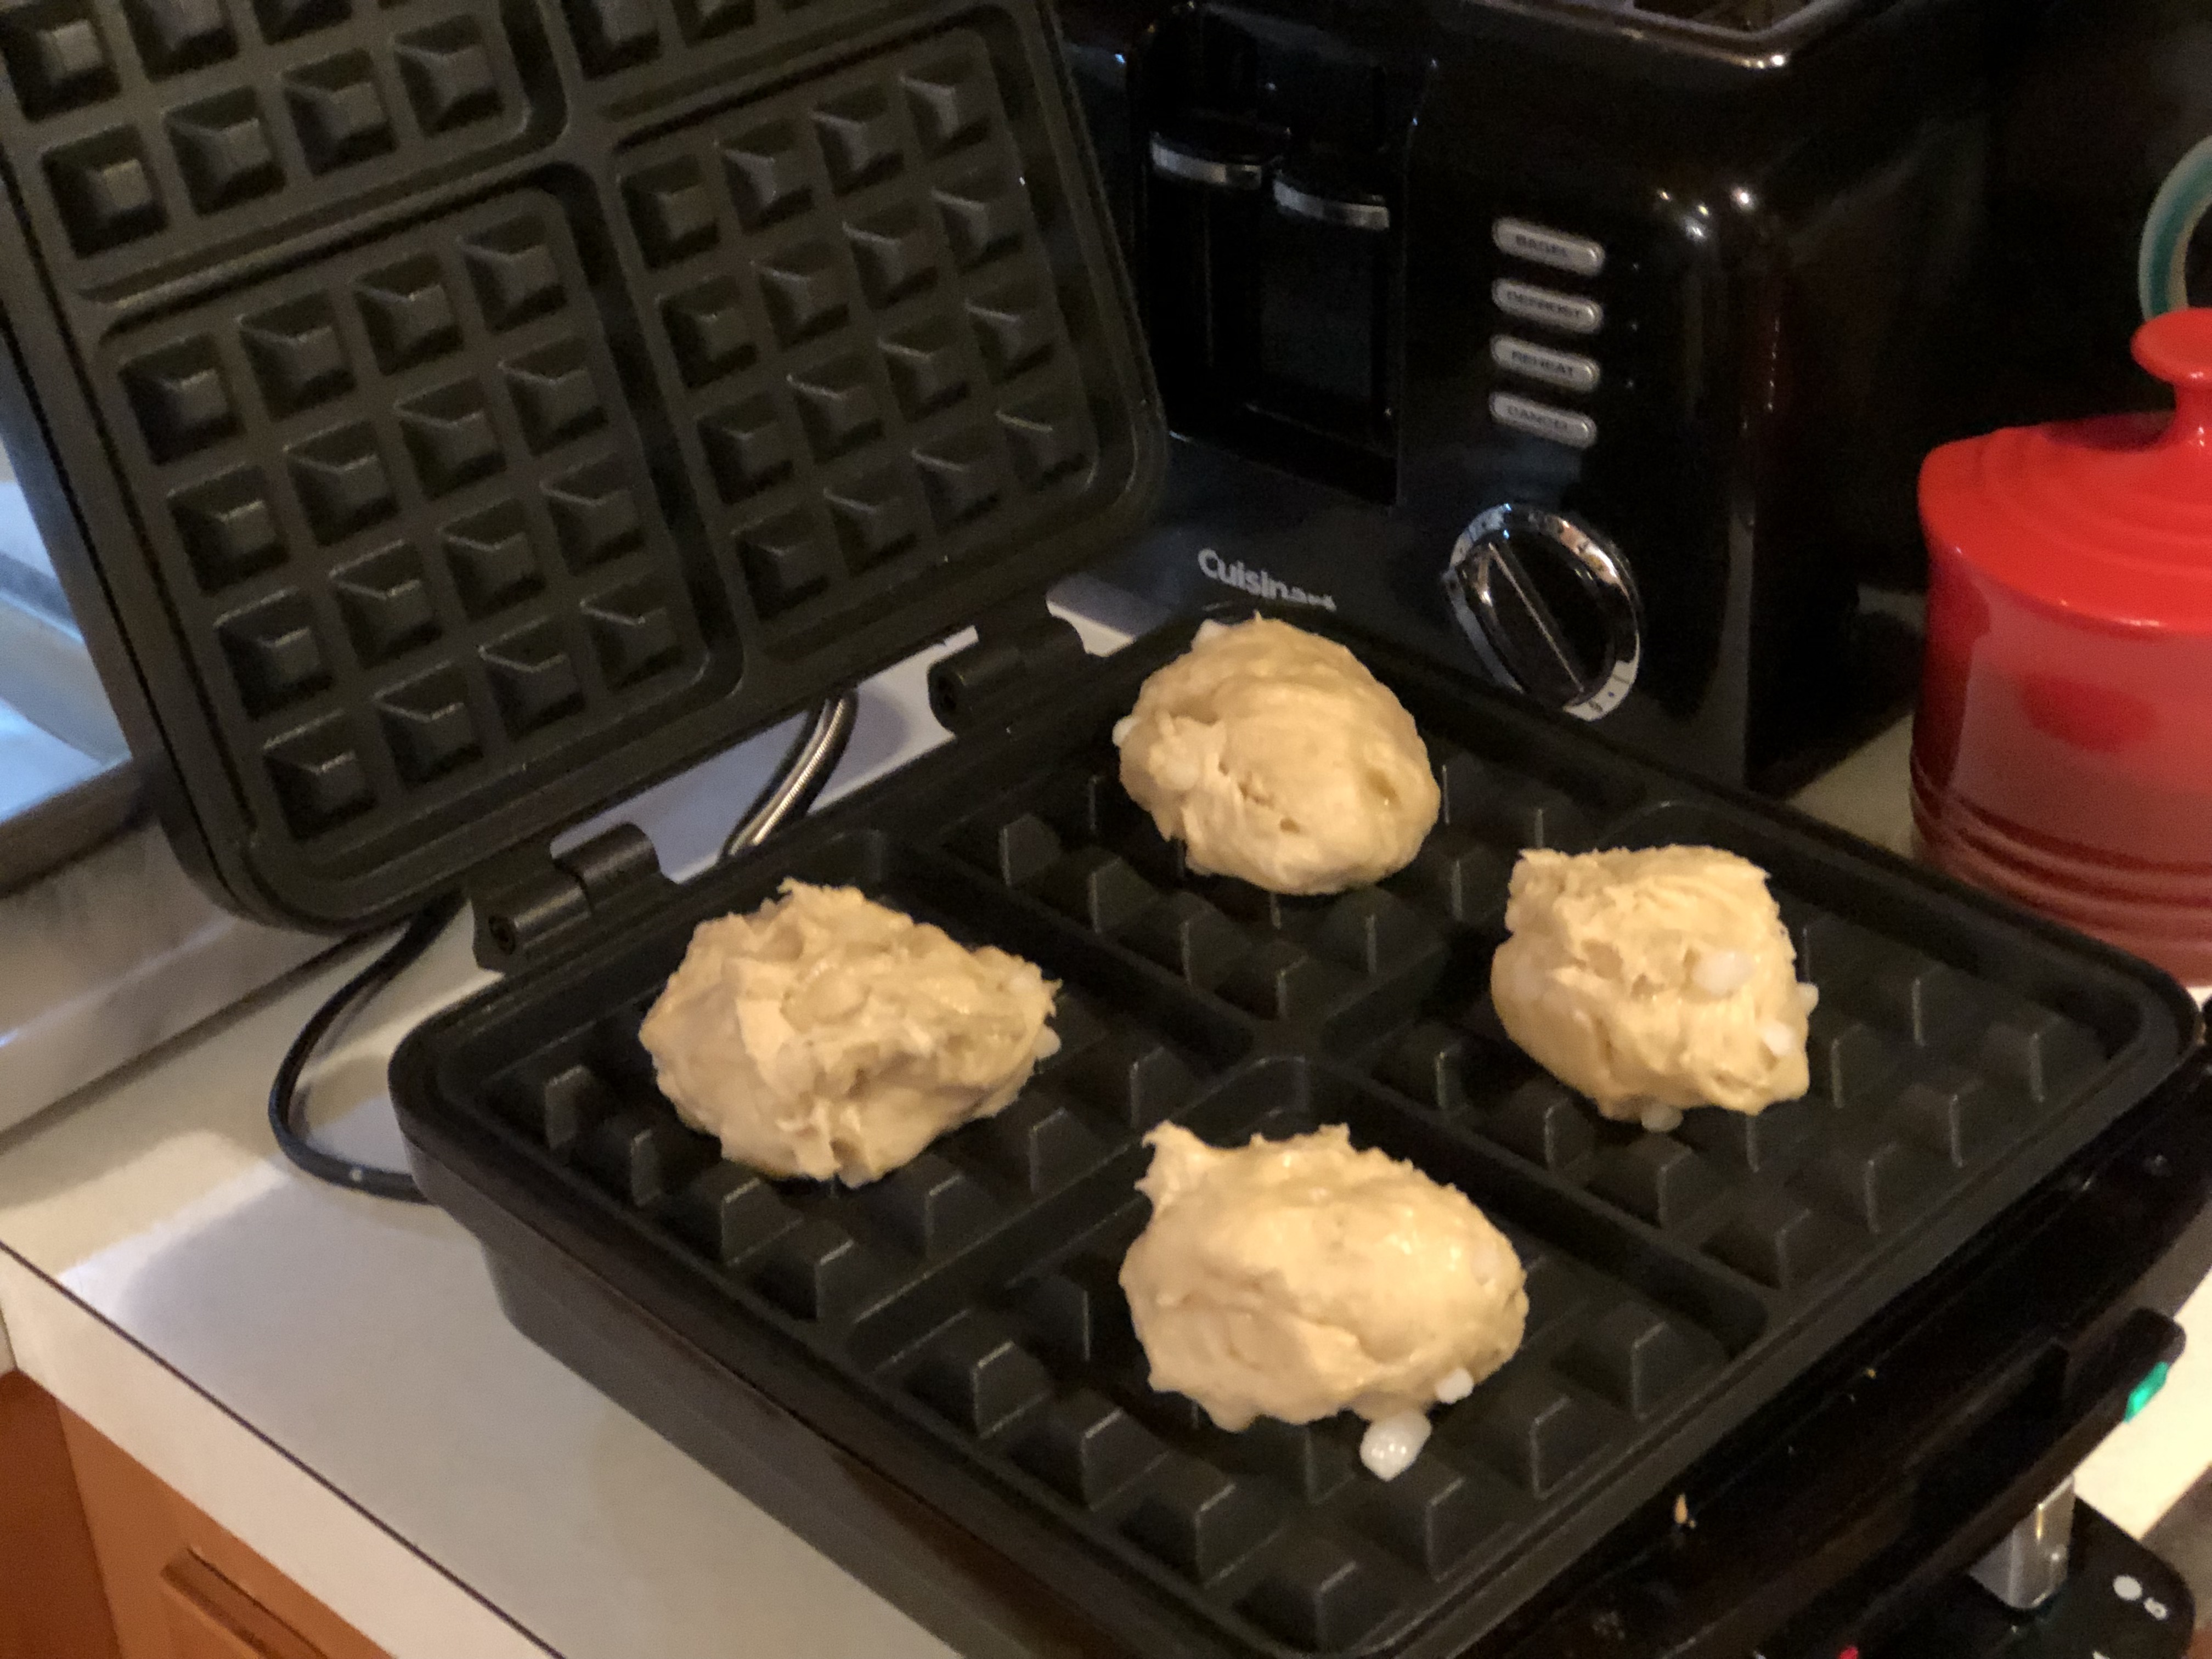
Don’t worry if some of the sugar pearls are coming out. They will melt into caramelized sugar – delicious. It might take around 3 minutes or so to cook, but that was just for my waffle iron. They should be golden brown.
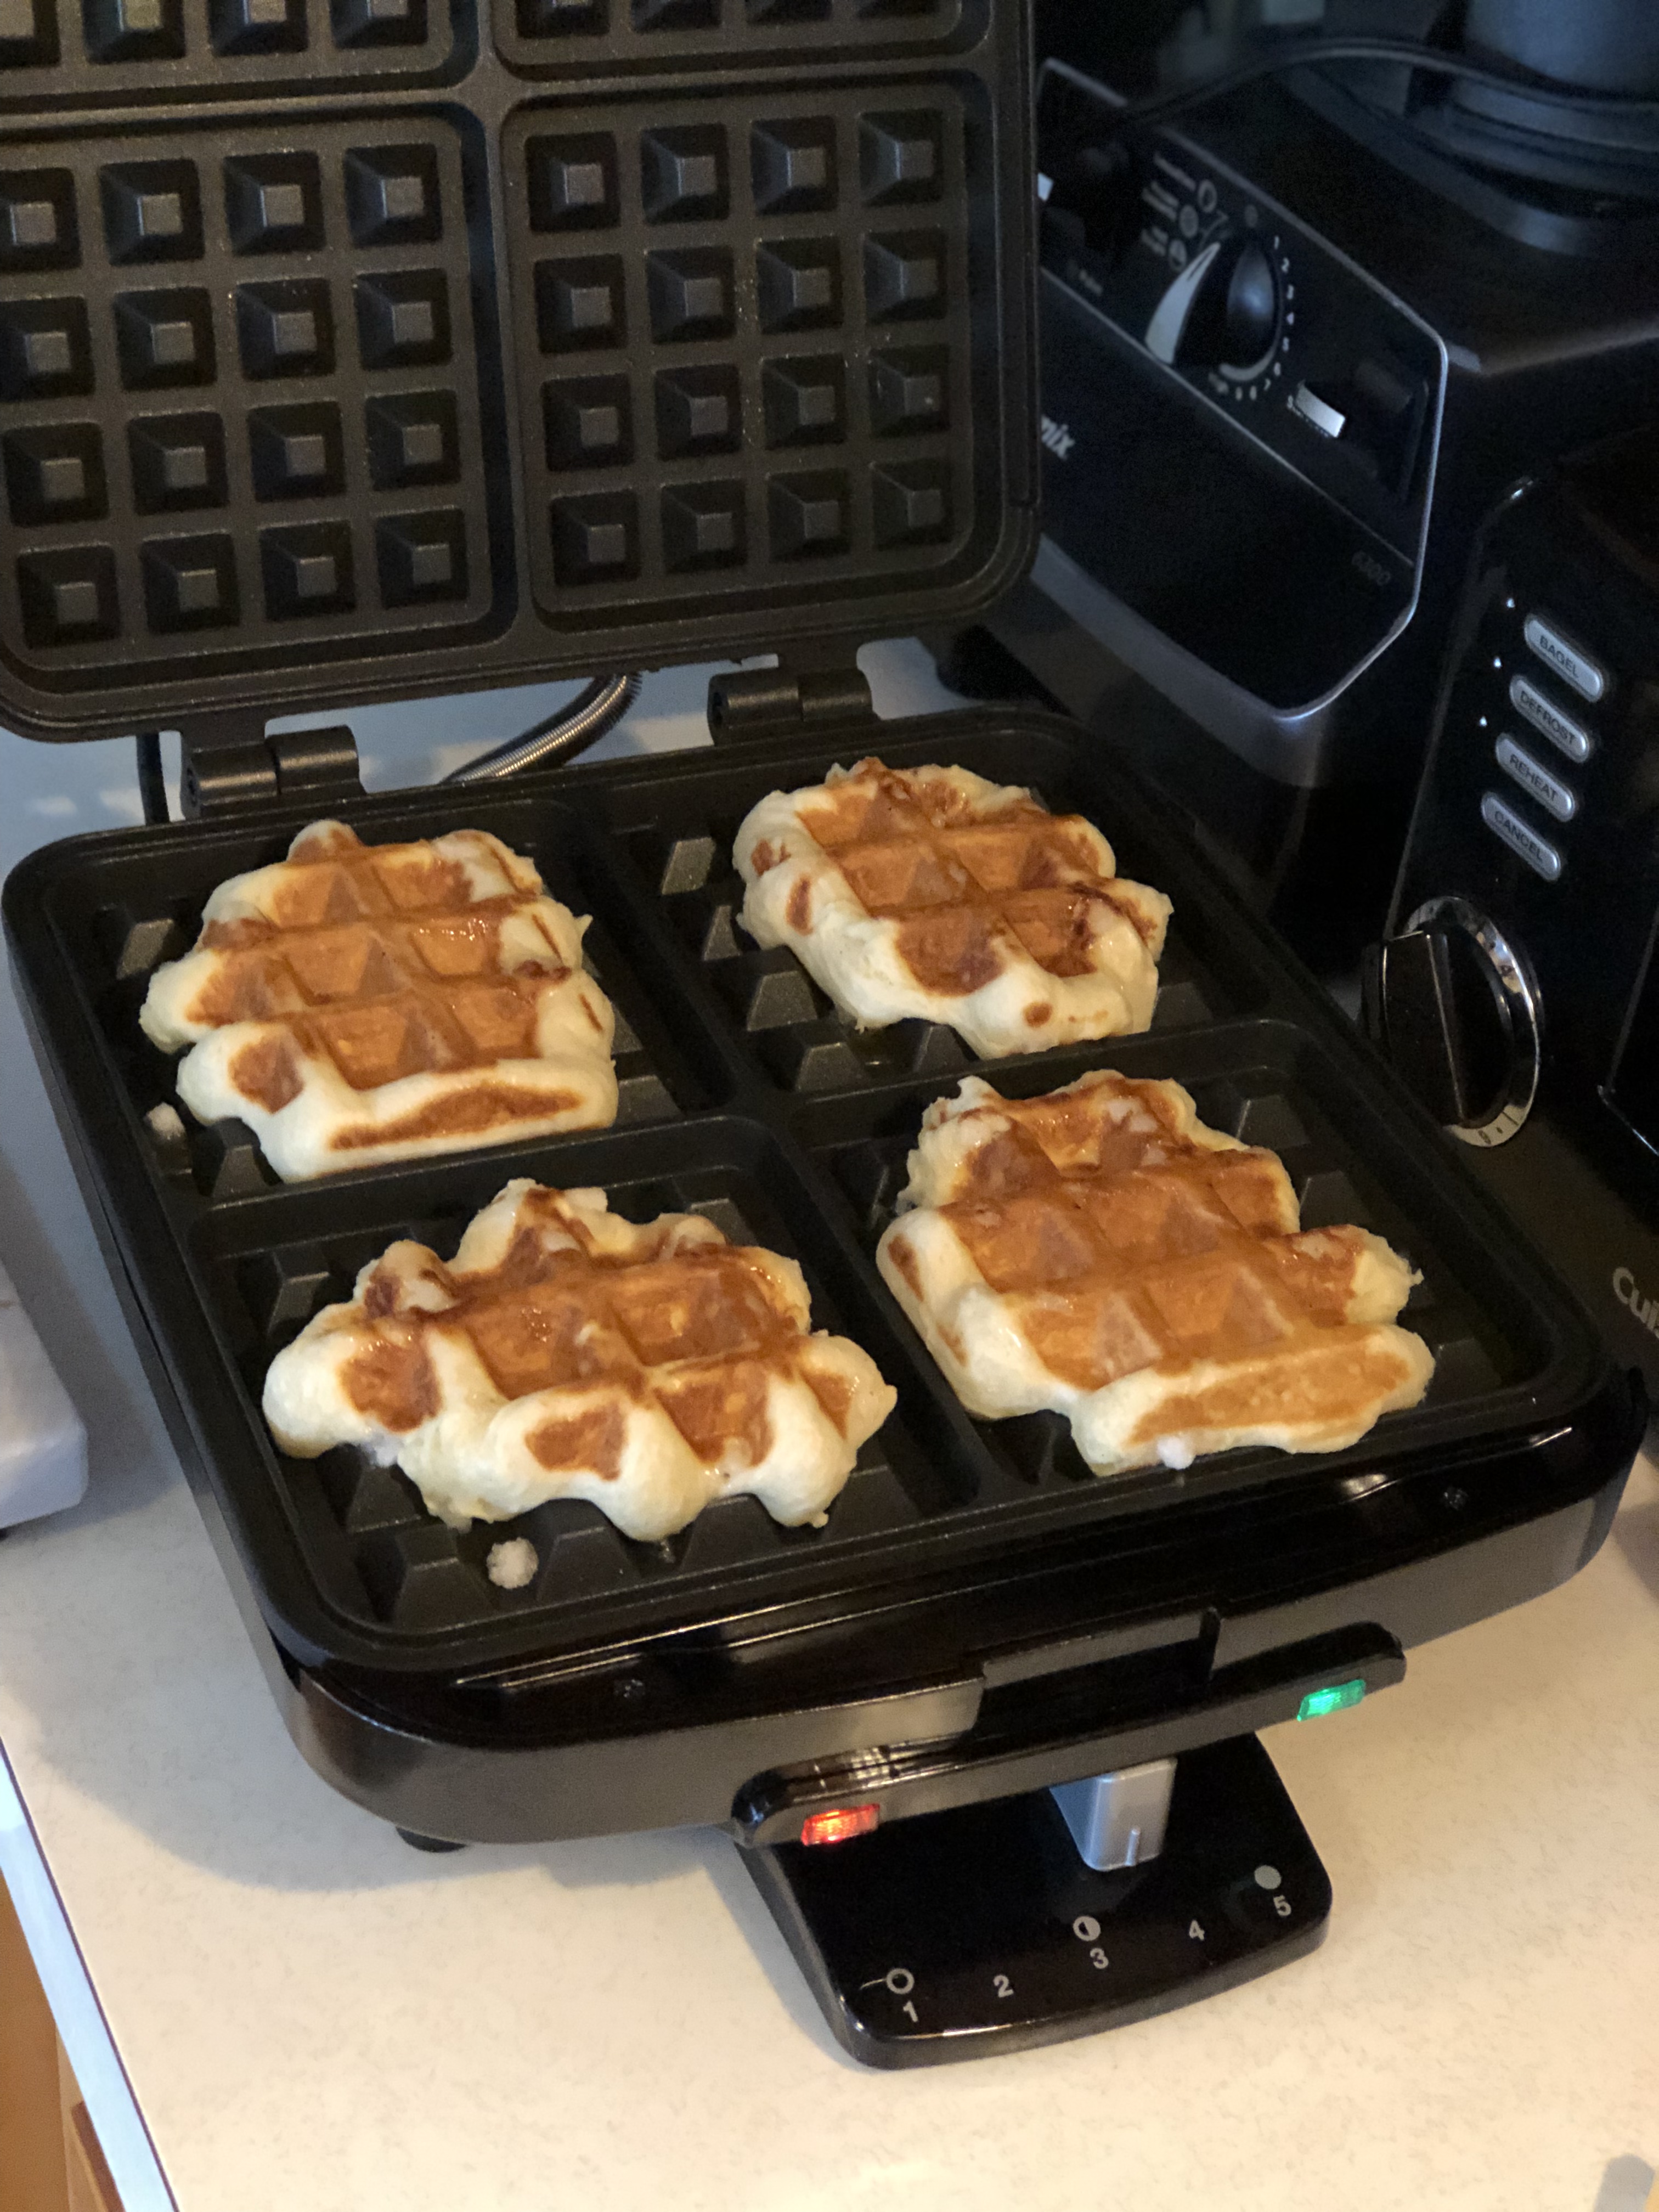
Carefully remove from the waffle iron with wooden tongs or something else that won’t scratch your waffle iron – these waffles will be HOT, due to the melted sugar, so don’t touch them with your fingers. I learned that lesson the hard way. Dear husband says I have “restaurant hands” and can touch very hot things, but not melted sugar. That’s where I draw the line. Transfer them to a cooling rack. And don’t worry about any sugar pearls that are remaining on the waffle iron. Just put your next batch on there to cook. The more sugar residue there is, the more caramelized each batch will be.
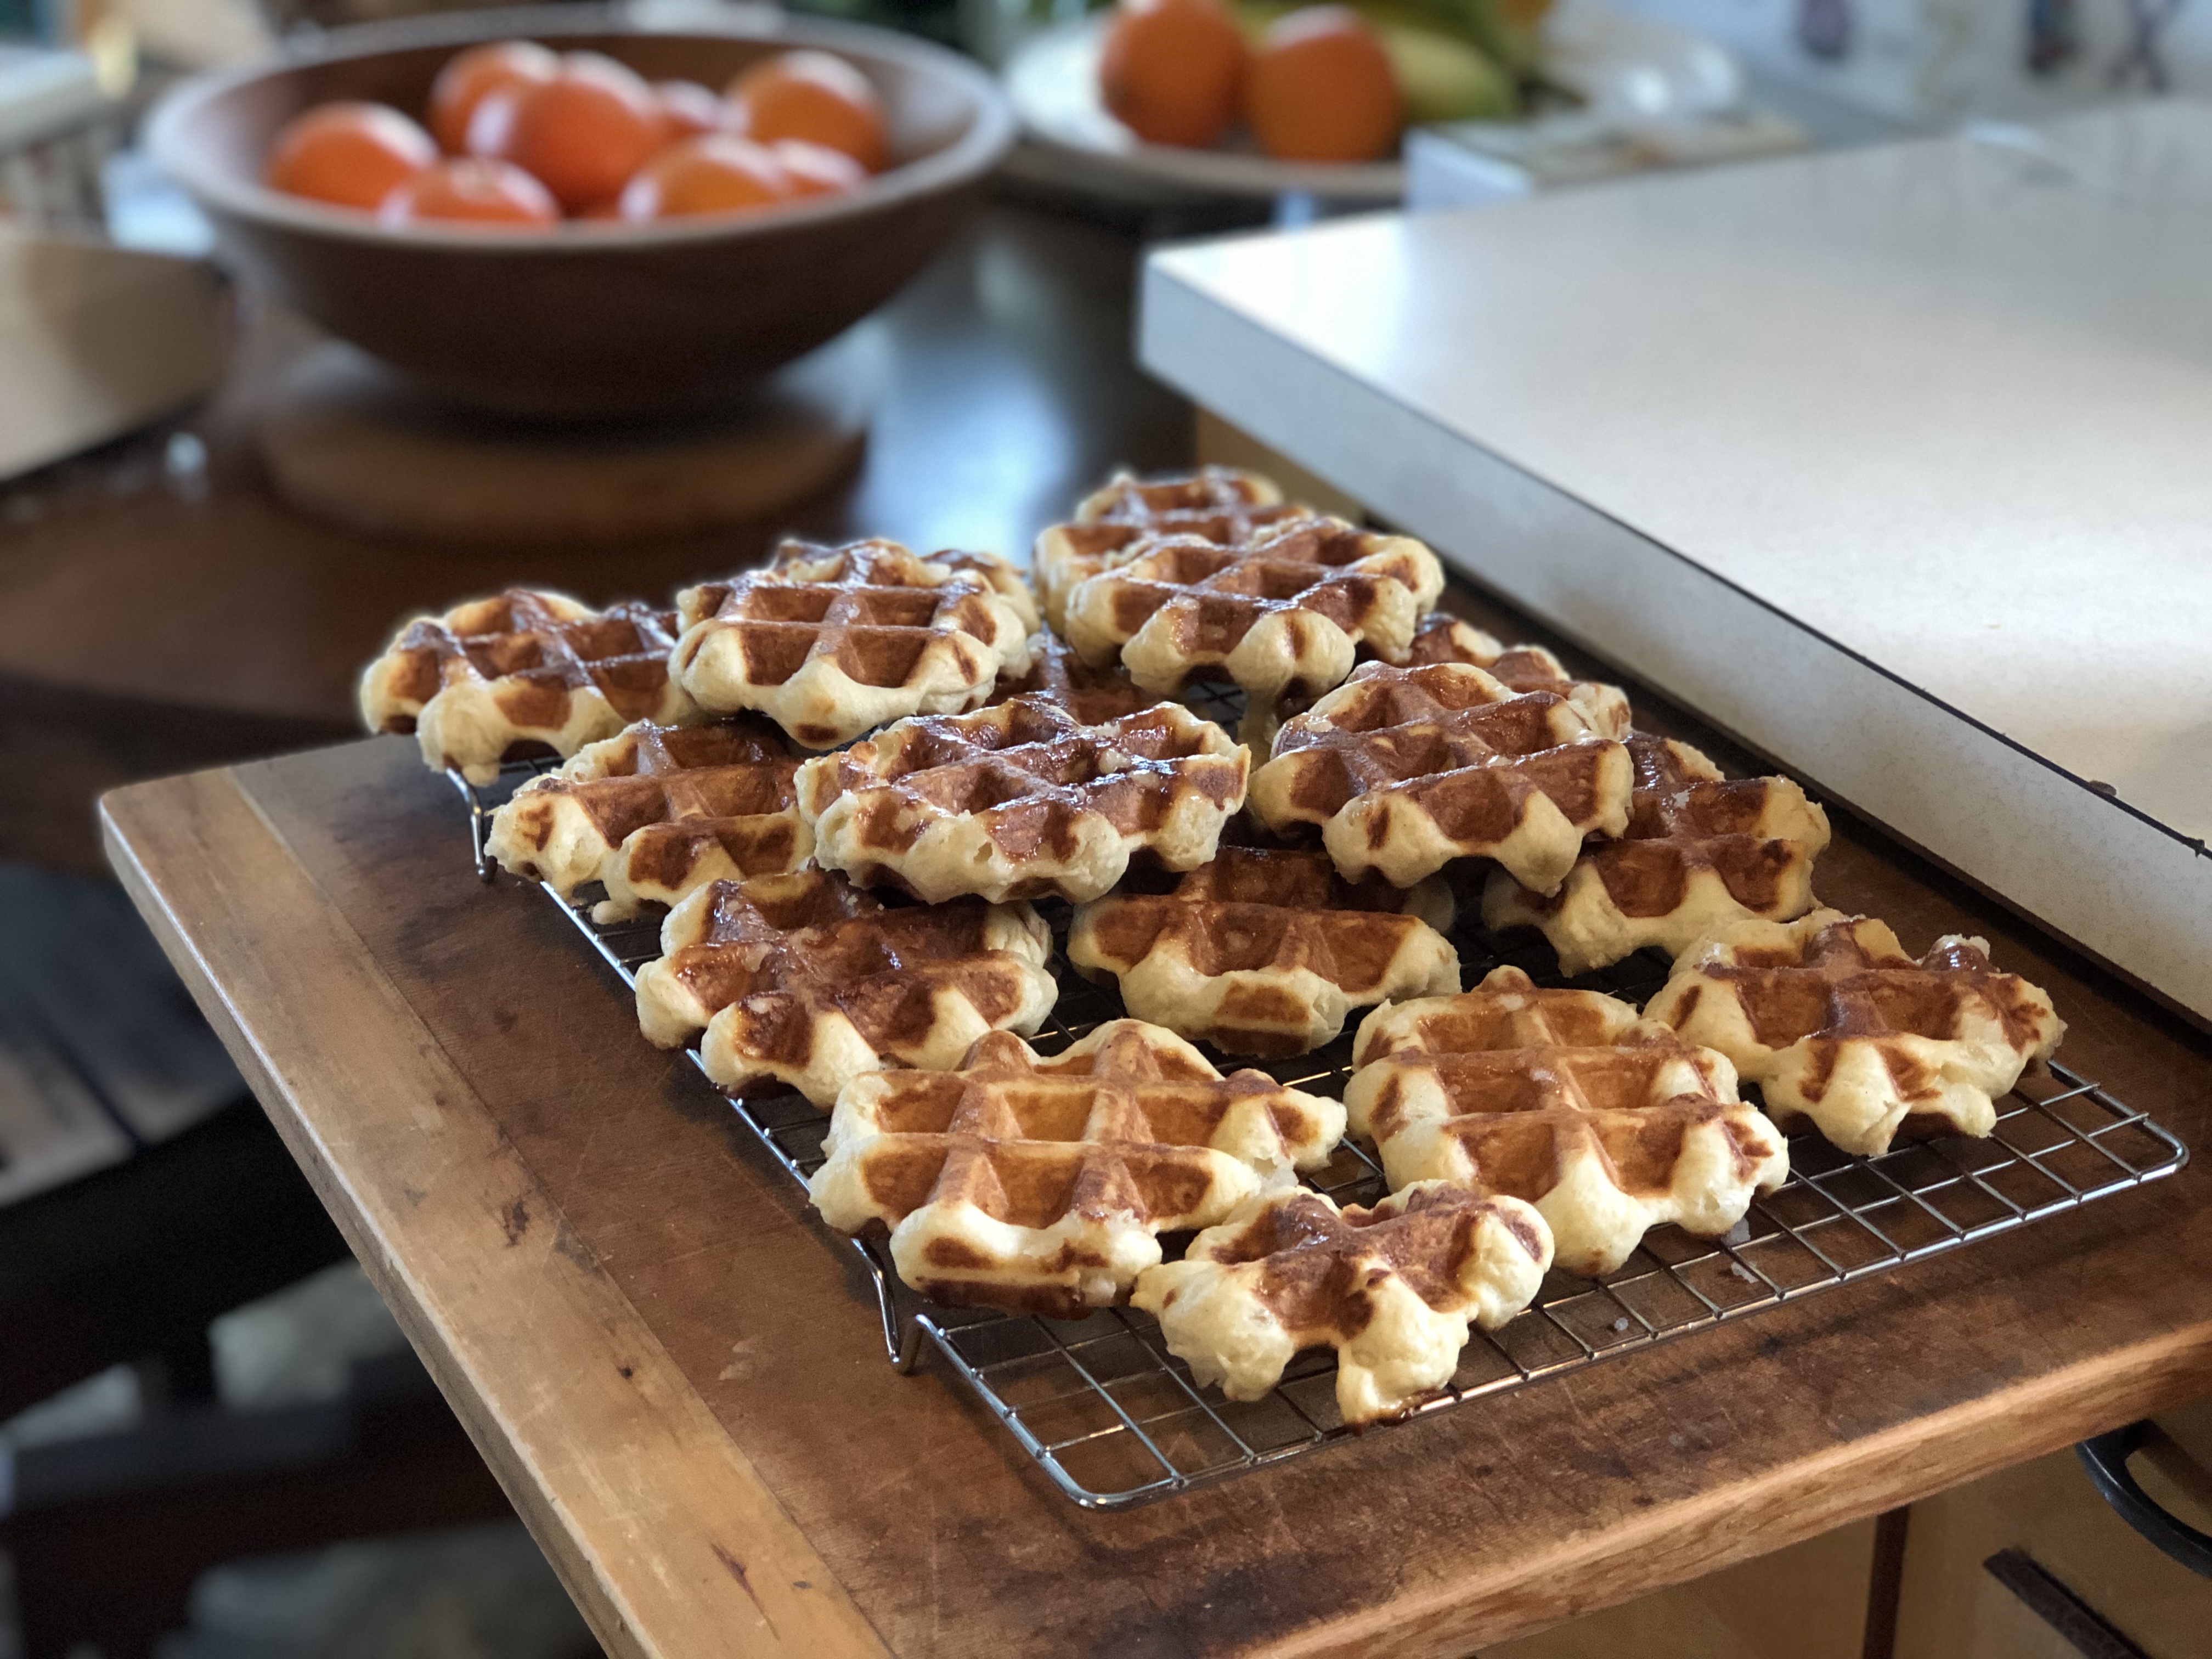
Beautiful!
These are best eaten warm (not hot!), but they are good at room temp, and even right out of the fridge if you can’t wait…. not that that has ever happened here….
Eat them plain; we think they are best that way. But if you want to go crazy, add whipped cream, chocolate sauce, caramel sauce…. not that that has ever happened here….
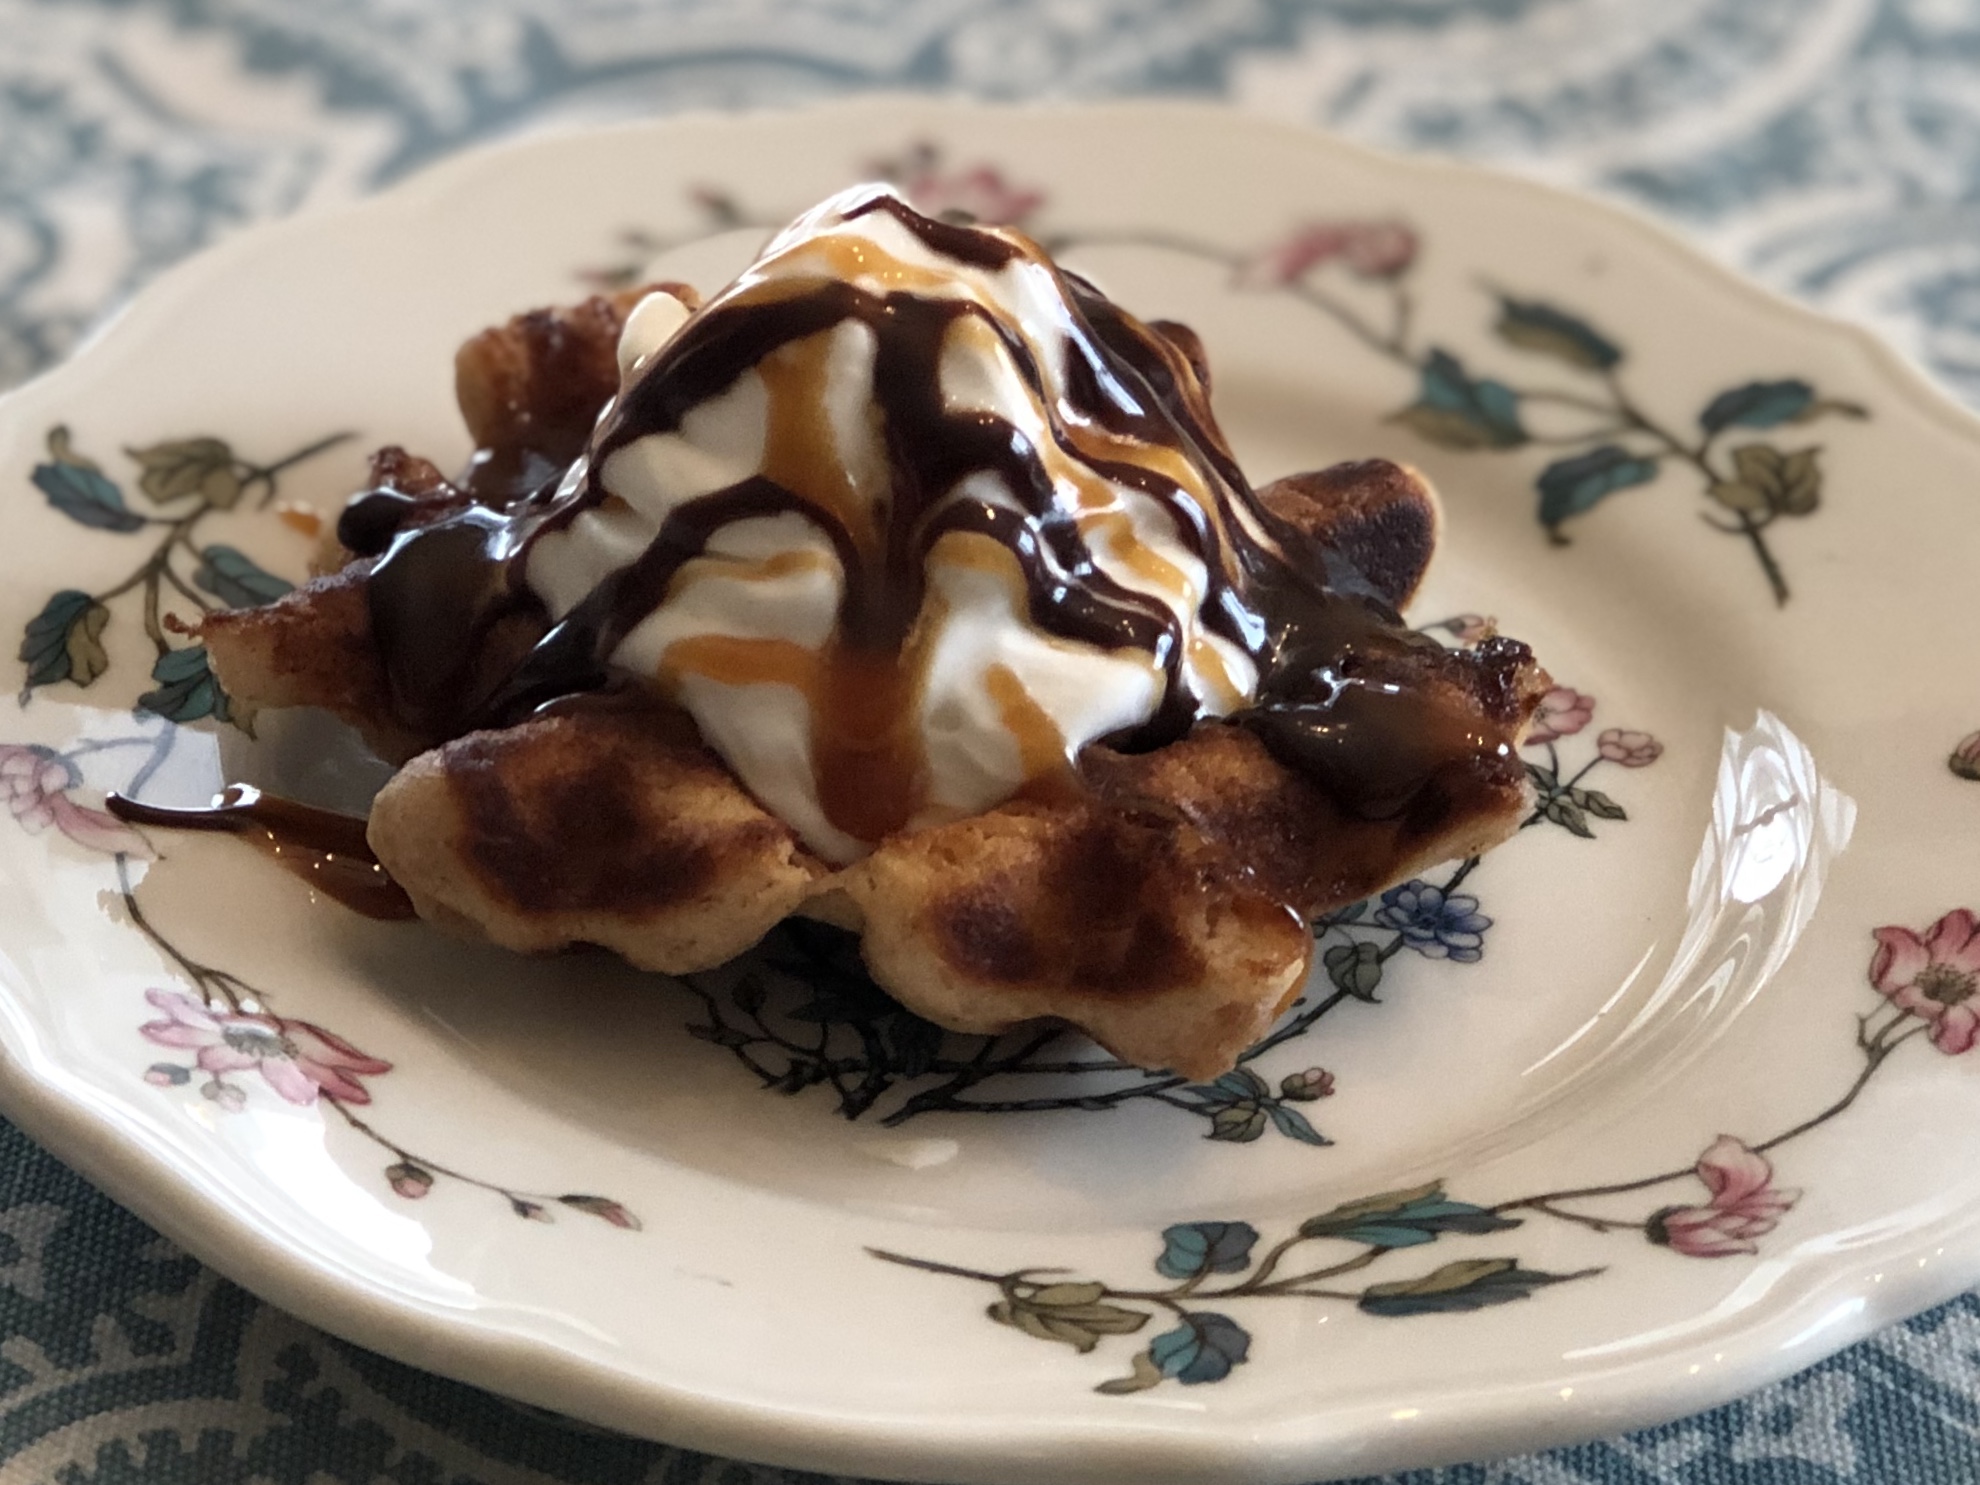
Over the top.
During our crazy snowmageddon here in Seattle, I sent some of these out to the neighbors that were sledding and skiing (yes, that’s right) down our street. They were a big hit!

Cutie-pie! Look at that expression!
Now, if you have any left after sharing them with your neighbors, and trying more than one to make sure that you like them, wait until they have cooled completely, and store them by wrapping in waxed paper, then aluminum foil, and keep them in your freezer. They are very easy to re-heat for a fun snack. Just put them back in your hot waffle iron – they will fit like a puzzle piece. You can also heat them in a 250° oven on a cookie sheet lined with parchment paper for 5 to 10 minutes if you don’t feel like getting your waffle iron out.
Oh, and here’s how to clean your waffle iron! While it is still hot, unplug it. Pour a little water in each waffle section, then close the waffle iron and let it bubble and steam in there for about thirty seconds. Open it up. When it cools a bit, take a wash cloth and soak up the water and wipe the iron clean. Easy!
What you will need to make these, aside from a Belgian waffle iron:
- 1 packet active dry yeast
- 1 cup milk, warmed to 100°
- 1 Tablespoon granulated sugar
- 3 3/4 cups all purpose flour and a couple more Tablespoons of AP flour
- 2 eggs at room temperature
- 1 teaspoon salt
- 1 teaspoon vanilla
- 1 teaspoon cinnamon
- 1 cup (2 sticks) unsalted butter at room temperature (should be soft)
- 1 1/2 cups Belgian Pearl Sugar
To make:
- Combine the yeast, warm milk, 1 Tablespoon granulated sugar, and 1 Tablespoon all purpose flour in a large mixing bowl or bowl of a stand mixer, and let sit for 5 to 10 minutes, until foamy.
- Add 3 3/4 cups flour, 2 eggs, 1 teaspoon salt, 1 teaspoon vanilla, and 1 teaspoon cinnamon. Mix until well combined and dough is a bit elastic.
- Add in little by little the softened butter, mixing each addition until well incorporated.
- Cover bowl in plastic wrap and set aside to rise. Dough should double in size, so let it rest for a half hour to an hour.
- Punch down dough, pour in the pearl sugar, and sprinkle the top with a Tablespoon or two of all purpose flour. Mix with your hand until pearl sugar is well distributed.
- Divide dough into twenty-four balls of dough, put them on a cookie sheet, cover them with plastic wrap and let rest (and rise a bit more) for 15 minutes.
- Heat waffle iron and cook the waffles until golden brown.
- Remove from waffle iron with wooden tongs and let cool a bit on a cooling rack.
- Enjoy warm!

