
Alert: this requires an Instant Pot with the “yogurt” function. If you don’t have in Instant Pot, it is very easy to make yogurt without one using this method.
Recently I have experimented with different ways to make yogurt. I have been making yogurt for a while now, just using my dutch oven. This required that I “incubate” the yogurt in our oven overnight, with just the oven light turned on to keep the yogurt warm. I did feel a bit nervous about the possibility that the oven light bulb would burn out in the middle of the night, leaving me with a gallon of NOT YOGURT. Everyone keeps talking about how great it is to use their Instant Pot for yogurt, so I finally decided I would give it a go.
I followed the directions for Instant Pot yogurt, and ended up with less than satisfactory results. A couple of things that I didn’t like about this method. First of all, the milk heats up too fast, so some of it scorches on the bottom of the pot. Secondly, when it reaches temperature, it doesn’t quite make it to 180°. I read up online about this, and it turns out that this is a common problem, and often you have to switch to the “saute” function to get the milk to 180°, and then you’ve really scorched the bottom. If you don’t get the milk all the way to 180°, then you have very soupy yogurt. When what you really want is yogurt that looks like this:

So here is my solution. Do the first part on your stove top in a dutch oven, and then use the Instant Pot for the cool down and incubation period. I love this solution. I can make yogurt during the day and it doesn’t tie up my oven (I used to have to let it incubate overnight for this reason), and I don’t have to worry about the oven light burning out! Also, the Instant Pot keeps the yogurt just a few degrees warmer than my oven light does, which I like.
Homemade Yogurt
Things you will need (you can halve the recipe if you like):
- 1 gallon whole milk
- 1/4 cup plain greek-style, whole milk yogurt with live cultures to use as a starter
- Candy thermometer or instant read thermometer
- Large dutch oven or heavy-bottom pan
- Instant Pot with yogurt function
- (optional) colander with cloth for straining
Update 2/21/23: I have reduced the amount of “starter” yogurt to only 1/4 cup. It works better this way. Also, please see the note at the bottom of the directions for a more streamlined version.
- Take your starter yogurt (1/4 cup) and put it on the counter to come to room temperature.
- Take an ice cube and rub it on the bottom of your dutch oven for a minute. Toss the ice cube, and dump out the drops of water from your dutch oven. No need to dry it.*
- Pour 1 gallon of whole milk into your dutch oven. Place your thermometer on the side of the pot. Turn the heat to medium. DO NOT COVER.
- Stir the milk every ten minutes (I set a timer) with a wooden spoon, but don’t let the spoon touch the bottom of the pot. You don’t want to scrape off any scorched bits that could add a strange texture to your yogurt.
- Your goal is to get the temperature to 180°. Once the temperature is at about 170°, start to stir constantly, and scoop out any skin that develops on top of the milk. A constant stirring at this point will discourage skin from developing.
- Prepare an ice bath in your kitchen sink, and have your Instant Pot insert at the ready.
- Once your milk has reached 180°, let it stay at this temperature for 5 to 10 minutes more. I believe that this improves flavor and adds to thickness.
- Ladle the hot milk into your Instant Pot insert (the inner metal pot), place the thermometer on the side of the insert, and place the insert into your ice bath. Stir the milk and watch it like a hawk. The milk needs to cool down to 115°.
- Once the milk is at 115°, immediately pull the insert out of the ice bath. Have your 1/2 cup starter yogurt in a larger glass. Ladle some of the 115° milk into the glass with yogurt and stir to combine. Now pour this into your warmed milk and stir gently to combine with your wooden spoon.
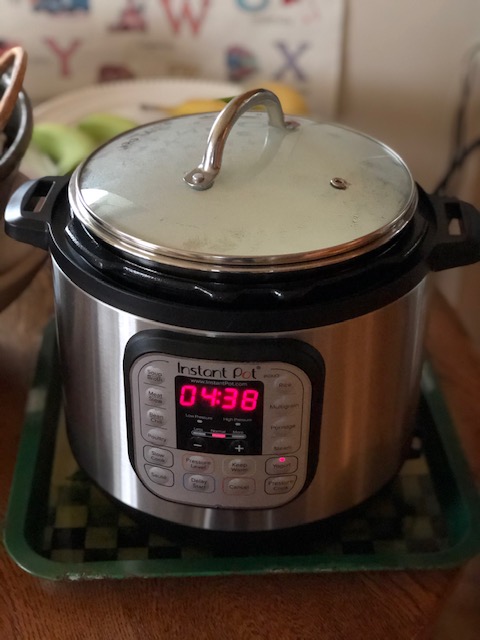
- Place the insert (that is full of the warm milk and yogurt starter) into your Instant Pot. Place the cover on and close. I actually use a glass lid, but either way works. Just make sure it is covered with a lid. Press the “Yogurt” button so that it is at “normal” for ten hours. And voilà. Go about your day. Ten hours later (or I like to stop it at eight hours) you have yogurt.
- If you want your yogurt to be thicker (I like it very thick), you can strain it by placing cheesecloth or a large piece of muslin into a large colander. I used to prefer cheesecloth, but now I prefer muslin. Place the colander in a large glass bowl. Ladle the yogurt into the lined colander and let strain anywhere from 4 to 8 hours. I usually let it strain on my counter for about a half hour, dumping out the golden liquid (whey) that accumulates in the glass bowl every ten minutes. After that I cover the yogurt and put it in the fridge for the rest of the straining time.
- After straining, put yogurt into a large glass bowl and whisk until smooth and glossy/creamy. If you have strained the yogurt, you will end up with about eight cups. If you didn’t strain, you’ll end up with a lot more.
- Store in glass jars in your fridge. Lasts seven to ten days. Don’t forget to save a half cup to use as your next starter.
- Have fun with all the different ways you will use your fabulous yogurt. You will never want to go back to store bought ever again!
Note: *Update! I now heat up my milk in the instant pot on the saute function to bring it up to 180° (or sometimes as high as 190°). I whisk it the whole time so it doesn’t scorch on the bottom. It takes about 25 minutes total, and I check my email on my phone while I whisk :). When I pull the insert out to let the milk cool down using the ice bath, I immediately press the “cancel” button on the instant pot so it has time to cool down a bit before I put the milk back in and press “yogurt”. This streamlines the whole operation, taking the dutch oven and stove top out of the equation.
I am including some pictures of the process below, as well as some ideas for how you might want to enjoy your fabulous yogurt.

Heating up the milk.

Ice bath in the Instant Pot insert.
Incubating. I love the glass lid.
After eight hours it looks ready.

Straining.

Whisking.
And now the fun begins.

Homemade raspberry yogurt.
Homemade blueberry yogurt.

Serve unsweetened with granola and maple syrup.

Use in place of sour cream (here with arepas).

Serve with waffles.

Have it on pancakes.
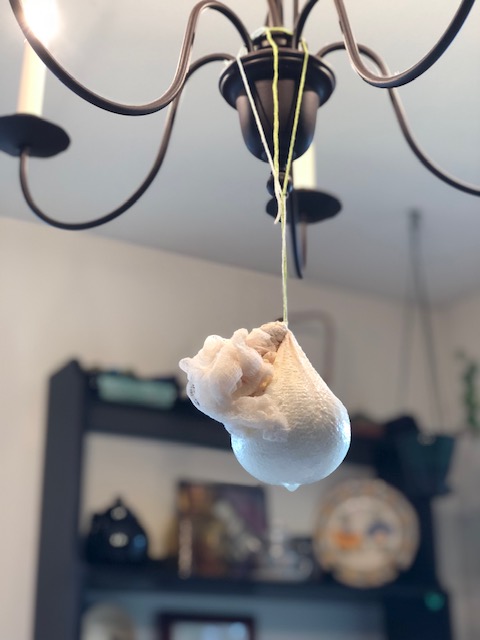
Strain longer and make cheese!
Enjoy!

So is it really worth it? I mean is the yogurt actually better than what you can buy at PCC? Also where do you buy cheesecloth or muslin for the straining part? This looks like fun and I love yogurt!!
I can’t (and therefore shouldn’t and won’t) answer whether or not it is worth it for Angela, because she does the work, not I. But as the beneficiary of the work, I can state unequivocally that there is no commercial yogurt (I won’t even give commercial yogurt an h) — I say, there is no commercial yogurt that comes anywhere near this. Ninety percent of storeboughts are too sweet, and every time I found a storebought that wasn’t too sweet AND was local AND was made with ingredients I trusted, they would go out of business. Angela’s yoghurt is perfect. She makes me the blueberry one shown above. Just pulling it out of my backback every day at work and seeing that dark indigo swirl splashing up with the white against the glass container gives me a sense of well-being, health, and plenty. And then I open, stir, and eat, and after that I can deal with the worst the day can throw at me. Try this yoghurt!
Susan, yes, it is worth it! And you even got a testimonial from my dear husband! Seriously, this yogurt is really really good. We’ve all become obsessed with it. I make it once a week. Mara tried lots of store brands thinking she would find something she liked, but no. Now I make her the raspberry yogurt, and she loves it. Has it in her lunch every day. And you know how much Matthew loves it! ;-). Millie eats it mostly unsweetened, with just a teeny bit of vanilla and sugar. She loves it too. And we all love it on pancakes and waffles, *and* in place of sour cream…. baked potatoes, taco night, arepa night. As for the cheesecloth, you can get that at Whole Foods, or possibly at PCC. I got some at a fabric store and hemmed it so I could re-use it. I also got organic muslin at a fabric store and hemmed it, and now that’s all I use. Much easier than cheesecloth. Rinse it out in soapy water in the kitchen sink and hang to dry. Ready to use for the next time. Much better than cheesecloth that tends to be fragile and falls apart.
And Matthew, if I could make a heart emoji here, I would :-).
Btw, I set up an account on WordPress so now it’s letting me leave comments!
Hooray!! Now you have to let me know how the macaroons turned out!
My new cookie scoop arrived this evening so I’m all set to make them tomorrow and of course I’ll let you know how they turned out! Looking forward!
Wow, sounds like the Fleagles all love the yogurt! I’m interested in making it because it’s naturally gluten free and Yogi doesn’t like a lot of sweet. It sounds pure and simple! So, Angela, what size of muslin should I buy? I’ve actually been making lots of trips to Joanne’s because I’m in the middle of another sewing project so it won’t be a problem to pick up the muslin. What should the hemmed, finished size be?
Susan, my muslin is 18″ x 15″, but I wish it were 18″ x 18″. You want it to hang over a bit in the colander, so I would recommend measuring the colander that you plan on using and allow two inches overhang on all four sides. I would also wash and dry the muslin before cutting and hemming, to allow for shrinkage.
Pingback: Homemade Yogurt! | and everything nice
Pingback: Sourdough Waffles | and everything nice