
We’ve been having pizza night once a week at our house lately. For a while I was buying the fresh pizza dough from Trader Joe’s, but I started to wonder why I wasn’t just making the pizza dough from scratch. I had tried making pizza dough a few times, but was never crazy about the results.

But then I found Bobby Flay’s recipe online, and I have been making pizza dough from scratch ever since… thank you Bobby!!!! I don’t have any tweaks or changes, because it is delicious just the way it is: crispy, chewy, light and airy… perfection! But maybe you want to see my pictures, and how I make it? I promise it’s really easy!

Pizza Dough
(From Bobby Flay on Food Network)
(Dough takes about 1.5 hours with very little hands on time.)
- 3 1/2 to 4 cups bread flour (16 to 18 ounces or so), plus more for dusting
- 1 teaspoon sugar
- 2 1/4 teaspoons instant dry yeast (1 packet)
- 2 teaspoons kosher salt
- Italian herbs (optional)
- 1 1/2 cups warm water (110°F)
- 2 Tablespoons olive oil
For pizza toppings:
- Favorite tomato sauce or pesto or olive oil
- Shredded mozzarella or other favorite shredded cheeses
- Thinly sliced veggies of choice
- Pepperoni or other meats
- Anything you like on pizza!
Starting with the dough:
- Combine 3 1/2 cups (16 ounces) bread flour, sugar, yeast, salt, and herbs (if using) in bowl of stand mixer. Give a stir with a whisk, then put bowl in stand mixer.
- With the mixer on slow speed, using dough hook, pour in the oil and warm water. Mix until dough comes together and becomes elastic and tacky, adding a little more flour little by little if dough is too sticky or wet. The dough should feel like touching the sticky side of a post-it note… tacky but not wet.
- Turn dough out onto floured surface and knead until dough is firm and smooth, only adding enough flour so that the dough doesn’t stick. This should take maybe five minutes of vigorous kneading? You can use a bench scraper to move the dough around to discourage sticking (so that you don’t add too much flour). You will know when the dough is ready because it will be very firm, and when you poke a finger into the dough it will pop right back. Dough will be taut.
- Oil the inside of a clean bowl and place dough in bowl. Cover with plastic wrap or tea towel and set aside in a warm place in your kitchen for an hour. Dough should double in size. At this time, place one rack in the bottom third of your oven and put your pizza stone* on it (see note). Place another rack on the top third of the oven. Preheat your oven to 550°. Yes, that’s right. And your oven and pizza stone will preheat for an hour while your dough is rising. It’s worth it.
- When dough has doubled in size (after about an hour), turn dough out onto floured surface and cut into two pieces for two medium size pizzas, or you can cut into four for individual sized pizzas. Shape into balls and cover with a clean, slightly damp tea towel for ten minutes. During that ten minutes, shred your cheese and prepare the rest of your toppings. After ten minutes of resting, your pizza dough is now ready to use!**
- Roll out dough gently (don’t mash it down) with a rolling pin (or pat out with hands) to desired thickness on parchment paper. Let dough rest for five minutes (to relax the gluten) and then roll out thinner if you want a thinner crust. I like mine rolled out to be just a bit thicker than 1/4″. For a more tender crust, do all shaping and stretching by hand. Slide parchment paper with rolled out dough onto a rimless cookie sheet.
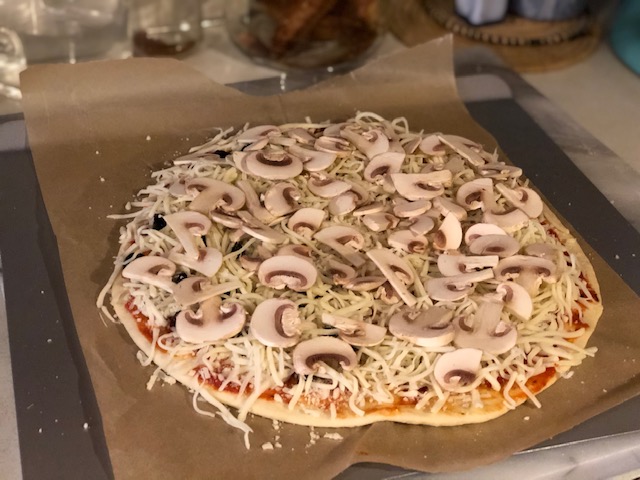
- Top with your favorite tomato sauce or pesto (take the sauce all the way to edge to keep your crust edges from drying out), grated mozzarella or other cheeses, and favorite toppings***. Slide the pizza and parchment paper onto preheated baking stone, and let pizza bake for two to three minutes. Carefully remove the parchment paper (it should slide right out) and bake for perhaps three more minutes. Check to see if the bottom crust is as browned as you like it, then remove the pizza from the pizza stone (just slide the pizza onto the rimless cookie sheet) and slide the pizza onto the top rack and switch your heat to the “broil” setting. Let pizza bake for two to three more minutes, watching like a hawk so as not to burn it. Remove from oven and let rest on cooling rack for about five minutes before slicing. (Return the oven setting to “bake”, and repeat the bake/broil process for each pizza.) Buon appetito!
Notes:
*If you do not have a pizza stone, you can bake your pizza on parchment paper on a baking sheet on the middle rack of your oven for 10 to 12 minutes, or until done to your liking.
**Update 4/16/23: Lately, once I’ve shaped the pizza dough into balls for the second rise, I cover them with a damp tea towel and let them rise for about an hour. The dough is much easier to shape by hand this way, and the flavor has more time to develop. If you do this, only turn your oven on to preheat once you have shaped your dough into balls for the second rise.
***Update Go lightly on your toppings to have a light, airy, well baked crust. The pictures below don’t reflect the lighter toppings, but I have been going lighter on the toppings lately (sauce and cheese too), and it makes a big difference!


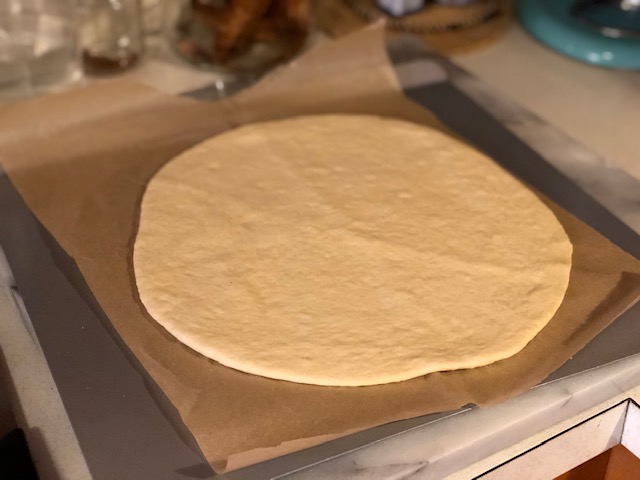
Rolled out nice and thin, but you can still see the bubbles that will make the dough light and airy.


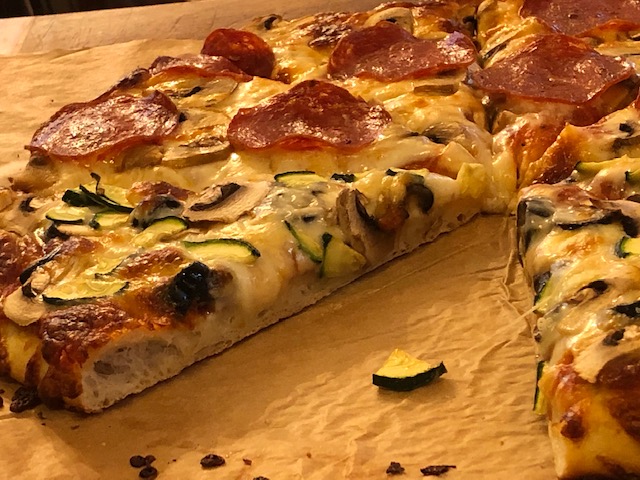
Probably the best pizza I have ever made.
Individual pizzas are fun for the kids!

Made this for the first time tonight. The whole family loved it. In the midst of this quarantine, getting a sincere “thanks for making this, mom” from my 16-year-old was the highlight of my week. He said it was the best homemade pizza he has ever had.
I’m not at all experienced with bread-making and these instructions were great. I was a little nervous kneading the dough – how long should I do it?was it “firm”? but I followed the directions and when I poked my finger in it popped back. Also, the dough was sticking to my fingers and I was trying not to add too much flour. But I kept going, followed the directions and, sure enough, within about an hour, the dough doubled in size. It was gorgeous and delicious. Can’t wait to try it again. Thanks for the post!
Yay Kelly!! It is always so satisfying to have a success with a yeast dough. So glad you and your family enjoyed it! And bonus points for pleasing the 16 year old ;-).
I want to try this recipe
Hi Elece! I was just thinking that I want to update this post, or even write a new one, because there are a few changes that I think take this pizza to the next level. Like putting your baking stone on the lowest rack in your oven for baking (for a nice crispy crust). Once the bottom of the crust is how you like it (I check at around the 8 minute mark), move your pizza to the top rack of the oven for a few minutes more to get the top good and bubbly. And also, instead of rolling out the dough (which is good if you are in a hurry), stretch it out by hand. It makes the process a teeny bit more fussy, but worth it for a more airy crust. Let me know if you try it!
Pingback: Homemade Pizza, Take Two! | and everything nice
Pingback: Sourdough Pizza | and everything nice