
I have been dragging my heels on blog posts lately, mostly because I have been making so many different things that I am overwhelmed at the idea of writing about all of them. But this one is easy. If you want to take your pizza to the next level, use pizza flour! Seriously, this “00” flour is amazing. I have started making pasta from scratch with it (that’s for another post), and decided to try using it for pizza crust. Wow. Just wow.
This dough is so very easy to work with. My other favorite pizza dough recipe is yummy, but not so easy to stretch. I was recently having a discussion with another baking friend about how it is difficult to get the pizza dough thin enough by hand, so we have to resort to using a rolling pin. Now, I don’t mind using a rolling pin, but this new recipe is like satin draping over your hands, silky smooth and pliable, just begging to be hand-stretched and shaped.

And the end result? A light, tender, crispy bubbly crust that you would only expect to find at an upscale pizzeria. This recipe came to me from my friend Joe, who loves biscotti. He emailed the recipe to me a while ago, but since I already had a recipe I loved, I didn’t pay too much attention. Until I had extra “00” flour sitting around. This is based on Roberta’s Pizza Dough Recipe from NYT cooking. I only changed it a little bit. And it is so very good. It is worth your time and effort to make this… to go to the store and get the special flour… just do it. Also, take a look at the original recipe (link included above). I found it super helpful to watch the video of the guy shaping the pizza dough. He makes it look so easy. I remember thinking to myself that it wouldn’t work that way for me. But it does.

Oh, here’s the rub. You have to plan ahead for this. You can either make the dough and let it rest for three to four hours, which is about all I can stand to do, since I’m not the plan ahead type. Or, you can make the dough and let it rest in the fridge overnight for enhanced flavor. I will do this someday. I know I will. But for now, I’m enjoying the three to four hour dough.
Pizza Dough
(Adapted ever so slightly from Roberta’s Pizza Dough Recipe)
This recipe will make two larger pizzas, or four individual sized pizzas.
- 230 grams “00” flour
- 230 grams all purpose flour
- 12 grams fine sea salt
- 1 1/2 teaspoons instant yeast
- 1 to 2 tablespoons dried herbs of choice (optional)
- 300 grams warm water (90°)
- 1 tablespoons olive oil
- Combine all dry ingredients in large bowl (I used my Kitchenaid stand mixer)
- Add warm water and olive oil.
- With dough hook, mix for about 3 minutes. Dough will pull away from the sides of the bowl, but will stick to the bottom. If doing by hand, mix until well combined (for about 3 minutes).
- Cover the dough and let rest for 15 minutes. Don’t even think about skipping this.
- Turn rested dough out onto a lightly floured work surface, and knead the dough for about 3 minutes, until smooth and springy.
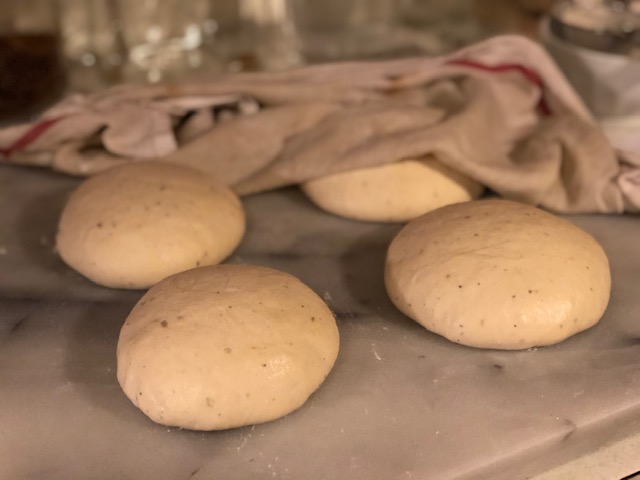
- Cut into two pieces for two larger pizzas, or four pieces for individual pizzas. Shape into balls. Place balls on floured surface and cover with slightly damp towel and let dough rest for three to four hours. Honestly, three hours is about all I can stand. One hour before you plan to shape and bake your pizzas, place one rack in the bottom third of your oven and put your pizza stone on it. Place another rack on the top third of the oven. Preheat your oven to 550°. Yes, that’s right. You want to preheat your oven for an entire hour. I got lazy last time and only preheated for half an hour, and I could tell the difference.
- While your oven is preheating, get all of your sauces and toppings ready.
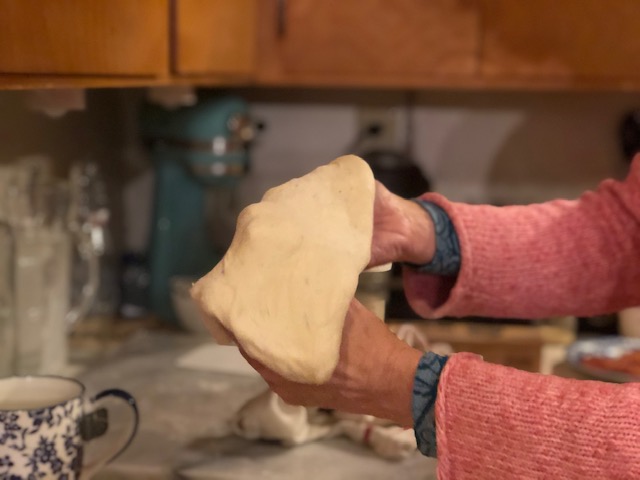
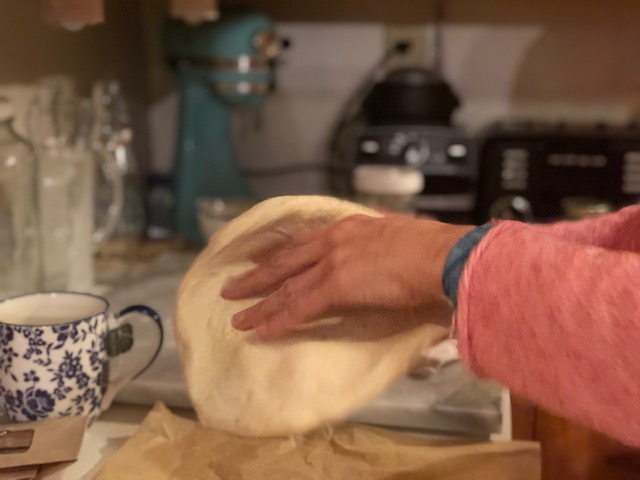
- After oven has been preheated for about an hour, shape and stretch the pizza dough by hand, placing it on parchment paper for easy transferring to the oven. Top with favorite sauce, cheese, and toppings. Don’t overdo it with the toppings, or it will weigh down your crust.
- Using a rimless baking sheet, slide the pizza and parchment paper onto preheated baking stone, and let pizza bake for two to three minutes. Carefully remove the parchment paper (it should slide right out) and bake for perhaps three more minutes. Check to see if the bottom crust is as browned as you like it, then remove the pizza from the pizza stone (just slide the pizza onto the rimless cookie sheet) and slide the pizza directly onto the top rack and switch your heat to the “broil” setting. Let pizza bake for two to three more minutes, watching like a hawk so as not to burn it, but you can let it get a bit of char for that ultimate pizza experience. Remove from oven and let rest on cooling rack for about five minutes before slicing.
- Switch the heat back to “bake”, and wait a minute or two before placing your next pizza into the oven. Repeat the bake/broil process for each pizza.
- Marvel at what you have just accomplished, and enjoy!
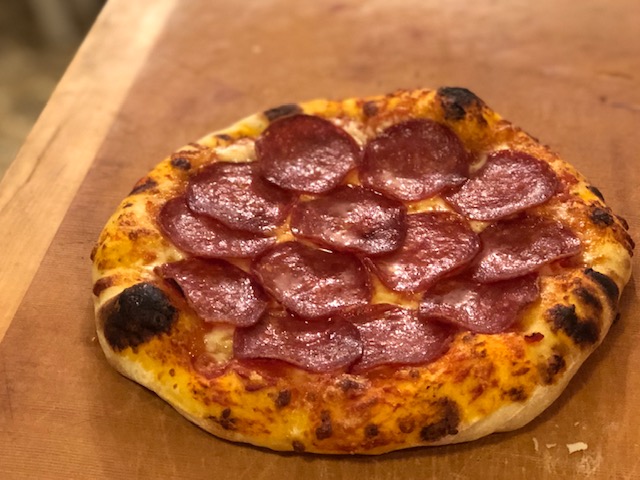

Even many “upscale pizzerias” won’t be able to touch this. This is the best pizza crust you’ll ever taste, guaran-darn-teed. I’m Customer Zero, and you have my word on it.
I like you, Customer Zero ;-).
I can attest to every word Customer Zero writes. I’ve been lucky enough to have this pizza and it’s worth gluten-head & gluten-belly. Mmmm-mmmm so yum!
Hey Gluten-belly-head! I miss you, and can’t wait until our next gluten-fest!