
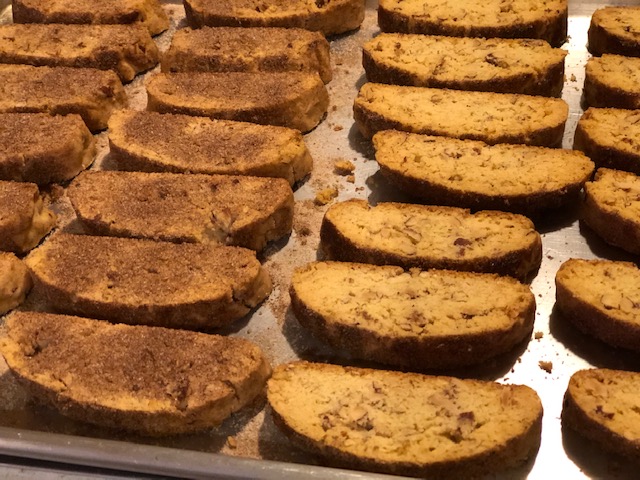
Mandelbrot is a humble cookie, but don’t let it fool you. This cinnamon almond cookie is exquisite. It is similar to biscotti in that it is “twice baked”, and traditionally is made with almonds, but there the similarities end. It is rich and crumbly, almost velvety, and has a wonderful cinnamon sugar coating to balance the not-so-sweet cookie inside. It’s perfect to go with your afternoon coffee or tea, but no dunking is necessary! Millie, my eleven-year-old photographer/assistant says they are like snickerdoodle biscotti.

I made some with both more and less cinnamon sugar as an experiment.
I’m not going to pretend to know the history of this wonderful treat, but I do know my own history with it. Mandelbrot is a traditional Jewish cookie, and I have memories of enjoying them back in St. Louis, with my friend Lisa, when we were kids. Lisa’s mom used to make Mandelbrot, and it was so very good.

Lisa’s mom, Joan, just as I remember her.
I had to text Lisa to ask her about details, because my memory is a bit fuzzy. Do you sprinkle the cinnamon sugar on the loaves before they are sliced, or on the cut side of the cookies after the loaves have been sliced? Lisa and her mom waited until the cookies were sliced to sprinkle with cinnamon sugar. Lisa asked me if I have a preference… I have tried both ways to see what I like best, and am still trying to decide.
I’m leaning towards doing both!
This recipe is a hodge-podge of many recipes that I looked at online (Lisa’s recipe was buried in storage somewhere). I started out making Tori Avey’s recipe, then got other ideas from both the King Arthur recipe and Claire Saffitz’ recipe, and with the assistance of many taste-testers, this is what I ended up with, and I’m super happy with it. I hope you try this recipe, and if you do, let me know what you think. Warning! This recipe takes several hours, but not a lot of hands-on time. It’s worth it.
Mandelbrot
Makes about 3 dozen cookies.
- 1 1/2 cups raw almonds, finely chopped, then toasted
- 1 cup granulated sugar (200 grams)
- 1 cup vegetable oil (200 ml)
- 3 large eggs
- 1 teaspoon vanilla extract
- 1/2 teaspoon almond extract (optional)
- 3 1/3 cups all-purpose flour (400 grams)*
- 1 teaspoon kosher salt (6 grams)
- 1 1/2 teaspoons baking powder
- 1/2 cup sugar + 2 tablespoons cinnamon (for sprinkling)
- Preheat oven to 350° – preheat for 15 minutes to make sure oven is up to temp.
- Finely chop raw almonds – I use a nut chopper, but you can use a sharp knife or anything else that gets the job done.
- Spread them out on a cookie sheet and bake them for ten minutes in your preheated 350° oven.
- Remove the almonds and let cool to room temp. Turn the oven off!
- In a large bowl, mix 1 cup sugar and 1 cup oil. A wooden spoon works fine.
- Add in the eggs, mixing well after each addition. By the time you have mixed in the third egg, the oil should be well incorporated with no separating.
- Add in the vanilla and almond extracts and mix well.
- Pour the flour on top of the sugar/oil/egg mixture, then sprinkle the salt and baking powder evenly over the flour. Now mix well, until there are no dry bits.
- Add the cooled almonds and mix well. Dough will be stiff and glossy.
- Place uncovered in your refrigerator for at least one hour.
- After dough has chilled for at least one hour, line a cookie sheet with parchment paper. Remove dough from refrigerator and divide into three equal portions. I like to weigh them so that I know the cookies will come out evenly. But you can eyeball it. With your hands, shape each portion into a log and place on your lined cookie sheet, having the logs a good couple of inches apart from each other. The logs should be about 8 inches by 2 inches, and sit rather tall. I like to make the logs with squared edges. Place the cookie sheet in your fridge for another hour. This is not absolutely necessary, but I think the cookies come out better this way. Just do it.
- After the logs have been chilling for almost an hour, preheat your oven to 350°. Mix together 1/2 cup granulated sugar and 2 tablespoons cinnamon. Pull the logs out of the fridge and sprinkle generously with the cinnamon sugar.
- Bake logs on center rack in oven for 30 minutes.
- After baking for 30 minutes, remove from oven and let cool on the cookie sheet for 15 minutes, but leave your oven on and turn oven temperature down to 300°. (The 15 minutes for cooling is important. If you let the logs cool for too long, they will be too hard to slice. If you don’t let them cool long enough, they will crumble when slicing. 15 minutes seems to be perfect.)
- Get out another cookie sheet and have it ready to go. Take each log and cut into 3/4″ slices – cut nice and straight. To make cutting easier, use a good bread knife, and make a gentle sawing motion to slice through without causing the loaf to break. Place the slices cut side down on the new cookie sheet (NO parchment paper, just the cookie sheet). You should end up with almost three dozen slices, they should fit snugly on the cookie sheet. My assistant likes to eat the ends of the loaves, so those don’t get baked again.
- Sprinkle the slices lightly with the cinnamon sugar to coat, then bake at 300° for 20 minutes.
- Remove from oven, flip the cookies, sprinkle with cinnamon sugar, and bake for another 20 minutes.
- Remove from oven, stand cookies up, and bake another ten minutes, unless your cookies are looking dark at the edges. If they look dark, no need for the last ten minute bake.**
- Remove cookies from oven and let cool completely on the cookie sheet. (You may now turn your oven off! ) These cookies keep well for a couple of weeks stored in an airtight container, making them great for gift giving and sending in the mail. They are also a lovely gift for your dairy-free friends.
Notes:
*I put the weight of the flour because it is important! If you use too much flour, your cookies will be dry and hard. If you use too little flour, your cookies will be oily and dense. If you don’t have a kitchen scale, stir your flour before measuring to aerate it, then spoon your aerated flour into your measuring cup. Sweep a knife across the top to level the flour.
**All ovens are different. I recommend having an oven thermometer in your oven at all times to make sure your oven is well calibrated. I actually have two oven thermometers in my oven, just in case one conks out. In any case, keep an eye on the cookies during the last bake. It is disappointing to go through a lot of trouble with a recipe, only to end up with a burned batch. My advice is this: if in doubt, stop the baking and let the cookies cool. You can always put them back in the oven, even hours later! But you can’t fix burned cookies.
And now, some pictures of the process!
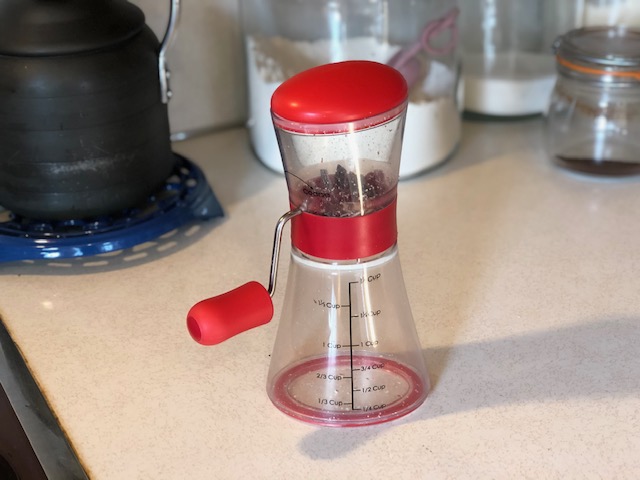
I love my nut chopper.

Toasted chopped almonds cooling. I often put mine out on the deck to speed up the process.

The sugar/oil/egg/vanilla mixture. Kind of looks like lemon curd.
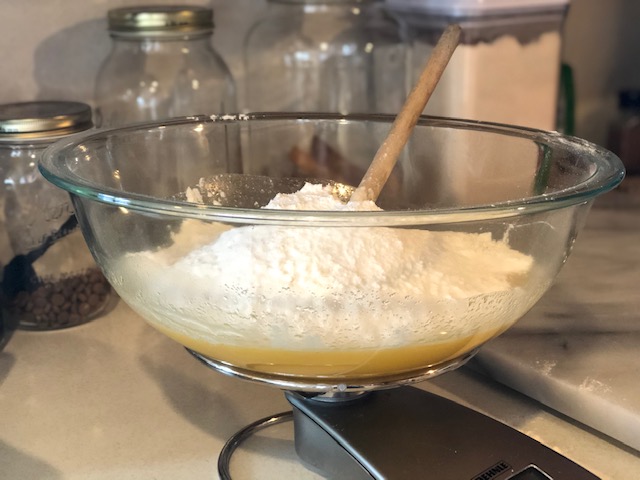
Add flour on top, then sprinkle salt, and baking powder on top of that.

Combine until no more dry bits. Dough will be soft and glossy.

Stir in the almonds. The dough will begin to stiffen.

Close up of texture. Thick and glossy. Time to refrigerate.

After an hour or so in fridge, make three logs, about 8 inches by 2 inches. Refrigerate again!
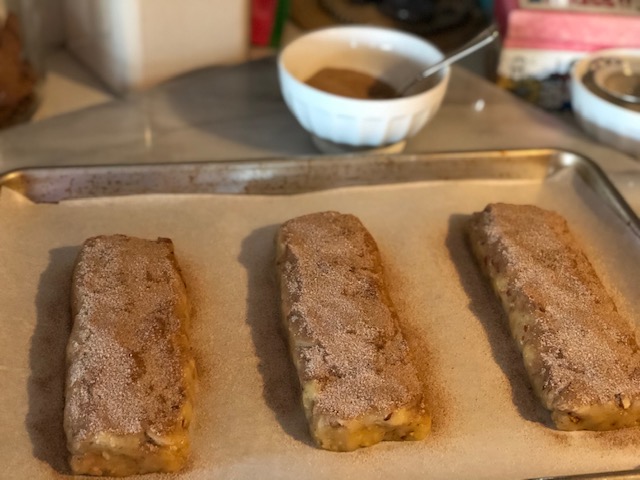
After second chill, preheat oven to 350° and sprinkle loaves liberally with cinnamon sugar. Bake for 30 minutes.

After first bake let cool for 15 minutes. (Turn oven down to 300° at this time.) They might look something like this. I already removed one log for slicing.

Nice even slices.
About halfway done with the sprinkling cinnamon sugar. Bake for 20 minutes at 300°, flip slices, sprinkle more cinnamon sugar, then bake again for 20 minutes.

Stand cookies up and bake another ten minutes, but don’t let them get too dark! Allow to cool completely before enjoying.

Lisa is on the left… from a trip to Portland, summer 2019.

They look really tasty!
Thanks Dorothy, they are! And I bet you could make them with gluten-free flour too, although I haven’t tried that yet. Then they would be dairy-free *and* gluten-free! Also, I just added a photo of Lisa’s mom. Now the post is just as it should be.
I love how memories of our special people live on in our foods. Thank you for this sweet (& tasty) blog post. You are wonderful!
I love this too, Lisa, and I love you!