

This pastry blender is the only tool you’ll need. Or you could use your fingers!
Okay, so, there are a million pie crust recipes out there, and a million different techniques. And a million different opinions. Most pie crust recipes pretty much have the same ingredients and same amounts, with very little variation. Flour, salt, butter, and ice water. My challenge was to be able to make an all-butter pie crust by hand, that was just as flaky and tender as the one that I make with my stand mixer. First of all, the one I make with my stand mixer is a bit messy to make, and secondly, what if I’m traveling, or at a friend’s house, and I want to whip up a really good pie crust? Am I destined to be dependent upon a machine?

Ice water… so very simple.
I truly believe that I had to go through all of the experimentation (and frustration) to finally get to the point where I could do this. I had to know what the dough looks like when the butter is cut in just enough for me. I had to know what the dough feels like when it’s hydrated to my liking.

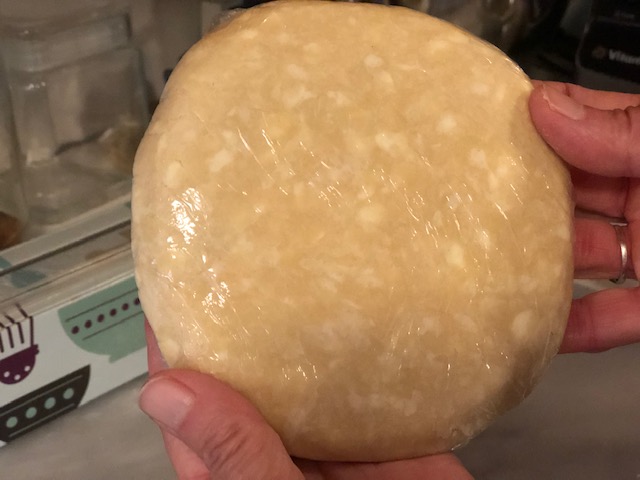
This dough is hydrated enough.
Honestly, I believe that it is all the tips out there that kind of screwed me up (nobody’s fault but my own). Like, “Don’t cut the butter pieces too small!”, or, “Don’t touch the butter with your hands!”, or, “Make sure everything is ICE COLD!”, or, “Don’t overwork the dough!”. I took all of these things very seriously, and perhaps to the extreme, trying to do everything just right. I was traumatized in my own kitchen.

Cold out of the fridge is cold enough.
What if everything doesn’t have to be ice cold? (It certainly doesn’t with my favorite pie crust recipe.) What if it’s okay to touch the butter with your hands, even if your hands have not just been dunked into ice water (brrrrrr)? What if it’s okay to cut your butter into much smaller pieces? I mean, is it really desirable to be able to see big chunks of butter when you roll out your dough? In my experience, it is not. And what if you do a little bit of extra smooshing to get the dough to cooperate?
Teeny tiny bits of butter, almost marbled. This is it.
Well, I am here to tell you that I may have broken some rules, and I have no regrets.
All Butter Pie Crust Made By Hand
(This makes enough pie dough for two single crust pies, or one double-crust pie.*)
- 2 1/2 cups all-purpose flour (300 grams**)
- 1 tsp kosher salt
- 1 Tbsp sugar (optional, for sweet pies)
- 1 cup (2 sticks) cold-from-the fridge unsalted butter
- 1/2 cup ice water
- 1 tsp apple cider vinegar or freshly squeezed lemon juice
- Place a large, shallow glass bowl in your freezer just for a few minutes or so (I use a 4 quart Pyrex bowl).
- Pour 1/2 cup of water into a glass, add ice and a teaspoon of apple cider vinegar or white vinegar to it, and put in fridge.
- Take out your chilled bowl. Measure out your flour**, salt and sugar into it, and stir together with a fork or pastry blender.
- Cut two sticks of cold-from-the-fridge, unsalted butter into 1/2 inch cubes and toss them into the flour mixture as you go. Get your hands in there and make sure the cubes are separate and toss to coat.
- Cut butter into the flour mixture with a pastry blender, turning the bowl as you go along. I like to cut the butter in along the side of the bowl. Every now and then, remove butter chunks from the pastry blender with you fingers or a butter knife, and swoosh everything around with the pastry blender to bring up the flour from the bottom of the bowl.
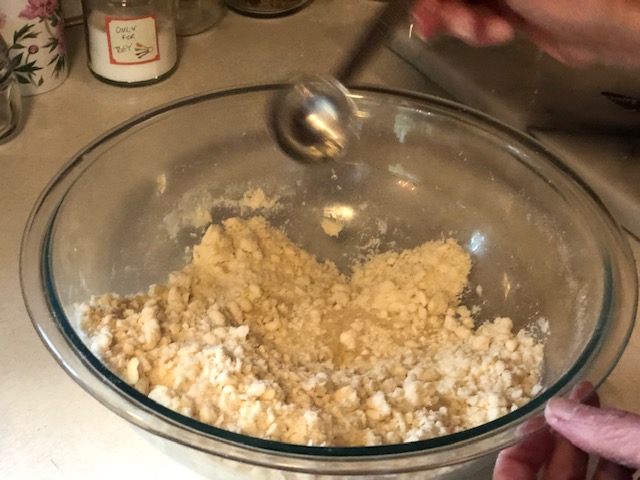
- Continue to blend the butter into the flour until everything has the consistency of bread crumbs, with a few (only a few!!!) ever-so-slightly larger pieces of butter still hanging around. Those few pieces should only be the size of small peas. SMALL peas.
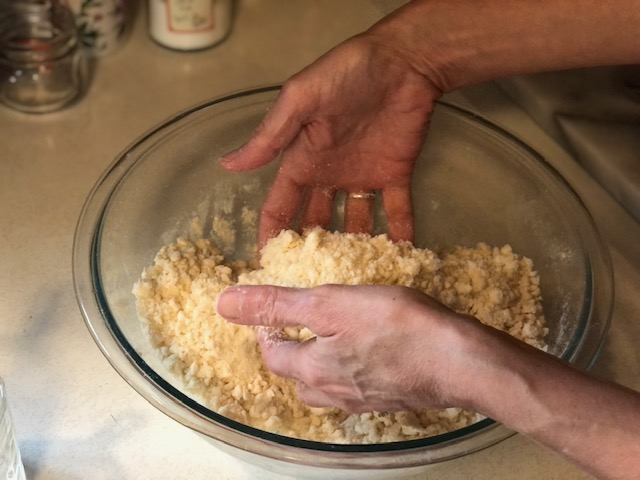
- Get your fingers in the dough and quickly flatten any larger pieces of butter you find. This part is fun, because aren’t we trained to not touch the butter???
- Remove ice water/vinegar mix from fridge and remove the ice cubes. Drizzle two tablespoons of the ice water over the flour/butter mix, and toss with a fork. Add two more tablespoons and toss again with a fork. At this point the dough should start to come together a bit, but you might notice how there are dry floury bits at the bottom of the bowl. Scoot some of the dough over to one side to expose the floury part, and toss one tablespoon of ice water with that floury part. Now scoot the other half of the dough over to expose the other half of the floury part. Toss one tablespoon of water with that part. You have now used 6 tablespoons of ice water. That is probably enough, but if you still see too much dry floury stuff, go ahead and toss in a bit more ice water, but go lightly at this point, maybe a teaspoon at a time, until you only see a bit of flour here and there.
- Run fingers through the dough, letting it fall through your fingers, to evenly disperse the water. Do this a couple of times.
- Quickly scoop up about half of the dough (it will still be in pieces), fold it over onto itself, and flatten it all down. Turn bowl a quarter turn and repeat (fold over and flatten). Turn bowl one more time and repeat.*** If you are nervous about your hot hands doing this part, you can do this using a spatula, but it is easier with your hands. Dough should be very much together at this point. Shape dough in the bowl into an oblong/rectangle-y thing. Cut in half with butter knife.
- Wash hands if you want to :). Have a piece of plastic wrap ready on your workspace. Take half of the dough and plop it down onto the plastic wrap. Using the sides of the plastic wrap, smoosh the dough together and shape it into a disc. Wrap well with the plastic wrap, and once wrapped, press out any cracks in the dough with your hands. Place dough in refrigerator and repeat with the other half of the dough. Let dough chill for at least 30 minutes before rolling out.
Notes:
*The above recipe gives you just enough for two discs of dough for pies made in standard 9″ pie pans. If you will be making a deep dish pie, or even if you just like to have a bit extra dough to make rolling out a bit easier, then I recommend these amounts:
- 3 cups flour (360 grams)
- 1 tsp kosher salt
- 1 Tbsp sugar
- 1 1/4 cup (2 1/2 sticks) unsalted butter
- 1/2 cup ice water
- 1 tsp apple cider vinegar or lemon juice
**If you are not using a kitchen scale, stir your flour to aerate and fluff it up before lightly sprinkling your flour by the spoonful into measuring cup, and use the straight edge of a knife to level the flour. By this method, your flour should weigh approximately 120 grams per cup.
***I dared to try this method after reading Sister Pie, by Lisa Ludwinski. I am constantly checking cookbooks out from our local library (sorry, no more room on my kitchen bookshelves). I often check out the same ones over and over again if they are about pie. And I read them over and over again. Because I never know when my brain will have room for one more great idea.
And here are some pictures of the process. Some of the photos are a little on the dark/shadowy side; sorry about that! I will take new photos soon.

Get your ice water ready (you can add a bit of vinegar) and put in fridge.

Measure your flour and salt (and sugar if you are using it) into cold bowl.

Two sticks of unsalted butter straight from the fridge.
Cut into 1/2″ cubes – a bench scraper makes quick work of this.

Add butter to flour/salt mixture, and toss and separate cubes.

Start to cut the butter into the flour, rotating bowl as you go.

Keep going.

See these pieces of butter? They are too big!

Keep going.
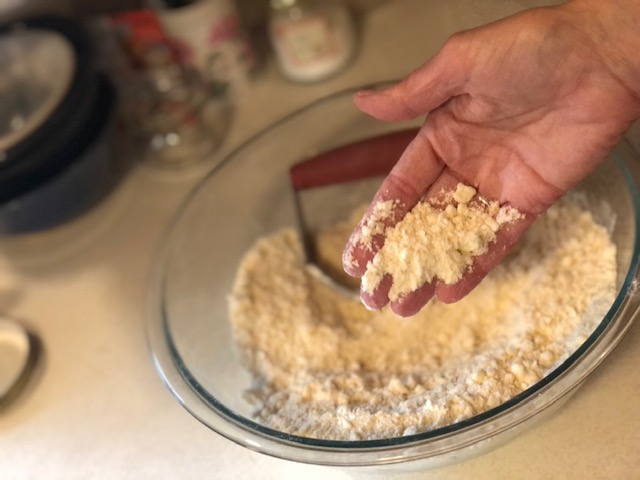
Get a good look at this. This is just right. Like bread crumbs with a few bigger pieces.

Now get your fingers in there and quickly pinch to flatten any larger remaining pieces of butter.
Add a couple tablespoons of the ice water.
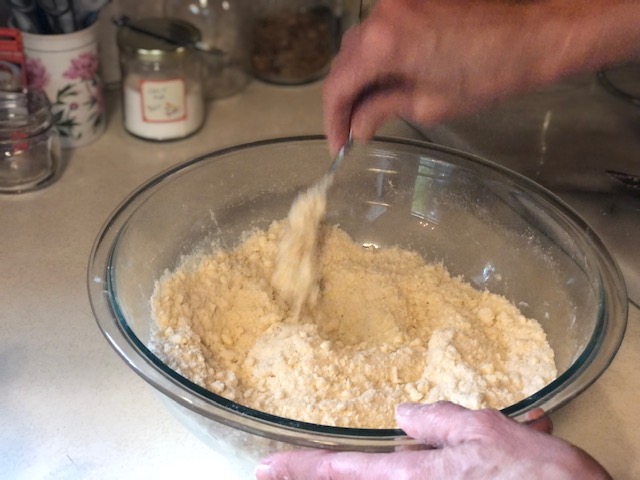
Toss from the bottom up with a fork.
Add two more tablespoons water.

Toss some more.

Push dough aside to reveal floury parts underneath.
Add a tablespoon of water to the dry part and toss some more. Repeat on the other side.
Run fingers through dough to evenly distribute the water.
Take half of the dough with your fingers…

And fold it over onto itself.

Rotate the bowl a quarter turn and grab some more dough to fold over.

Press it down and flatten it. You can do this one more time if you like.

Form dough into an oblong/rectangle-ish shape.

Should look something like this. And the dough is still relatively cool thanks to the chilled bowl.

Cut in half.

Place half of dough onto sheet of plastic wrap.
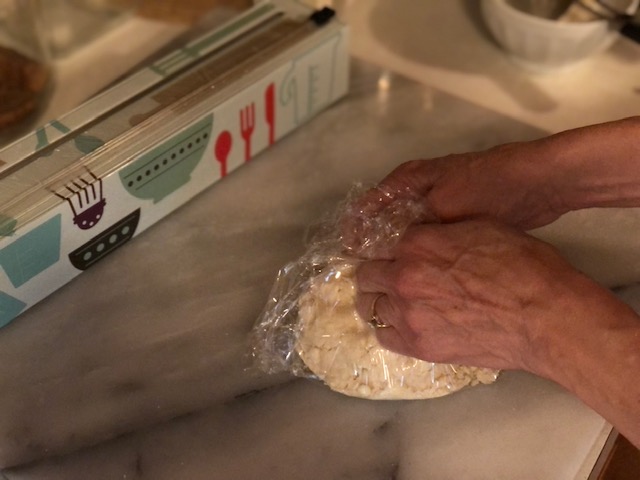
Bring up the sides of plastic wrap to smoosh the dough together, shaping it into a round disc.

Wrap and press out air and flatten the disc a bit. It might be about 3/4″ thick.

Smooth out the sides of the dough to get rid of any cracks.

Repeat with the other half of the dough. Store in fridge for up to three days, or keep in freezer in a freezer bag for up to three months.

I really liked this post because there are so darn many rules out there it can make a novice very intimidated. The only real “rule” I take completely to heart in regard to pie dough is to not overwork it. I have really warm hands, and I’ve mixed mine with my fingers as well and the pastry is fine!
Yes, it’s so satisfying to really get the feel of the dough with your hands; nothing else quite does that… and my hands are warm too! I’m glad you liked the post :). Thanks for reading, Dorothy!
💕
Great read. I love all the smooshing and swooshing, and of course I love the crusts you make.
Thanks Sweetie! I consider that a huge success :).
Pingback: Cornelia’s Pumpkin Pie | and everything nice
Pingback: Peach Nectarine Galette | and everything nice
Pingback: Blind-Baking (prebaking) Your Pie Crust | and everything nice