Blueberry Crumb Muffins

IMG_7606

The other day, Millie decided she wanted to bake with me. She looked online and found a recipe for blueberry muffins that looked good, and off we went. (I have to chuckle to myself, because if it had been me, I would have researched for days before finding just the right recipe.) So we made the recipe exactly as written, and the muffins were fantastic! But because I am me, I imagined something a bit more dense and buttery for the cake part, and I wanted a crumb topping. The crumb topping was easy, since I already have a nice crumb topping go-to recipe from my German Style Crumb Cake post. As for the texture of the cake, I decided to use a little bit of almond flour to create the dense but moist texture I was after. Success! If you don’t have the almond flour, and/or don’t want a crumb topping, you can make the original recipe just as is, and you will still love it.

Now, this recipe might seem a bit fussy, because it calls for things like Greek-style yogurt, buttermilk, and now almond flour. But it’s worth it.

Blueberry Crumb Muffins

(Adapted from Broma Bakery’s recipe)

  • 1/2 cup unsalted butter, melted
  • 1 cup granulated sugar
  • 2 eggs, room temperature*
  • 1 teaspoon vanilla extract
  • 1/4 cup plus 2 Tablespoons buttermilk
  • 1/4 cup plus 2 Tablespoons Greek-style yogurt (plain)
  • 1 Tablespoon baking powder
  • 1/2 teaspoon kosher salt
  • 1/2 cup almond flour
  • 1 1/2 cup plus 1 Tablespoon all-purpose flour
  • 2 cups blueberries, fresh or frozen

Crumb Topping

  • 1/2 cup all-purpose flour (Gold Medal if you have it**)
  • 1/4 cup granulated sugar
  • 1 teaspoon cinnamon
  • 1/2 stick (1/4 cup) unsalted, cold butter, cut into cubes
  • pinch kosher salt
  • 1/4 teaspoon vanilla
  1. To make the crumb topping, put sugar, flour, cold cubed butter, cinnamon, salt, and vanilla into the bowl of your stand mixer.
  2. Using the paddle attachment, beat on low speed until topping resembles sand or crumbs, with some larger clumps. Clumps should come together when pinched with your fingers. Do not cream!!! If you prefer to do this by hand, use a pastry blender to blend the ingredients. If you see some chunks of butter that have not blended in, use your fingers to blend it in.
  3. Put crumb topping into a different bowl and place in fridge. Now wash your stand mixer bowl (sorry!) because you’ll need it.
  4. Preheat oven to 425°.
  5. Grease 12 muffin tins, including a bit of the top of the pan around the individual tins, and line with cupcake liners and set aside.
  6. In your stand mixer bowl, combine the melted butter and granulated sugar, beating until combined. Add the eggs in one at a time. Add the buttermilk, greek yogurt, and vanilla extract. Mix until combined.
  7. Add flour, almond flour, baking powder, and salt. Mix on low speed just until batter begins to come together (not fully incorporated). Toss the blueberries with the additional one Tablespoon of flour. Fold the blueberries into the batter, mixing only until combined – don’t over mix!!! Batter will be thick.
  8. Scoop batter into prepared muffin tins. I like to use a large cookie scoop for this; my cookie scoop measure just under 1/4 cup. Level the batter in the scoop by pressing along side of the bowl before putting in muffin tins so that there is plenty of room for the crumb topping. If you end up with extra batter, just distribute it equally among the 12 muffins.
  9. Sprinkle tops with crumb topping. Really pile it on there. If you have extra you can save it in an airtight container in your fridge for the next time you need crumb topping***.
  10. Bake for 5 minutes at 425°F, then turn oven down to 375°F and bake for an additional 15 minutes, until muffins are golden brown and spring back to the touch. Remove from oven and allow to cool for at least 15 minutes before eating!

Notes:

*Here is a quick way to get your eggs to room temperature: place eggs in bowl of tepid water and let sit for 5 minutes. You just want to take the chill off of the eggs. Done!

**Your crumb topping will be more tender if you use a low protein flour, such as Gold Medal. But whatever all-purpose you have will be fine.

***You might want to make a larger quantity of crumb topping (that’s what I do), and then store it in your fridge in an airtight container for future use. It will last for about a month.

P.s. Sorry I don’t have more pictures. These are so good that I just wanted to post right away.


Posted in Comfort Food, Desserts, Fun in the kitchen! | 1 Comment

Zucchini Brownies

IMG_7405

It is August in Seattle, and there is a fall feeling in the air. It’s the time I need to be really creative to figure out ways to use all of the zucchini from just one plant.

IMG_7145

My daughter Mara has been wanting to make brownies, and I noticed a zucchini brownie recipe from King Arthur Baking Company that looked interesting. The perfect opportunity for some mother/daughter time. Here is Mara in the kitchen.

IMG_1421

Gaucamole is one of her specialties.

So yesterday, when I had a few other things going on, and needed to get dinner on the table, and needed to be at a school meeting, I called out to Mara to see if she wanted to make brownies with me. She appeared in an instant. Let me tell you something about Mara: she is fast. She is like a whirlwind in the kitchen. I told her to look at the recipe, which I had pulled up on my phone, and tell me what to do. She put me on zucchini duty, while she started pulling out all other necessary items.

She told me I needed to cut the zucchini into chunks, and tamp them down. What? I had not read the entire recipe, but I made assumptions about it. Well, okay, so I got on it. We both furrowed our brows at the idea of tamped down chunks of zucchini in brownies, but anyway… then I asked her to read the actual steps of the recipe, and it turns out the recipe calls for a food processor, which we don’t have! So I switched gears and set aside the chunks of zucchini; those ended up in our dinner. I got out more zucchini (not a problem) and started grating.

We just started putting all the ingredients into a large bowl and mixing with a wooden spoon. It then occurred to me that King Arthur recipes usually have “Bakers Tips” near the end of their recipes, so I scrolled down, and sure enough, they suggest that if you don’t have a food processor, you can use a blender. I imagined the mess of the blender, and Mara agreed that we should just stay the course and mix everything in a big bowl. So we did. Right at the end, we added chocolate chips. I at first grabbed “mini” chips, but then decided against it, and just used regular chips. We dumped them in and stirred. I then looked at the recipe and noticed that it said to add the chocolate chips and pulse a few times to break the chips into small bits. Oops. Keep in mind that all of this is happening at an alarmingly fast pace.

The recipe called for a 9″ x 9″ pan, which we don’t have! So we went with an 8″ x 8″. We both agreed that the brownies would be thicker, so not a problem, right? We baked them for 20 minutes and checked at that point. The batter was still too wet, so we set the timer for 5 more minutes while we hustled and bustled around the kitchen cleaning up and getting dinner ready. Suddenly I looked at Mara and asked her if the timer had gone off. She didn’t know. Well, it had, and neither of us heard it! So I’m not sure how much longer the brownies went, but they were slightly puffed up (the kiss of death for brownies). I pulled them out of the oven to cool, threw dinner onto a platter, and sent my family onto the deck to eat while I sat in front of my computer for a Zoom school meeting.

Why am I telling you all of this??? Because it seemed that we royally screwed up with these brownies. But when the meeting was over, and dinner was done, and the brownies had cooled, we all sat down together for some dessert. The brownies were dark, fudge-y, gooey perfection. And I got to have some fun in the kitchen with Mara. Oh yeah, the recipe called for frosting. Nope. We opted for vanilla ice cream. I wouldn’t change a thing.

Zucchini Brownies

(Adapted from King Arthur Baking Company’s recipe)

  • 1 1/2 cups (182 to 225 grams) grated zucchini*
  • 3 Tablespoons unsalted butter, melted
  • 3 large eggs
  • 1 teaspoon vanilla extract
  • 3/4 cup granulated sugar
  • 2/3 cup unsweetened cocoa, Dutch-process or natural (optional)
  • 1/2 teaspoon baking powder
  • heaping 1/4 teaspoon salt
  • 1/2 cup (57 grams) all-purpose flour (King Arthur, if you please)
  • 3/4 cup semisweet chocolate chips
  1. Preheat oven to 350°
  2. Grease an 8″ x 8″ brownie pan
  3. In a large mixing bowl, add ingredients in the order as listed above, mixing with a wooden spoon with each addition. When you get to the flour, mix it only until incorporated.  Then stir in the chocolate chips.
  4. Scrape batter into prepared pan and smooth it out with spatula.
  5. Bake brownies for 25 to 30 minutes, until a toothpick inserted into the center comes out clean. You shouldn’t see any sign of wet batter. Remove the brownies from the oven, and allow them to cool before enjoying.

Notes:

*If your zucchini is watery, place grated zucchini between sheets of paper towels or tea towels to absorb some of the moisture before using.

**Hats off to King Arthur Baking Company to come up with a recipe that even when you screw up royally, the results are royally delicious.

IMG_7405


Posted in Comfort Food, Desserts, Fun in the kitchen! | 4 Comments

Perfect Every Time Pie Crust

IMG_3871

I know I already wrote about an all-butter pie crust, and that one is pretty good, although a bit fussy. But since that time, I have found the perfect pie crust. I mean, it is perfect. When I say perfect (shall I say that word again?), in my world of pie crusts, that means that the crust is easy to make, doesn’t require fancy ingredients, uses only butter, is fork-shatteringly flaky, and is consistently amazing every time I make it.

IMG_4835

Flaky perfection.

Even though I was pretty happy with my other pie crust recipe, this new one knocks it out of the ballpark every time. Every time. This recipe comes from Kenji López-Alt; it is his Easy Pie Dough Recipe. The name sounds so modest, you’d never know how fantastic it really is. And I’ve tried a gazillion different pie crust recipes, including all the fads, and none compare to this one. I can’t even believe I’m letting you in on this secret. But trust me, this is the one.

IMG_4829

Once I discovered this crust, I couldn’t stop making pies. All kinds of pies.

IMG_4583

Hand pies.

IMG_4685

Even meat pies.

IMG_4561-2

The moment I love is when someone bites into one of my pies, and they get this look of disbelief on their face, and say, “Did you make this??”. Yeah, that’s the moment. Even better is when my husband Matthew says it, because he eats everything I make, so taking him by surprise is a sweet moment indeed.

Okay, now that you are thoroughly convinced, let’s get to the recipe. When I first came across this recipe, I ignored it, because it called for a food processor [sigh]. I don’t have one, and they are a pain to clean, so I don’t want one. If you can convince me otherwise, that’s great. My birthday is two days after Christmas. Yeah, not the best day for a birthday, but let me not get sidetracked. I read all the reviews, which were all great, so I was bummed about the food processor thing. So I decided to experiment and use my stand mixer. It seemed like a stand mixer would not work… just could not do the same things that a food processor with a sharp blade could do. But understanding what the technique actually does – create a butter/flour paste, then break up the chunks of paste and coat them with flour to create flakiness, that seemed like it could maybe work. And it does. I have been making this crust ever since and have not looked back.

Perfect All-Butter Pie Crust

(Adapted from Kenji’s recipe)

Makes enough for two 9 inch pie crusts.

  • 2 1/2 cups (11 ounces, or 312 grams) all-purpose flour (divided) – I recommend King Arthur All-Purpose Flour.
  • 2 Tablespoons granulated sugar (optional, for sweet pies)
  • 1 teaspoon kosher salt
  • 2 1/2 sticks (1 1/4 cups) cold unsalted butter, cut into 1/4″ pats
  • 6 Tablespoons ice water
  1. Combine 2/3 of the flour (7.4 ounces, or 208 grams, or 1 3/4 cups – see note**) with the sugar and salt in the bowl of your stand mixer.
  2. Cut the butter into 1/4 inch pats and toss the butter in with the flour to coat.
  3. With the paddle attachment, mix at low to medium speed in little bursts. Watch carefully and stop as soon as all the flour is incorporated and it starts to look like a crumbly paste. (I know, I know, it goes against everything you thought you knew about a flaky crust. Stay with me.)
  4. Spread the dough evenly around the bowl using a rubber spatula.
  5. Sprinkle with the remaining 1/3 of the flour (3.6 ounces, or 104 grams, or 3/4 cup), and mix at medium speed in a few little short bursts, just until you have lots of little crumbles coated in flour. Do not over mix!
  6. Add the ice water one tablespoon at a time, tossing with a fork as you go, until dough starts to come together. You might not need all 6 tablespoons.
  7. Press down on dough with a rubber spatula to bring it into a ball. Do not stir!!!
  8. Dump out onto a work surface and divide dough in half.
  9. Place each half in plastic wrap, then quickly bring together into a 4 inch disc, using the plastic wrap, and not touching the dough with your hands (that will make the butter melt). Place discs in refrigerator to chill for at least two hours. For best results, leave in fridge overnight. (For directions on rolling out your dough, refer to my other post on pie dough.)

**Note – I am exact about flour measurements, because these are what work best for me. When I went back to Kenji’s recipe and made it using his weight measurements, I found the dough had too much flour. If you don’t have a kitchen scale, stir your flour well before measuring to aerate it, sprinkle the flour into your measuring cup using a spoon, and level it with a knife. Too much flour will kill this pie crust.

I’m including pictures below. I think having pictures to see what the process actually looks like is important, since it’s an unusual technique!

Combine 2/3 of the flour, sugar, and salt in the bowl of your stand mixer. Cut butter into 1/4″ pats and place into the bowl with the flour mixture.

IMG_4182

Yes, there is flour under there.

Toss the butter and flour together, then mix on low to medium speed in short little bursts just until the mixture starts to look like a crumbly paste.

IMG_4185

Yep, this is what it looks like!

Spread the crumbly paste evenly in the bowl with a rubber spatula. Sprinkle dough with remaining 1/3 of the flour.

IMG_4188

Mix at medium speed in a few little short bursts, just until you have lots of little crumbles coated in flour. Do not over mix!

IMG_4190

Add the ice water one tablespoon at a time, tossing with a fork as you go, until dough starts to come together. Press down on dough with a rubber spatula to bring it together.

IMG_4191

IMG_4192

Do this until until it comes into a rough ball.

IMG_4193

This shouldn’t take long. Just press it all together.

Dump out onto work space.

IMG_4194

See how it is still crumbly? That’s ok!

Divide dough in half.

IMG_4195

I love my bench scraper.

Place each half in plastic wrap, then quickly bring dough together using the plastic wrap, and not touching the dough with your hands.

IMG_4196

Make a 4 inch (or wider) disc and wrap well.

IMG_4197

Look at that marbleized butter!

One last thing I want to say: It is important to add the flour in two stages!!!! On a couple of occasions, I have forgotten to divide the flour in the beginning (GASP), which means that I went ahead and added the salt and sugar to all of the flour, only to realize afterwards my mistake. Not a big deal, since I hadn’t added the butter yet. At this point you can still divide the flour into 2/3 and 1/3. I’m not suggesting you do that, but just letting you know that it’s not the end of the world. What is important is adding the flour in two stages. That part is an absolute must. Now get ready to amaze your friends and family, and yourself!

IMG_3871


Posted in Comfort Food, Desserts, Fun in the kitchen! | 10 Comments

Sourdough Clean Up Tips

IMG_7169

I have two words for you: cold water.

I’m serious. The sooner you get stuff into cold water, the better. The cold water turns that floury sticky gluey crusty stuff into something watery and easy to clean off in no time. Of course, try to get as much stuff into the compost bin as possible. You don’t really want a lot of that stuff going down your drain.

I usually keep a bowl or glass filled with cold water in the sink, so I can toss stuff in there as I go. Then clean up is a breeze.

IMG_7108

But now let’s talk about the proofing towel.

IMG_7124

Crusty stuff. This one is not too bad.

This is a moderate mess. After I am done proofing my dough, often the towel I use is coated with floury crust. I take it outside and shake out all the loose flour into the compost bin, and I shake it like a maniac (no, I don’t have a picture of that). But I am still left with crusty stuff. What I have been doing is letting it dry really well, then scraping off the crust by hand. Tedious at best. So I talked to my friend Sarah, you know, my Buy Nothing friend that got this whole thing started, and she says she has three towels that she uses on a rotation, and that she just puts them in the wash! Well, I had a bad experience one time doing that. So now here is what works for me.

IMG_7206

Soak in cold water first!

After shaking the towel out, I just put it in a bowl of cold water, crusty stuff and all… the bowl I use to make the bread in the first place. It’s in there anyway. And just rinse a couple of times with cold water, rubbing the fabric together if necessary. All the stuff comes right off. If you think I am silly for telling you this, and of course everyone already knows this, then well, you are one step ahead of me. Or maybe two. I just didn’t know. Now my towel has no crusty stuff, and I can throw it in the wash.

So that’s it! Those are my tips. The other idea is that you can have your kids do the clean up for you, and then you don’t have to worry about it at all. Good luck with that.

IMG_6486

Posted in Musings, Yeasty Things | 1 Comment

Sourdough: Part Two!

IMG_7118

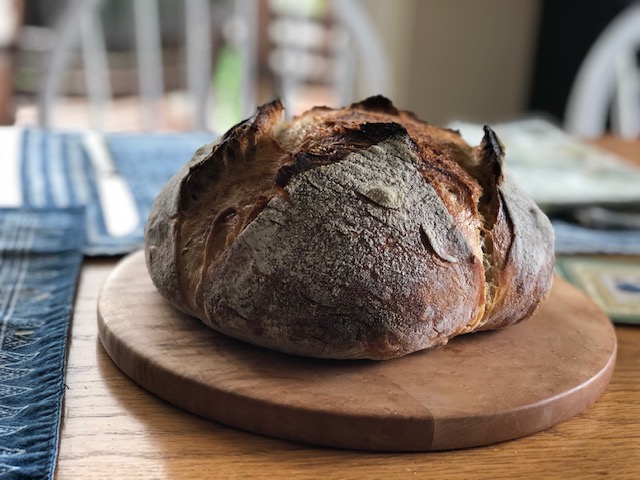
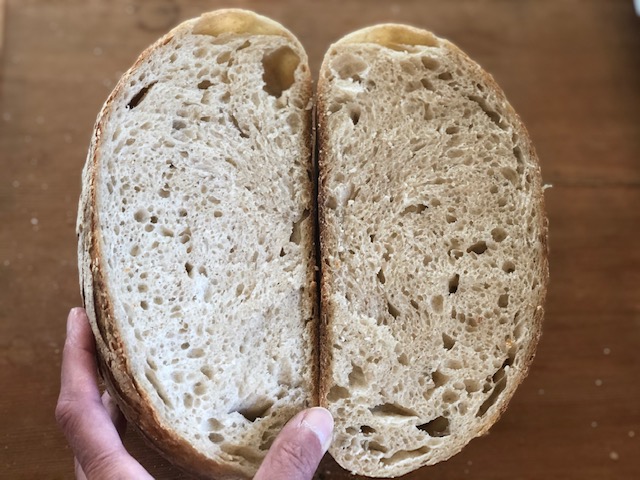
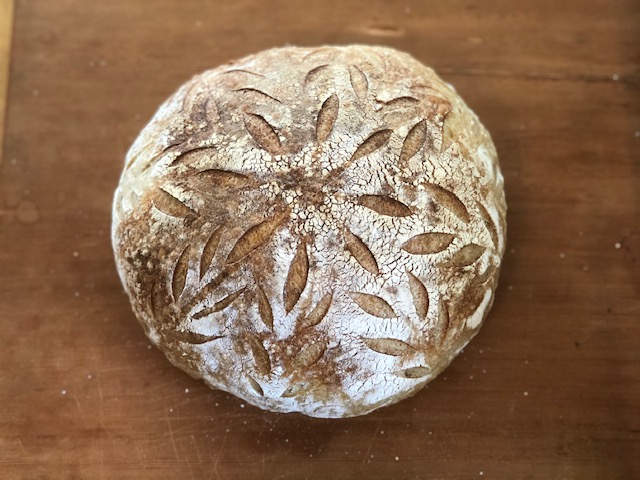
I am back to share with you my latest favorite sourdough bread recipe, along with techniques that work for me. I was going for an open, airy bread, with some of those great big holes, but not too many! I also wanted a mild but distinct sourdough tang. And a crispy crust that is not a tooth breaker. And I wanted to be able to make intricate designs… And I think I found it!! (Update 3/16/21: I have a new favorite sourdough bread recipe that I think you will like. Check it out!)

IMG_7101

After trying a few different recipes, and then focusing on the one that worked best for me, and trying a few different techniques, I am tempted to say that I am satisfied and will stop experimenting…

IMG_6709

So before I go and forget this yummy bread recipe, along with technique tweaks, I am going to document it right here and now, because all of that experimenting gets very confusing!

IMG_7095

My most successful sourdough loaf is King Arthur Baking Company’s Naturally Leavened Sourdough Bread recipe. It is fantastic! It came out beautifully the first time I made it, and that was with no tweaks at all. But then, I wanted a bit more rise, and a few more holes, and a bit more tang… so I had to tweak it a bit, mostly technique, and a tad more salt. And be aware, the original recipe makes two smallish loaves of bread, but I didn’t want to make two loaves. I just wanted to make one large loaf (a two pounder), so I make 2/3 of the recipe for one large loaf. It works well with my dutch oven, which is a Le Creuset #26 (26 indicates the inside diameter of the pot in centimeters), which has a 5.5 quart capacity.

IMG_7120

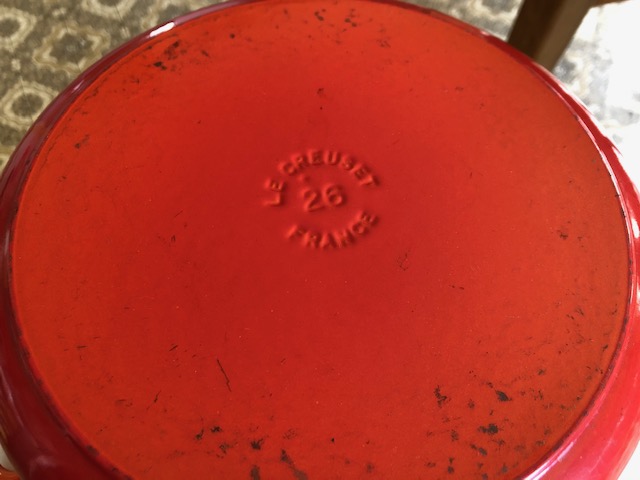
You can see the number on the bottom of the pot.

I also have a #22, which has a 3.5 quart capacity, and that one works well for small loaves. Since I am relatively new to sourdough, I feel a bit overwhelmed at the idea of making two loaves at a time. So I make one big loaf. And here is what works for me, from beginning to end.

Start two evenings before you want to bake your bread. For example, I want to bake bread on Saturday morning, so I start the process on Thursday evening. Don’t worry! What you have to do that first evening is minimal. And what you get to do on the morning that you bake is so fun and satisfying, and also not a lot of work. The middle day is when the bulk of the work happens.

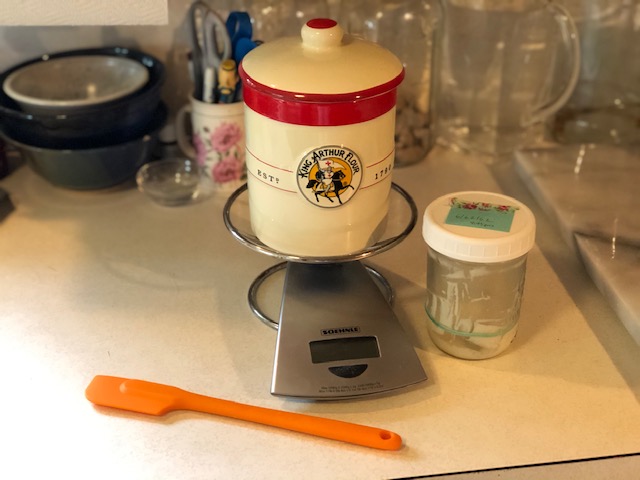
Day 1: In the evening, take your unfed starter out of the fridge. If you have read my Sourdough: Part One! post, maybe you will have a jar in your fridge that has about a tablespoon of starter in it. Or maybe you just got some starter from a friend. In any case, all you need is about 10 grams of starter. This is what I start with. Really.

IMG_6642

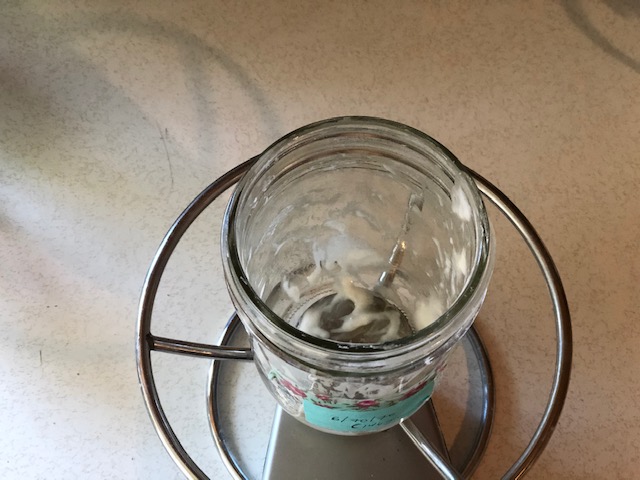
All the starter I need is in the jar… maybe 6 grams?

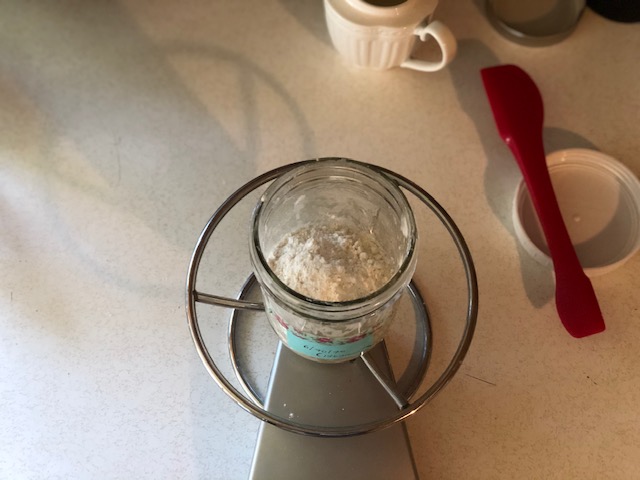
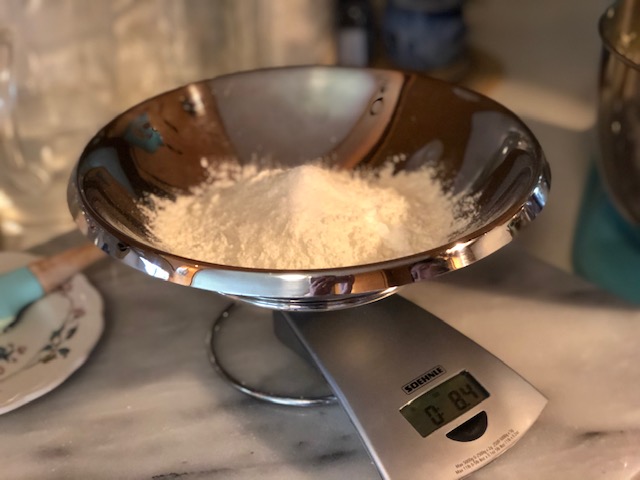
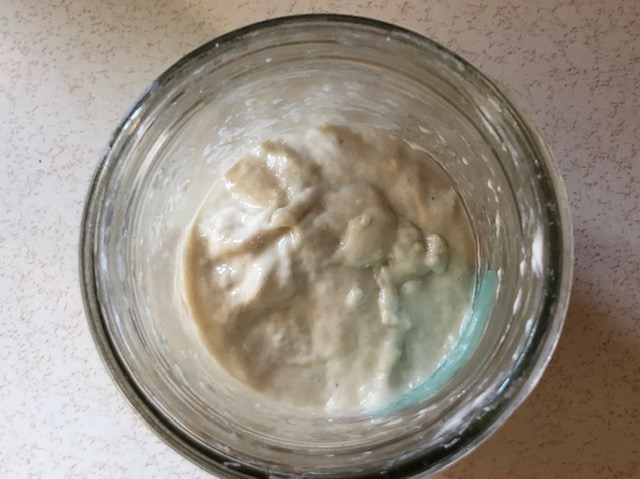
In a 16 ounce glass jar, mix about 1 tablespoon of unfed starter, or anywhere from 6 to 10 grams, with 70 grams filtered room temperature water and 70 grams all-purpose flour. Please use a scale and weigh everything. Stir the flour, water, and starter together and mix well, using a rubber spatula so you can get everything well combined. It might look something like this.

IMG_6646

Put a rubber band around the jar at the level of the starter so you can keep track of how much it rises. Put a lid on the jar, but don’t close it tightly. You just want to stop anything from falling into the jar. Leave it on your counter overnight.

IMG_6647

Now you are done with Day 1! Yay!

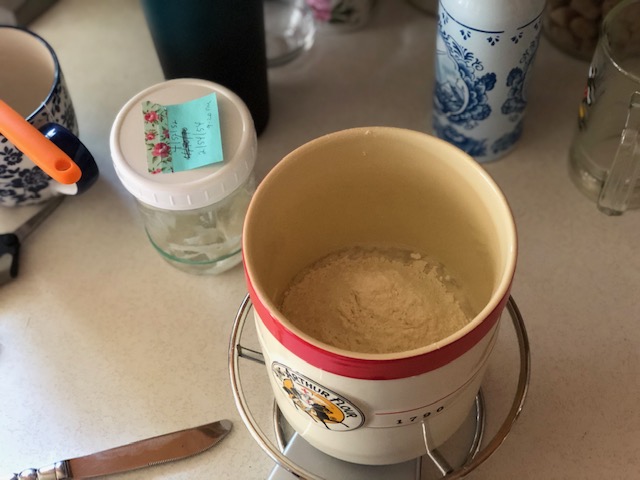
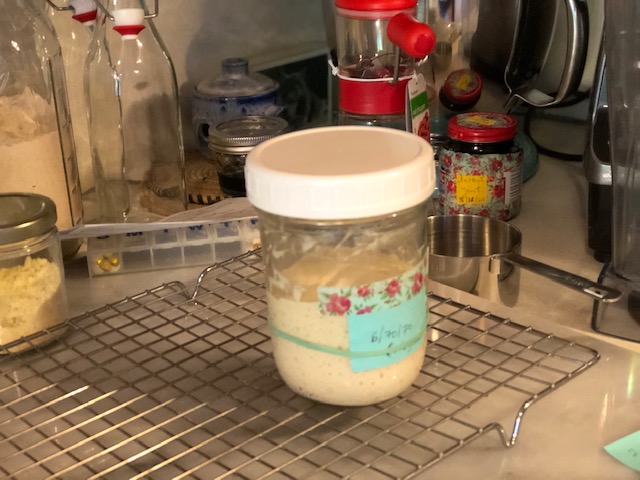
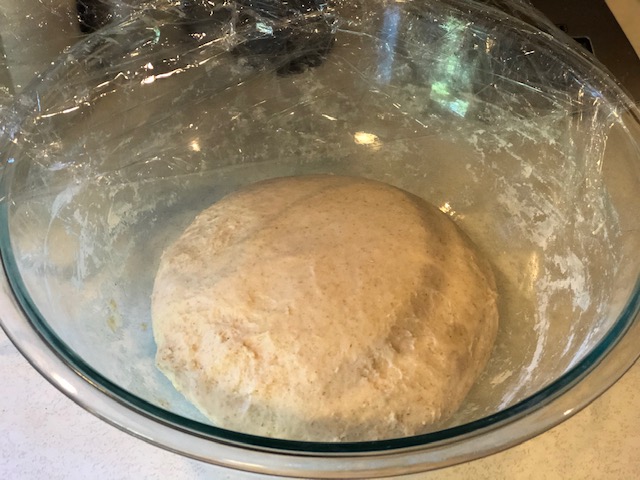
Day 2: Hopefully you will wake up and notice that your starter has grown quite a bit. Mine usually takes about 12 to 14 hours, so if I mixed it up at around 8pm on Day 1, on Day 2 at 8am my starter will have doubled, and will look something like this.

IMG_6670

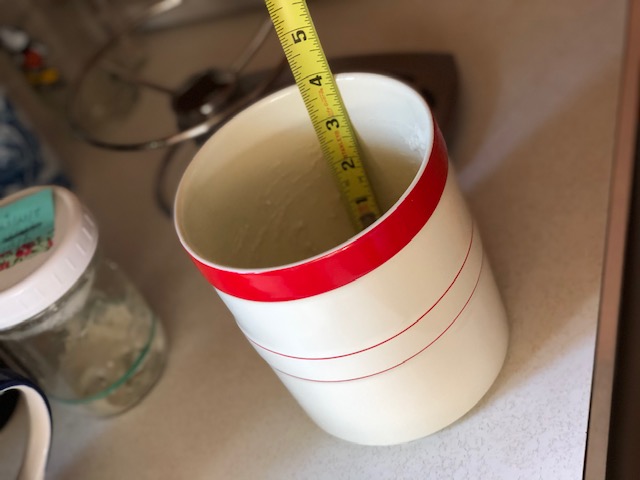
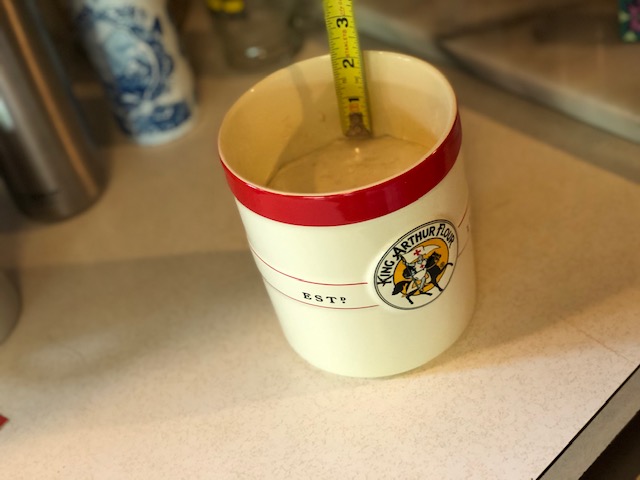
Because I want my starter to be very active, I let it go for another couple of hours, until it has almost tripled in size, and is doming on top. It will look like this.

IMG_6672

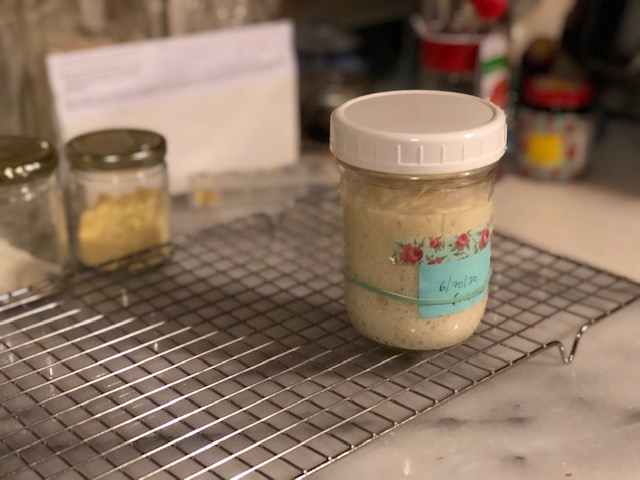
Anywhere from double to triple in size with lots of bubbles and doming top is great. To avoid waiting too long, aim for somewhere between double and triple in size. You are now ready to mix up your second starter. You will need a larger container for this.

Pour 105 grams of your starter into a large container or glass bowl. Add 105 grams room temperature filtered water and 105 grams of all-purpose flour. Mix well with a rubber spatula so you can scrape the sides and incorporate everything.

IMG_7109

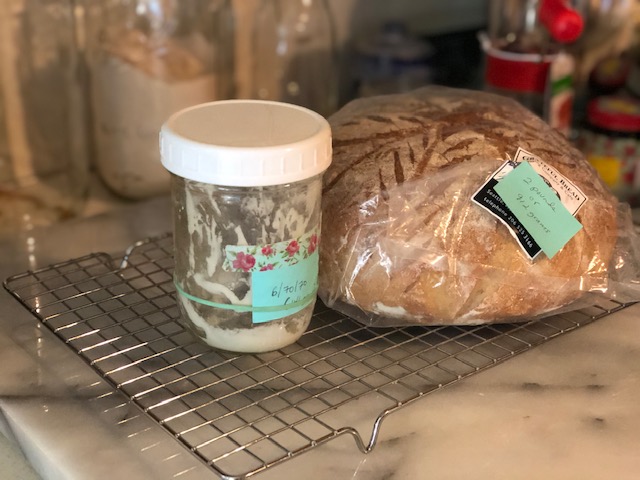
Cover this new starter with a loosely fitting lid (you should have about 315 grams total) and leave on your counter for about 6 hours. Again, you want the starter to have doubled to tripled in size, with lots of bubbles and a doming top. If you have let it go too long, the top will collapse, and you won’t have as much rising power for your bread. Don’t forget to put a tightly fitting lid on your original glass jar, which will have some scrapings in it. Pop it in the fridge for the next time you want to make bread. That jar of scrapings is your forever starter [insert heart emoji here].

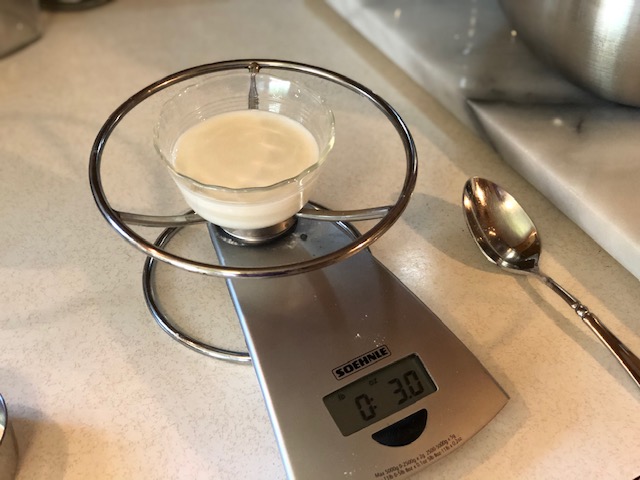
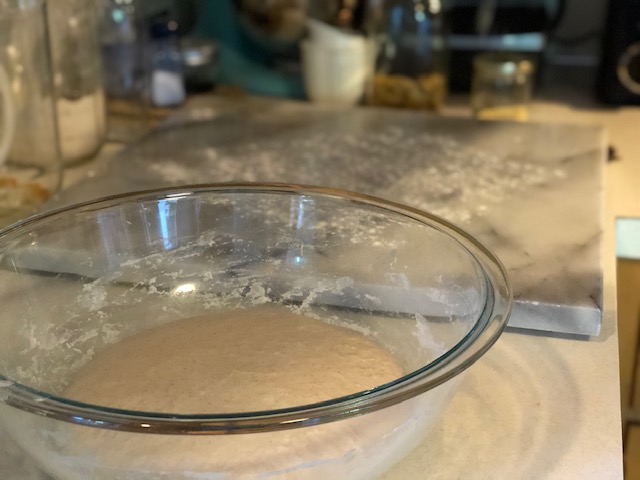
When your new starter has doubled to tripled in size, you are ready to mix your final dough together. In a large glass bowl, pour in 300 grams starter.

IMG_7111

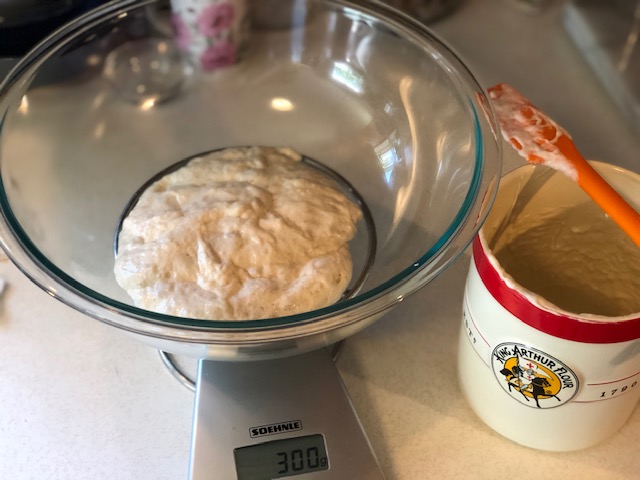
Add 264 grams room temperature filtered water. Right now it might look something like this.

IMG_7006

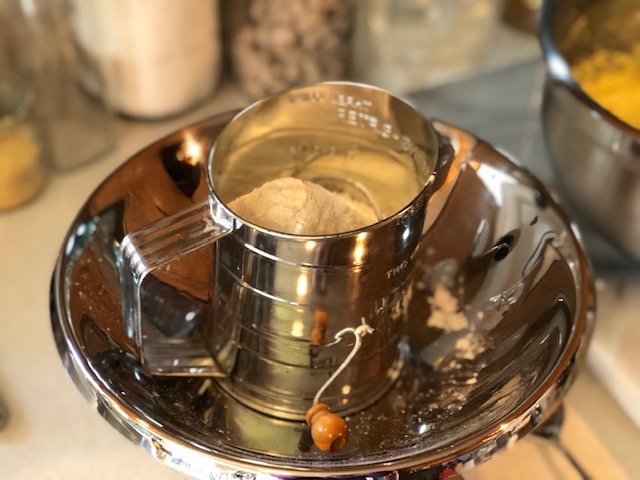
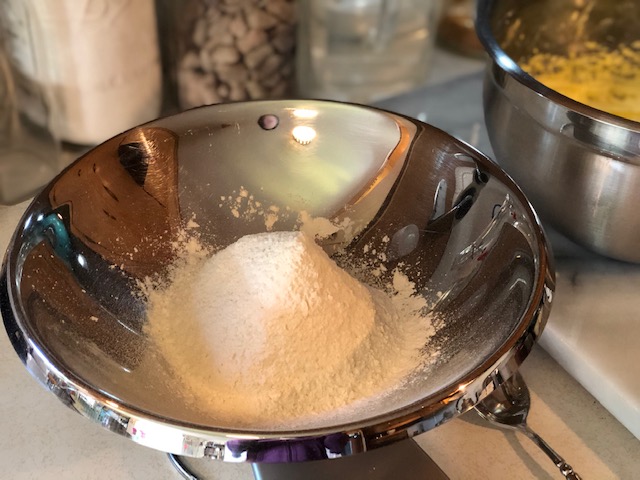
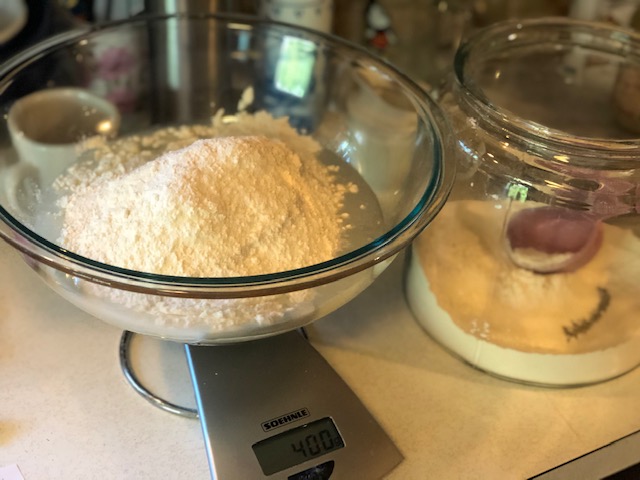
By the way, I zero out the scale before each addition so I don’t have to do the math in my head, if that makes sense. Now add 400 grams all-purpose flour.

IMG_7007

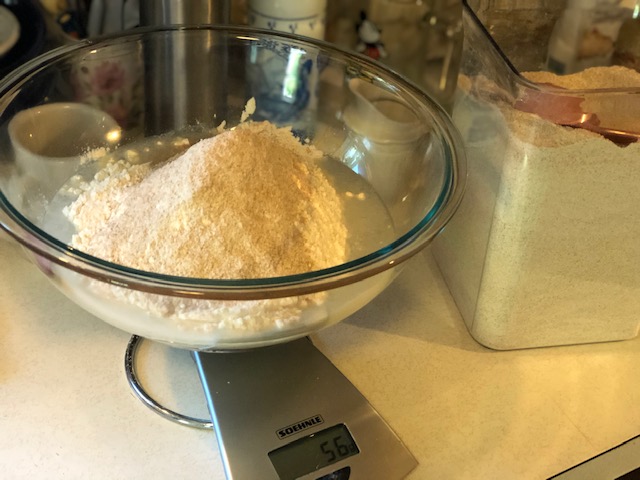
And now add 56 grams whole wheat flour.

IMG_7010

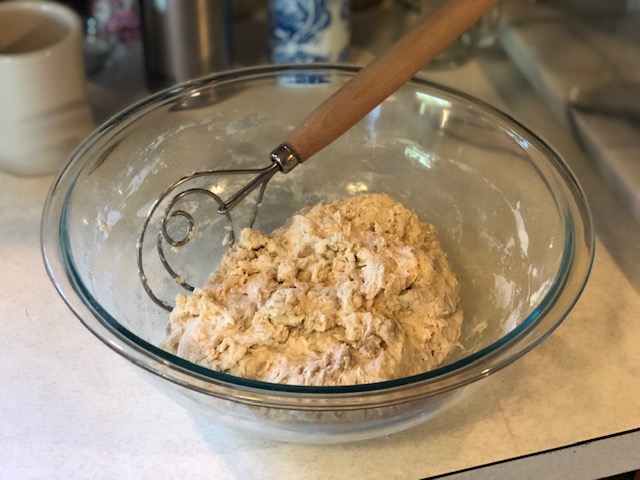
Stir everything together until everything is well incorporated and you see no more dry flour. Scrape the sides of the bowl to get every bit. The dough will look shaggy, like this.

IMG_7012

Cover with plastic wrap and let rest for 20 to 30 minutes. This rest is important, and is known as the autolyse. The flour continues to absorb the water, and the dough becomes easier to work with. DON’T skip this step.

IMG_7013

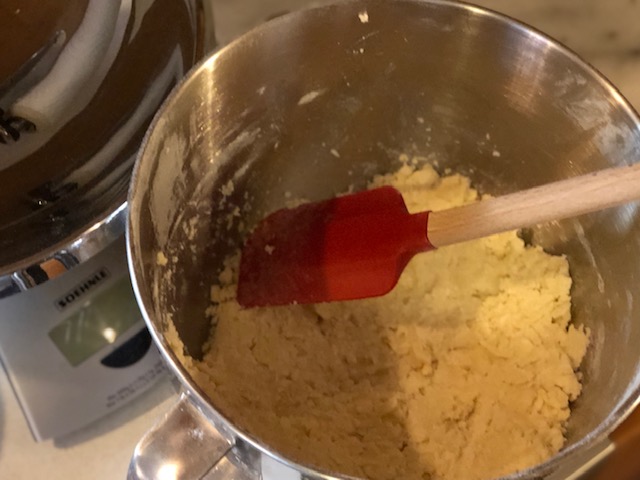
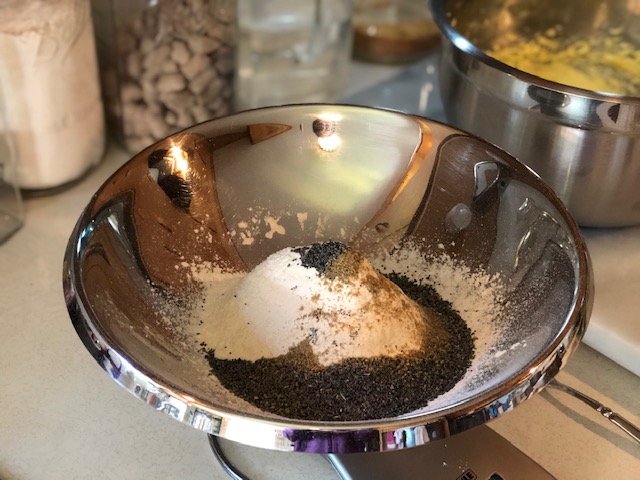
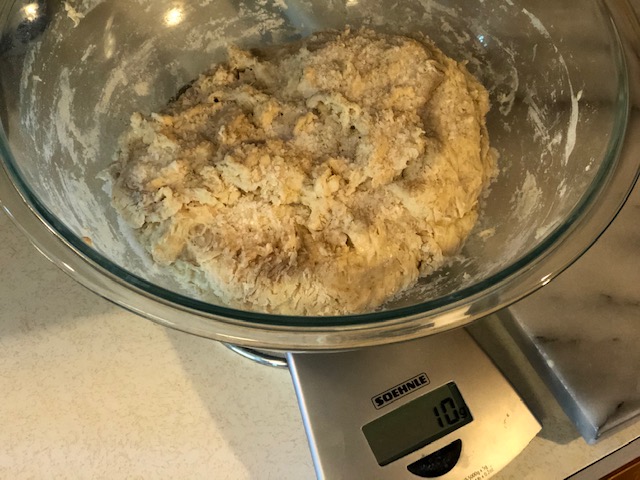
After the resting period, remove and set aside the plastic wrap, and sprinkle 2 teaspoons kosher salt (12 grams) over the dough. The picture shows 10 grams, but really it is 12 grams.

IMG_7016

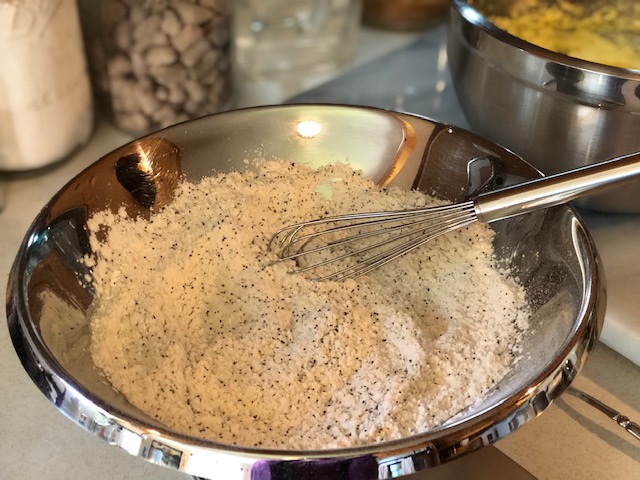
With a rubber spatula or bowl scraper, fold the dough over onto itself to start to incorporate the salt. By the way, a bowl scraper is made out of some sort of flexible plastic material that bends to work nicely in a bowl, and should not be confused with a bench scraper, which is made of metal and is not flexible at all!!!

IMG_7017

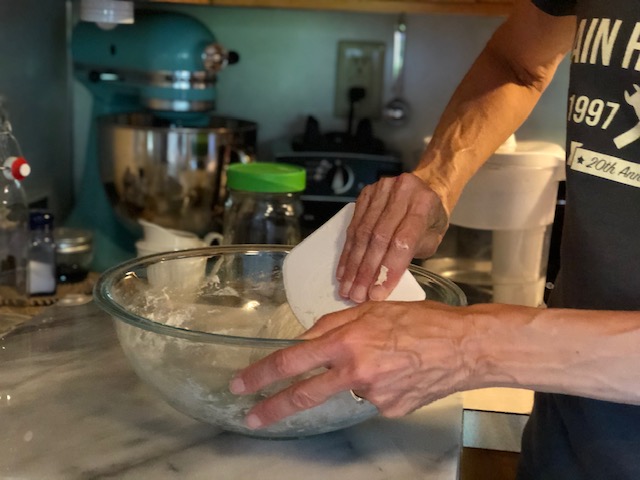
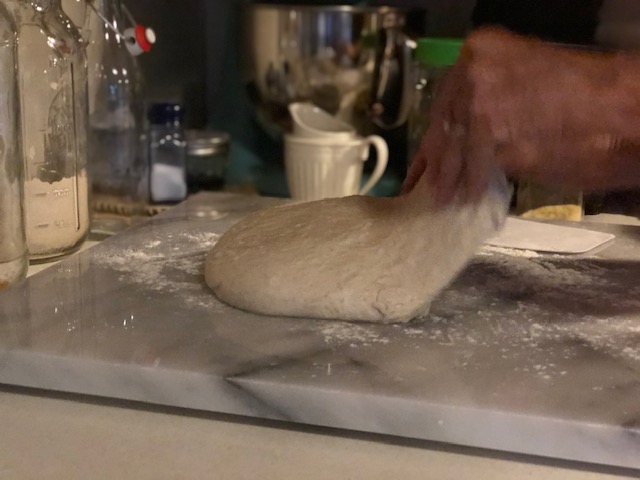
Scrape the dough out onto an UNFLOURED surface. This is where it gets interesting. Your dough will be wet and sticky. Don’t freak out.

IMG_7020

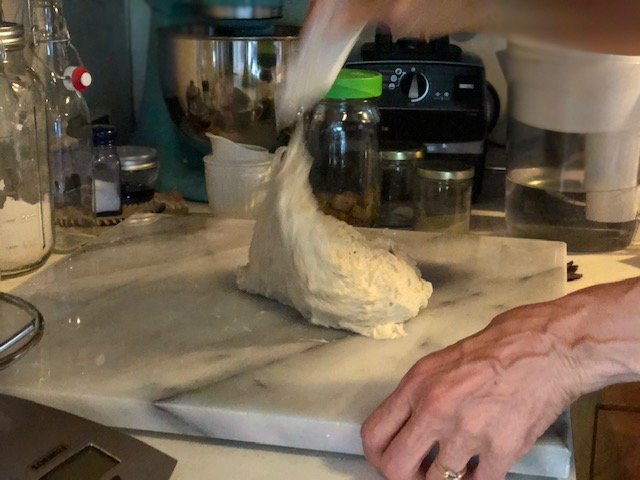
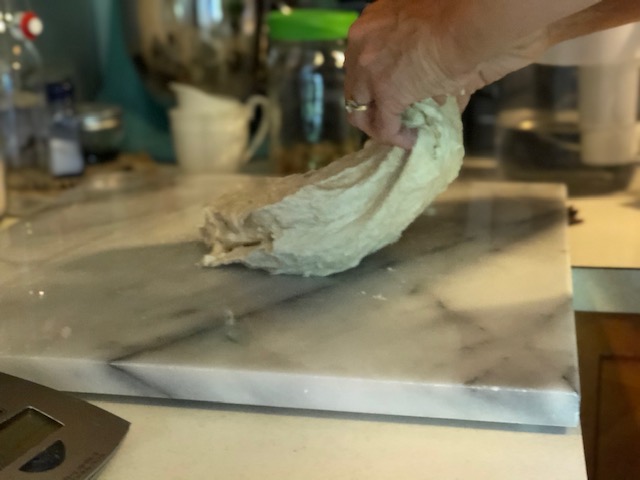
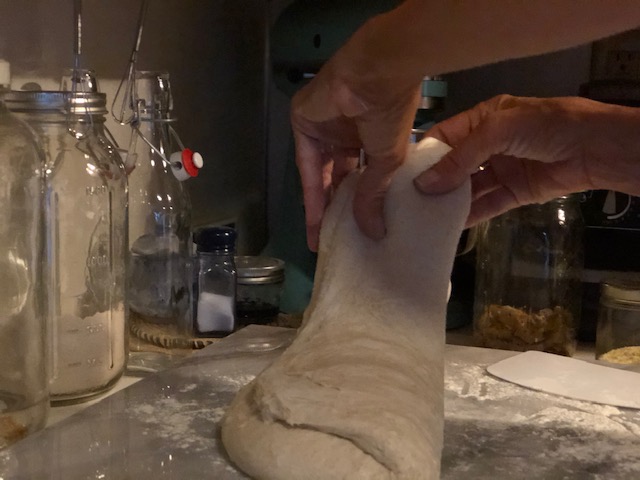
Now it is time to knead the dough. This is the most labor intensive part of the recipe. The first time I made this recipe, I kneaded the dough as I always do, on a lightly floured counter. The bread came out great, but I wanted a more open crumb (picture those nice big holes), which requires a more hydrated dough. So I use this slap and fold technique for kneading that requires no flour at all. Watch Alex do it here at 3:20 into the video. He explains it quite nicely. And here is a super short video of me doing it, so you know it’s possible, because if I can do it, so can you.

IMG_7023

IMG_7024

IMG_7025

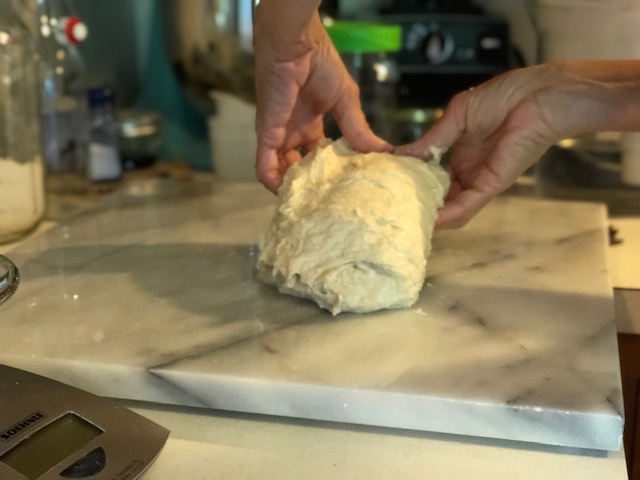
You want to knead your dough for about ten minutes, until the dough is nice and smooth and still tacky. Put the dough back in the bowl, cover it with the plastic wrap that you saved, and let it rest on your counter for one hour. The dough might look something like this.

IMG_7029

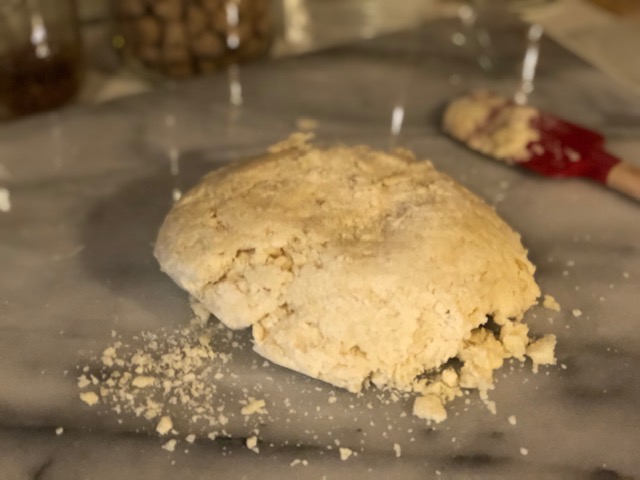
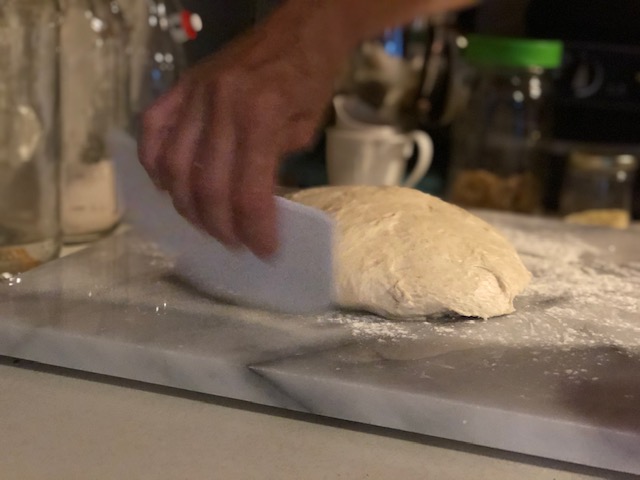
After an hour, you are ready to give the dough a few folds. You will want to very lightly flour your work surface for the folding. Your dough might look something like this – it will have flattened out.

IMG_7034

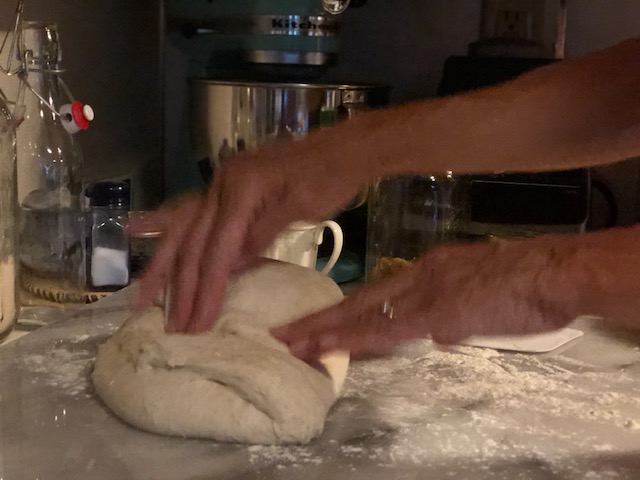
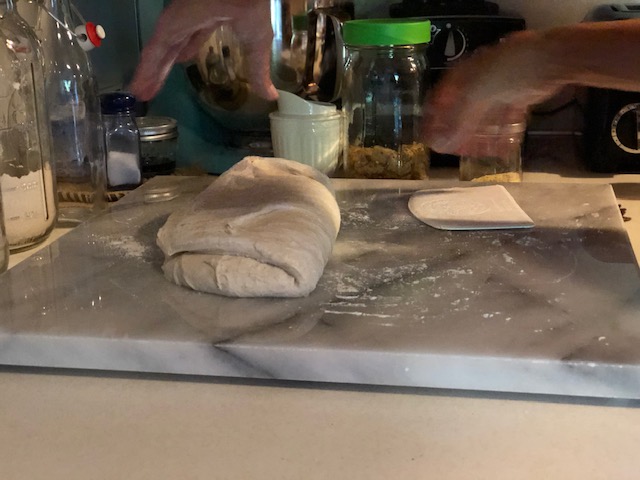
And now the folds. Scrape your dough out onto a very lightly floured surface. You will fold each end of the dough over like an envelope. You might need to use your bowl scraper to manipulate your dough.

IMG_7053

Eight folds… you’ll want to fold all four sides like an envelope, stretching the dough gently before folding it, and once you’ve done four folds, rotate the dough 90 degrees, gently flatten the dough a bit, and repeat. You are giving your dough structure now.

IMG_7054

IMG_7055

IMG_7056

IMG_7057

IMG_7058

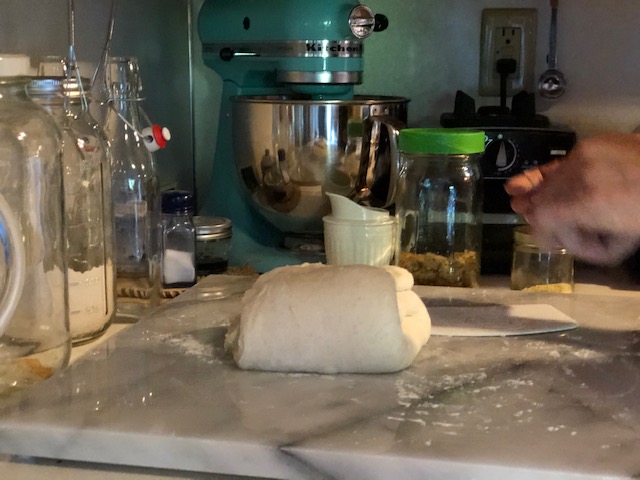
First of all, let me apologize if there are too many photos. I just know that when I am learning how to do something, I want to see it so that I know I am doing it right. And there are not pictures of every single fold, because my photographer got tired :). So you have folded all four sides, rotated the dough 90 degrees, and folded all four sides again. Now do one last fold and bring that fold over so that the seams are facing down. Pick up your package of dough and put it back in the bowl seam side down and cover it again with your saved plastic wrap. Let it sit for another hour. Don’t worry if this is starting to make your head spin. It is starting to make my head spin just writing it all out. I will put a timeline near the end of the post. After your dough has rested for that hour, you will want to do another set of folds, but just a few this time. When you gently scrape the dough out of the bowl, you want it to land smooth side down, seam side up.

IMG_7038

Now about three or four folds.

IMG_7042IMG_7044

IMG_7045

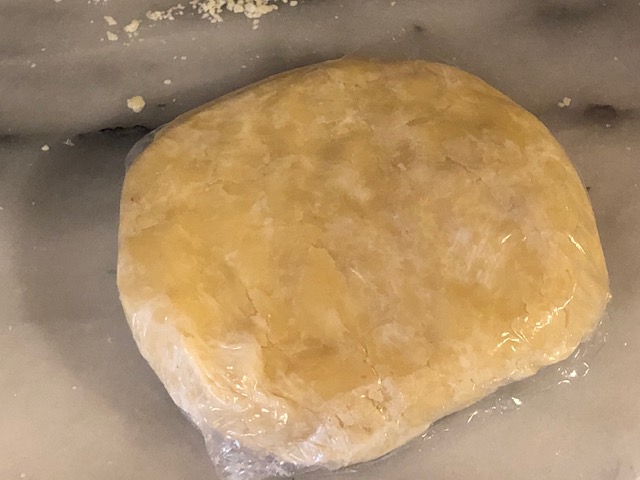
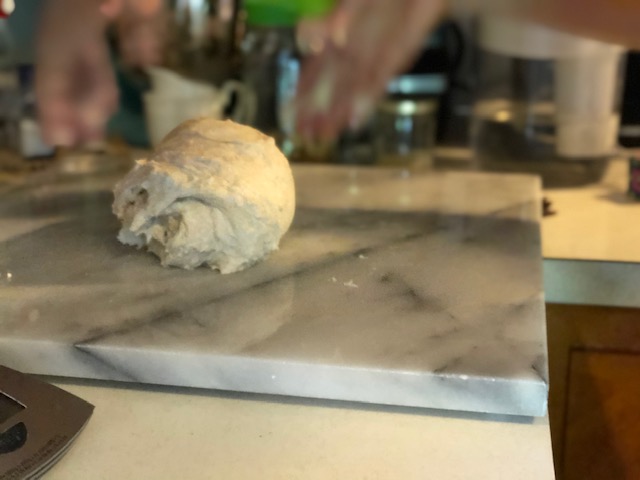
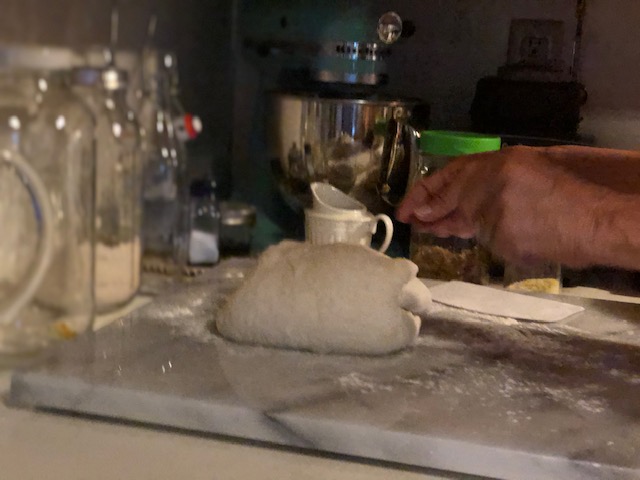
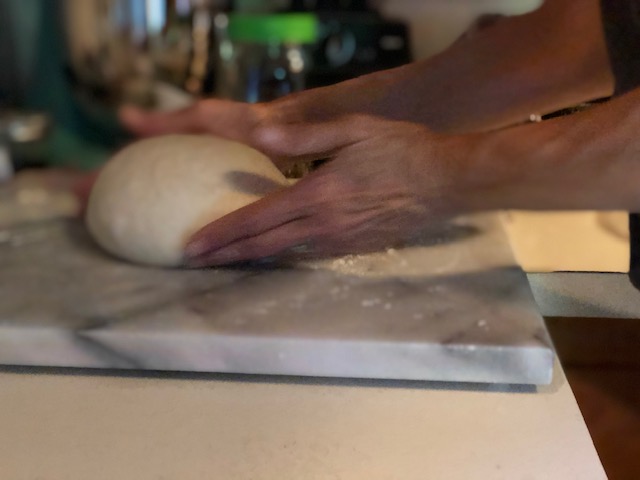
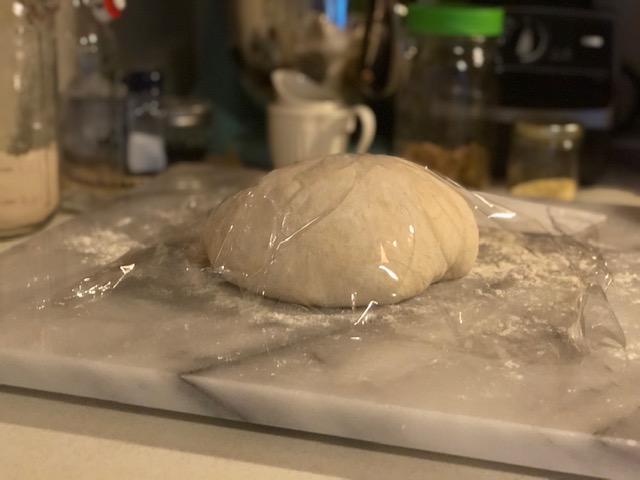
Roll the whole thing over so that the seam side is face down, and gently shape into a round by cupping your hands around the dough. Rotate it around while cupping the dough slightly under itself to create a nice round shape.

IMG_7048

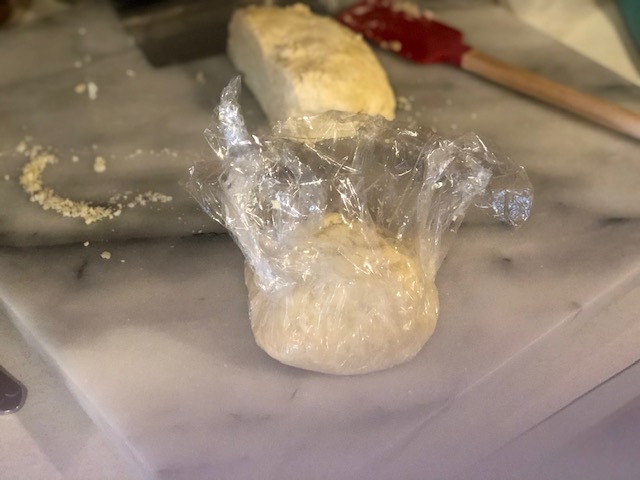
Lightly dust with flour and cover the ball of dough with plastic wrap and let it sit on the work surface for twenty minutes.

IMG_7067

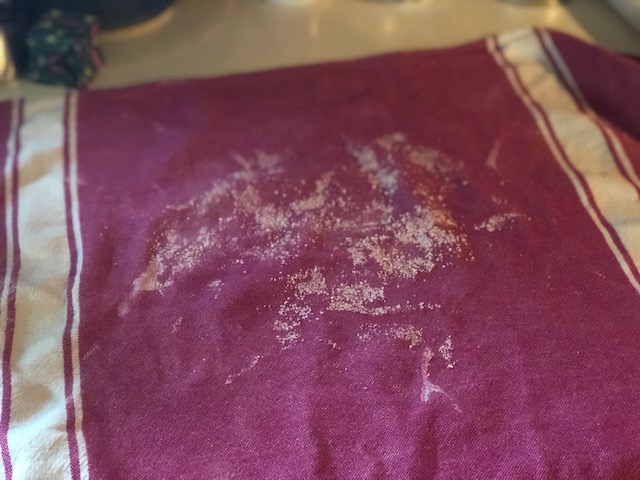
During those twenty minutes, get out a clean kitchen cloth (not terry cloth!). Tea towels work nicely. Put flour on the towel.

IMG_7068

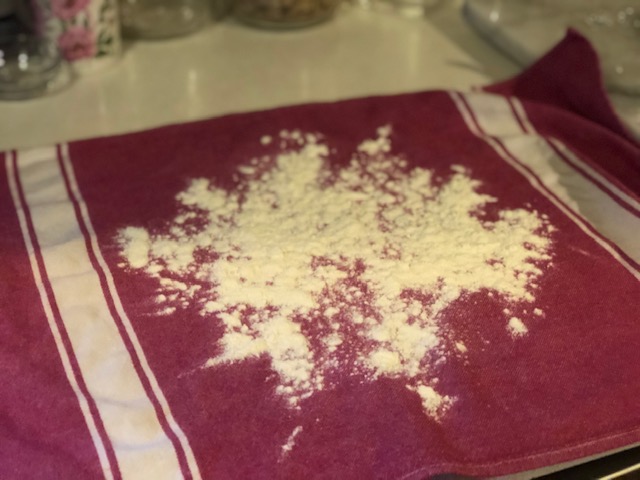
Now rub the flour into the towel so that you have a solid layer of flour.

IMG_7069

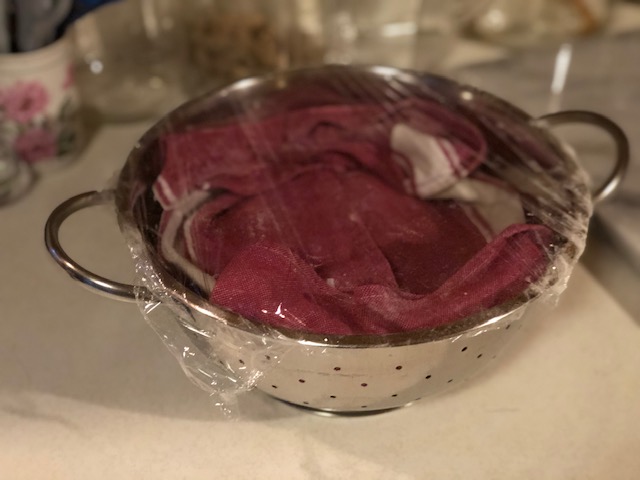
Fold the towel and put into a large colander.

IMG_7070

When the twenty minutes are up, open up the towel to prepare for the next step.

IMG_7071

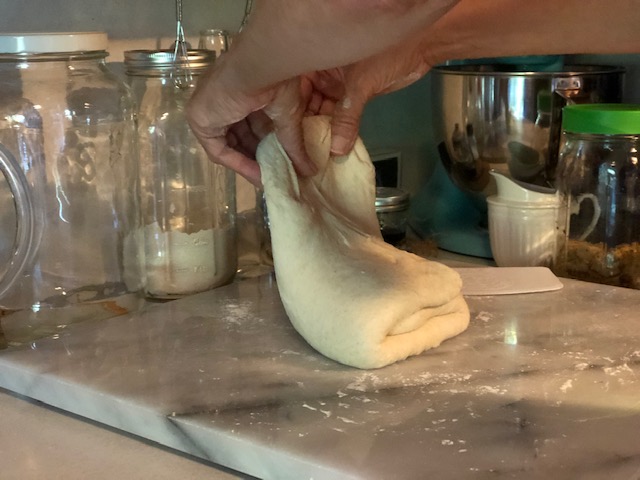
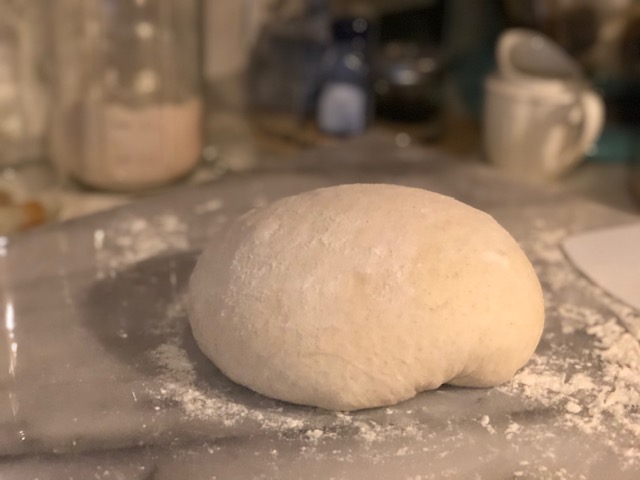
Go back to your dough after the twenty minutes is up. Now, don’t get mad at me, but you have to do a few more folds. By this time, your dough will have gained enough strength and structure that it will be difficult to do actual folds, so it’s just more like bringing the edges toward the center. I don’t have pictures of this part, as my photographer was on strike. She’s ten. But here’s what you do. Lightly flour the top of your dough and flip your dough gently over so that the smooth side is facing down. Bring all the edges gently in toward the center. Do one last fold to roll everything over again (bringing the seams side down), and cupping with your hands, rotate the dough gently around! You can bring the dough toward you and then rotate it. Do this many times, to create a little tension in the dough. But don’t be rough or vigorous with the dough, because you don’t want it to tear. Here Alex is doing it at 5 minutes into the video, but he uses a bench scraper. I use my hands. You might end up with something that looks like this.

IMG_7064

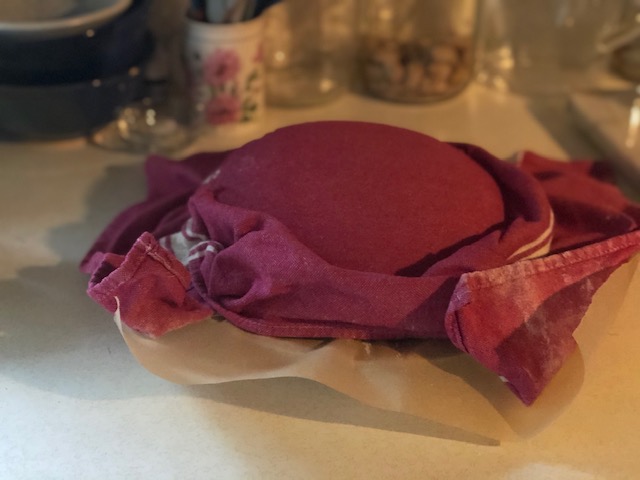
Now, lightly flour the top of your dough one more time, and place it smooth side down and seam side up into your prepared tea towel/colander. This is important! The smooth pretty side goes face down into the floured tea towel/colander. What you are now looking at is the seams. The not-pretty side, and eventually, the bottom of your loaf of bread.

IMG_7075

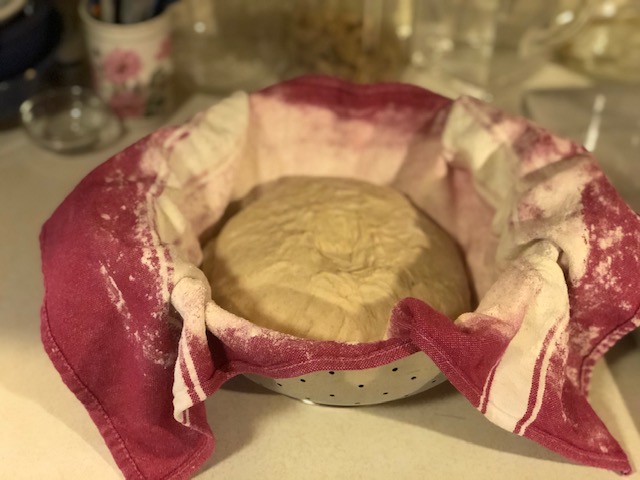
Dust the seam side of the dough with more flour, then cover with the towel. Then cover the top with the plastic wrap. Should look like this.

IMG_7076

Now let the dough rest on your counter for 20 to 30 minutes. When that time is up, place the whole thing in the fridge for an overnight rise. The dough can stay in your fridge for longer than overnight, but so far, I have just done a twelve hour rise in the fridge. You have completed Day 2. Congratulations!

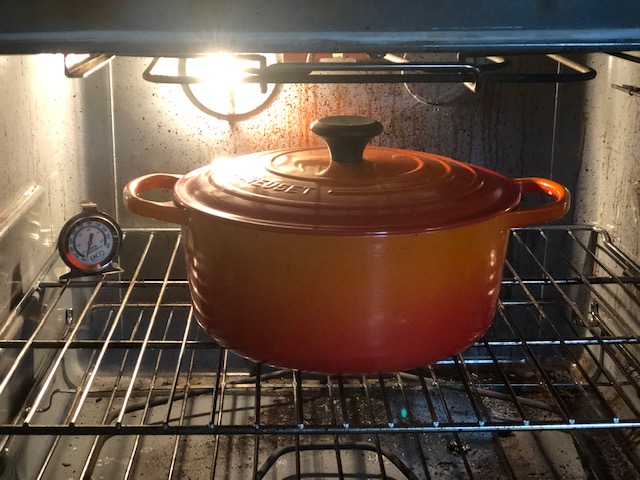
Day 3: When you are thinking you want to bake your bread, back track about an hour. So if you want to bake your bread at 9am, preheat your oven to 450° F at 8am. When you preheat your oven, put your dutch oven inside your oven so it can preheat with your oven. For this loaf of bread – it’s a biggie, 2 pounder – you will need a large dutch oven. Mine has a 5 1/2 quart capacity. Okay, so put your dutch oven with the lid on it into your oven and preheat to 450°.

IMG_7077

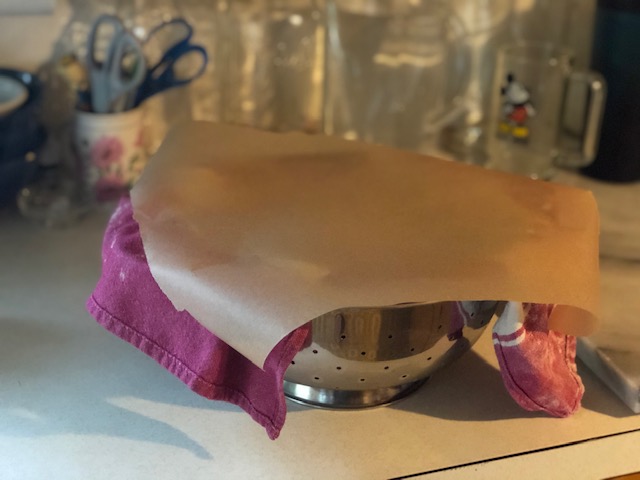
You can preheat your oven anywhere from 30 minutes to an hour. An hour is better, but not essential. A half hour is essential. Make sure your oven has come to temperature. Fifteen minutes before you want to bake your bread, take it out of the fridge. Remove the plastic wrap, open up the towel, and now set a square piece of parchment paper over the top of the dough and dutch oven.

IMG_7080

Then place a large plate upside down on top of the parchment.

IMG_7081

Now, with one hand on top of the plate, and one hand on the bottom of the colander, flip the whole thing over so that now the plate is on the bottom. Remove the colander.

IMG_7082

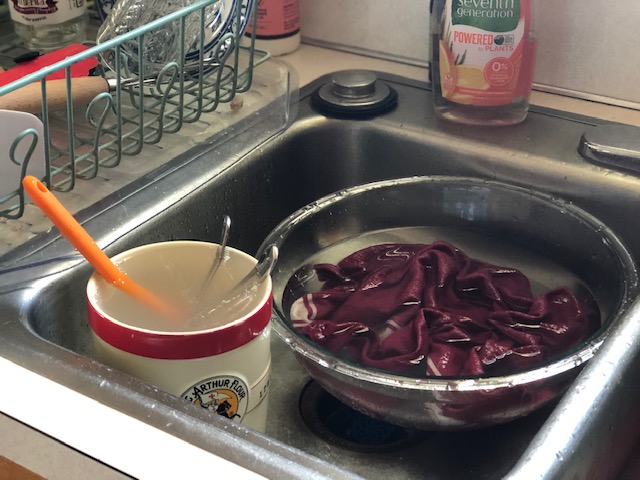
Carefully remove the towel and set aside, and brush any excess flour off of the parchment paper. It’s okay if there is flour on the dough. (Clean up tips for the towel are here, but that’s for later.)

IMG_7083

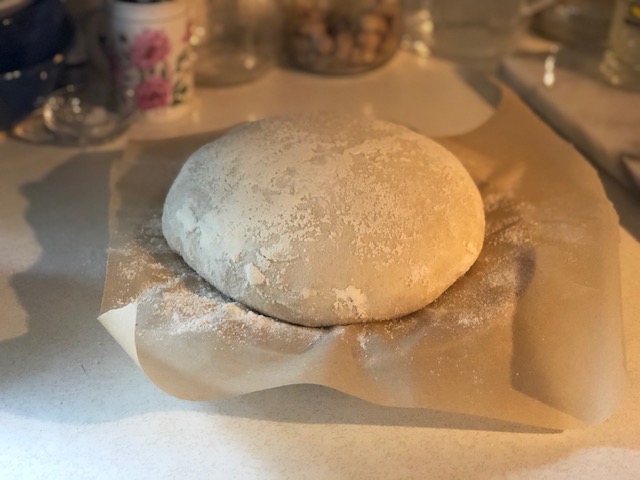
If you want to do fancy scoring (fancy cutting into the dough), you will need to take a small amount of flour and very gently smooth it over the surface of the dough so your design will show up.

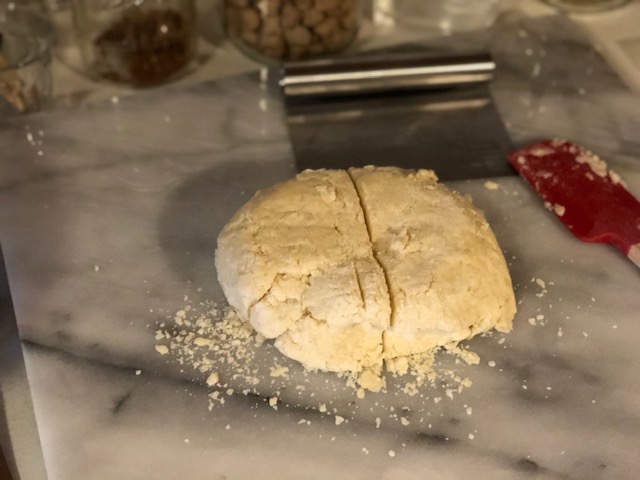
A note about scoring: one of the advantages of a long overnight rise in the fridge, aside from getting better flavor, is that the cold dough is easier to cut into! But if you don’t want to be fancy, you can just get a sharp knife or serrated knife and cut quickly and without fear across the loaf, about a half inch deep, and then again across the other direction, so you have a cross. These cuts are very important to allow the bread to rise and expand during baking. Otherwise your loaf will perhaps explode in places where you don’t want it to, and it will rise unevenly.

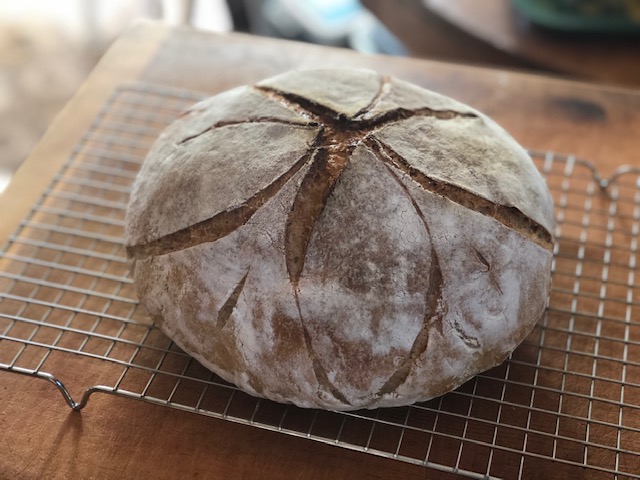
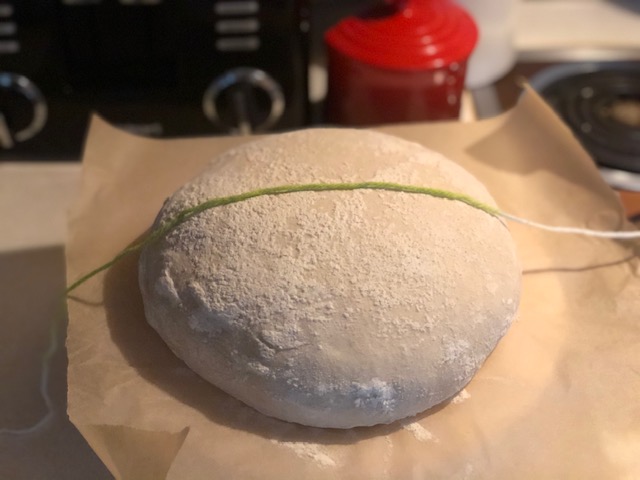
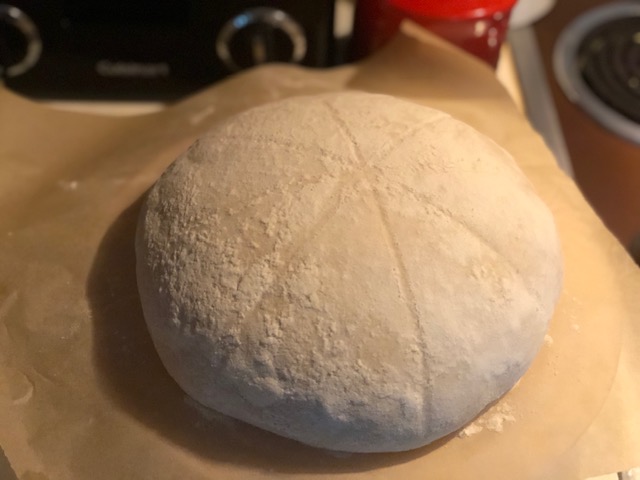
But I am going to assume you want to do something really fun, so you will need a sharp razor blade. Nothing fancy, just a sharp razor blade. The french call it a lame (pronounced lahm, rhymes with bomb), which just means blade. A lame is also what bakers refer to as a tool to score your bread. I have one, and basically, it is a sharp razor blade on the end of a stick. Below is a picture of something you can do to give yourself guidelines to work with. I take a cotton string and make marks in the floured dough. I forgot to flour it below, but it will be floured on the next one.

IMG_7084

IMG_7085

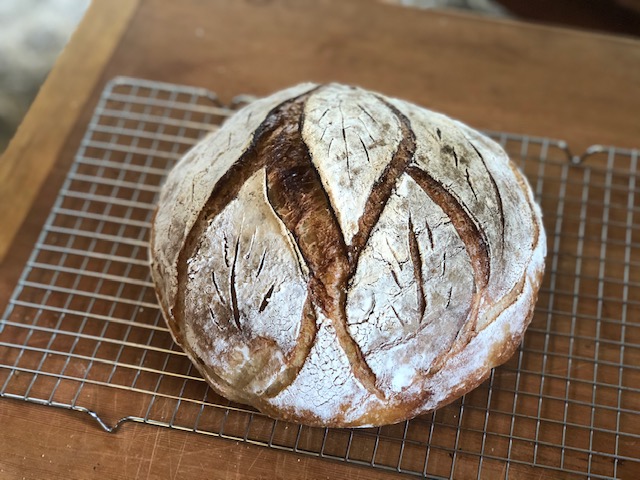
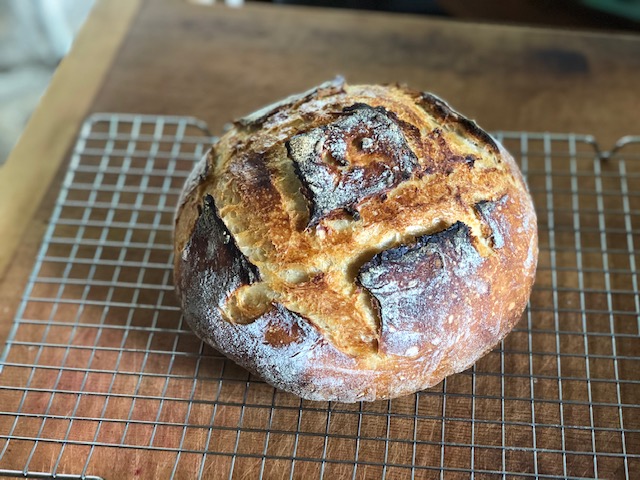
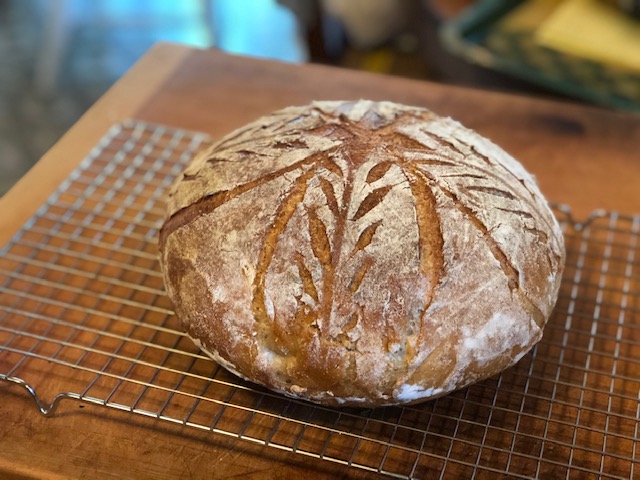
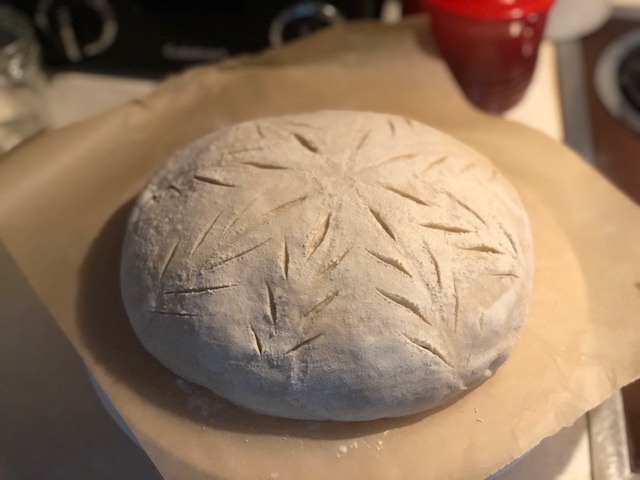
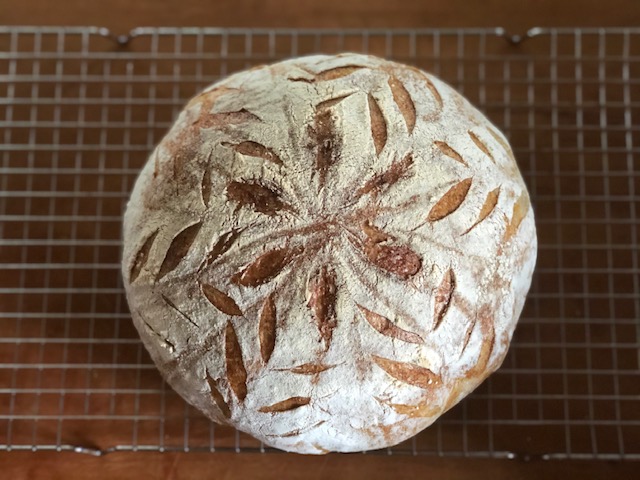
Now for the scoring. Since I want an intricate design, I will carefully and decisively make cuts that are barely 1/4 inch deep. There will be lots of these little cuts, so plenty of ability for the dough to rise. Here’s an example of one of my favorite patterns. I didn’t make it up. I found it online.

IMG_7086

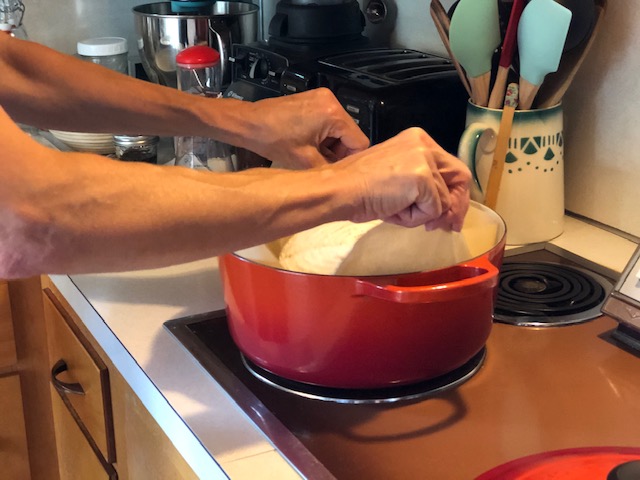
Now that you have scored your loaf, get some sturdy pot holders and take your dutch oven out of the oven. Take the lid off. This part you must do swiftly as to not lose too much heat. Now, believe it or not, take two ice cubes and put them in the bottom of the piping hot dutch oven. Now grab the parchment paper on both sides of the loaf and lift your masterpiece. Place it down into the dutch oven, parchment paper and all.

IMG_6573

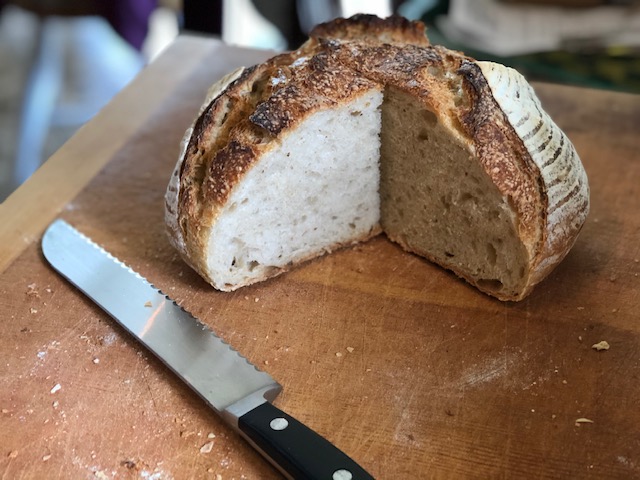
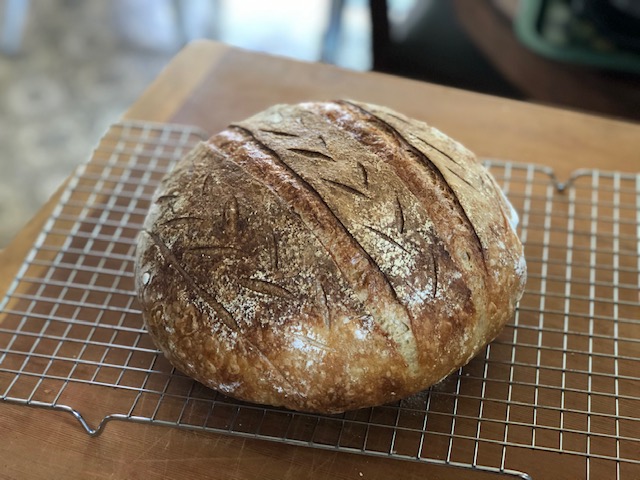
Grab your pot holders, place the lid back on the sizzling steaming dutch oven and put it back into your piping hot 450° degree oven. Set your timer for 25 minutes. Now go walk in your garden or have a cup of tea or wipe flour off of your counter, but don’t stray too far from your kitchen. I keep my timer on my person at all times. You have worked way too hard on this to mess up on the timing. When the timer goes off, grab your pot holders or oven mitts, open your oven and take the lid off of the dutch oven and set it aside, preferably somewhere heat proof, like your stove top. Stare at your beautiful creation for one or two seconds tops (it will look pale, but beautiful, and hopefully will have risen some), then close the oven door and let the bread bake without a lid for 15 minutes more. The top of the bread should be a deep golden brown when the bread is ready. When 15 minutes are up, take the dutch oven out and use a spatula or kitchen-gloved hands to remove the bread. It is hot!!! I use a flexible plastic spatula, the kind you use for flipping pancakes, and an oven mitt. If the bread looks pale on the bottom or sides, you can put it back in the oven directly on the rack (no dutch oven) for one or two more minutes to brown the crust a little more. Again, be careful and don’t let it burn!!! Two minutes is enough to brown the bottom of the crust. Bread is done when it is a deep golden brown and it sounds hollow when tapped on the bottom. Place the loaf on a cooling rack and let cool completely before cutting into. This can take a couple of hours.

IMG_6933

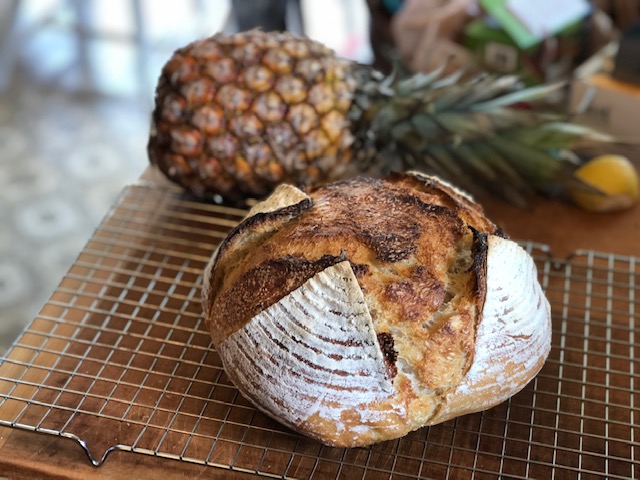
You might want to sit and stare at your bread for a while. I don’t blame you. Bread is beautiful. You might even hear your bread make a sweet, soft, crackling sound in those first several minutes that it is out of the oven. It is whispering sweet nothings to you.

Snap out of it!!! Here is a sample timeline:

Day 1:

  • 6:00pm – Mix starter (total about 145 grams) set on counter overnight

Day 2:

  • 8:00am – Mix second starter (total about 315 grams) and set on counter
  • 2:00pm – Mix 300 grams starter with flours and water, cover with wrap for autolyse
  • 2:40pm – Add salt and knead dough for ten minutes, put back in bowl and cover
  • 4:00pm – First set of eight folds, dough back in bowl and cover
  • 5:15pm – More folds and shaping, let rest on work surface covered at room temp
  • 6:00pm – Final shaping, place in prepared colander and let rise overnight in fridge

Day 3:

  • 8:00am – Preheat oven and dutch oven to 450°
  • 8:45am – Remove dough from fridge and score dough
  • 9:00am – Place dough in dutch oven and bake
  • 9:25am – Remove lid from dutch oven and continue to bake bread
  • 9:40am – Remove bread from oven and let cool
  • Noonish – Bread is ready!

Of course, this is just a sample timeline. You can play around with the timing if you prefer to do the bulk of the work on Day 2 later in the day. Just means you would need to get your starter going later in the evening on Day 1, and that your bread won’t be ready on Day 3 until a bit later. Just make sure that your overnight rise in the fridge at the end of Day 2 is at least 12 hours. I wanted to show you a sample timeline so you would see where the bulk of the work is, and that it’s really not too overwhelming, once you get the rhythm of it. Obviously, you’ll want to have a large chunk of time on Day 2 for all that kneading and folding business. On Day 1 there is hardly any hands-on time at all, and on Day 3 just a bit more of hands-on time.

Notes:

Flour is important! For this recipe, since it is a King Arthur Baking Company recipe, I use their flour. Their unbleached all-purpose flour has 11.7% protein, so it is ideal for breads. I also use their whole wheat flour. I have not tried this recipe with a different all-purpose flour, but when I do, I will update my post to to let you know how it goes.

Use a scale.  For consistently good results with bread making, it is important to weigh your ingredients. I never used to do this, and my results were not consistent. Not only that, I would avoid recipes that had measurements in grams instead of cups. So I missed out on a lot of great recipes. You can find good digital kitchen scales at kitchen stores or online, or if you are lucky, you can find one through your Buy Nothing group like I did.

Size of loaf:  If you have a dutch oven, but it is a bit smaller, you might want to make a slightly smaller recipe. If you go to the original recipe, just halve it and you will get a smaller loaf. Keep in mind that I did increase the amount of salt in the recipe, so if you are calculating, I put in 2 grams of salt per 100 grams of flour. So for a full recipe I would use 18 grams of salt (about 3 teaspoons), so 9 grams ( 1 1/2 teaspoons) for a half recipe. Remember, I did a 2/3 recipe, (thus the 2 teaspoons salt). I wanted a big loaf to make all of my work worthwhile!

Don’t have a dutch oven?  If you don’t have a dutch oven, no problem. The original recipe doesn’t call for one. You can bake your bread on a baking stone or on a baking sheet. I followed the recipe exactly the first time I made it, and used my baking stone. The bread came out great, but for me, it comes out even better when I use my dutch oven. The closed dutch oven is great for retaining steam, which makes for a better rise and lighter, crisper crust. And the ice cube trick (thanks to my friend Sarah) creates even more steam. Please refer to the original recipe for tips on how to bake this bread on a baking sheet or baking stone.

Don’t like the three day process?  Guess what? The original recipe has you making bread from beginning to end all in one day. That is assuming you have a large amount of starter ready to go. Instead of doing an overnight rise, you just let your prepared loaf rise for 2 1/2 hours on the counter (no fridge), then bake! For me, I like what the overnight rise does for the flavor of the bread (more sourdough tang, while still subtle), and I like the flexibility I have on Day 3 to bake the bread when I want to, earlier in the day. And I really love playing around with scoring, which is much easier on cold dough!

Finally:  This is an individual process. What works for me might not work for you. I played around with a lot of recipes, and then repeated the recipes using different techniques until I found what worked well for me. I read countless blogs and watched a ridiculous number of YouTube videos and read a gazillion recipe reviews, and asked my sourdough baking friends endless questions about what worked for them. What I ended up with was definitely my own thing. What works with my hands, my flour, my spirit, in my kitchen. So I encourage you to have fun with the process, and don’t give up! My first couple of loaves were dense and not at all what I wanted. And I had several other flops. We ate them all, of course, because anything toasted and buttered suddenly becomes irresistible. And the house regularly smells like wild yeast and freshly baked bread. And that is a good thing.

IMG_7118


Posted in Fun in the kitchen!, Yeasty Things | 1 Comment

Sourdough: Part One!

IMG_6933

Well, I did it. I jumped on the sourdough bandwagon. I wanted to find out what all the fuss was about, why everyone was going nuts for sourdough. My friend Sarah, whom I met through my Buy Nothing group, offered me some sourdough starter, and I was off and running.

IMG_6579

And I have to admit, there is something really exciting about creating a beautiful loaf of bread with nothing but flour, water, and salt. After all, the starter is just flour and water that has fermented. I find myself feeling excited about getting up in the morning to see how much my starter has risen, examining the bubbles and smelling the tang. Magic!

IMG_6672

And the thrill of pulling a loaf out of the oven and seeing how much it has risen, and what the design ends up looking like.

IMG_6503

And of course, cutting into the loaf and admiring your handy work.

IMG_6581

One of the things that made me nervous about sourdough was the idea of having to feed a starter every day, and then have a lot of discard to either throw away or have to use with sourdough discard recipes. That sounds like a lot of work!

But oh, the beautiful loaves of bread!

IMG_6709

So I needed to figure out a way to be able to make sourdough bread and have a very low maintenance starter. VERY low maintenance starter. I played around with amounts of this or that, and finally came up with a great solution for me – a starter with NO discard that I can keep in my fridge, and don’t have to feed it! And it turns out that it’s already a thing. It’s called the “scrapings” method. Or at least that’s what Jack says. I really enjoy watching Jack’s videos, and highly recommend checking them out. Don’t get me wrong; I will sometimes purposefully make extra starter so that I have discard to make fun recipes with.

But it’s really the traditional artisanal loaves of sourdough I am excited about.

IMG_6638

Okay, so are you ready? Let me preface what’s about to come with this: I am not an expert. Not by any stretch of the imagination. I just have come up with something that works for me. And my schedule. Maybe it will work for you too.

I use a 16 ounce wide mouth canning jar, straight up and down, no curves, to store my starter. And my starter is from 6 to 10 grams or so (between a teaspoon and a tablespoon) at any given time. Yep. that’s right. And I keep the jar in the fridge. Lately I’ve been making bread a couple of times a week, but I’m sure the starter can go longer in the fridge, like at least a week or two. And the jar with starter in it looks like this.

IMG_6641

When you look at sourdough bread recipes, they can call for hundreds of grams of starter. So how do I go from six grams of starter to 300 grams of starter? It requires a bit of planning, but here is what I do. And this is for my latest favorite recipe. I take my jar of starter scrapings out of the fridge in the late afternoon or evening the day before I want to make my recipe.

IMG_6642

Yep, this is what my starter looks like. Scrapings!

I add 60 grams of room temperature filtered water and 60 grams of all-purpose flour.

IMG_6645

I weigh everything!

And I mix it very well.

IMG_6646

If I put 62 grams of water by accident, no big deal, I just put 62 grams of flour. It’s important that you put the same amount of flour and water. (And by “amount”, I mean weight. I strongly suggest measuring by weight. 60 grams of flour is about a half cup of flour, while 60 grams of water is about 1/4 cup of water, so it’s confusing. A kitchen scale will make all of this much easier, I promise.) I put a rubber band around the jar at the level of the starter (about 126 to 130 grams) so I can keep track of how much it rises. I put a lid on the jar, but just lightly, and leave it on my kitchen counter overnight.

IMG_6647

With this one I added 70 grams each of water and flour… close enough.

The next morning it might look something like this, just about doubled in size.

IMG_6670

Almost doubled in size, with bubbles.

Now I might want my starter to be a bit more vigorous, so I could wait until it has almost tripled in size, which might take a few more hours.

IMG_6672

Almost tripled in size, with lots of bubbles.

At this point, the starter will be bubbly all over, and will have a dome on top. This is perfect – ripe starter. It’s important to keep an eye on it so it doesn’t go too far. When it has gone too far, the starter begins to collapse. No more dome. And every starter goes at its own pace, so mine might rise quicker than yours, or vice versa, and it also can depend on the temperature in your kitchen: warmer kitchen = quicker rise blah blah blah… so just keep an eye on it. You will have the best luck if you catch it somewhere between doubled and tripled in volume. Just doubled is fine too. You just want to see an increase in volume and bubbles. Lots of bubbles.

Now, remember that for my recipe, I need 300 grams of starter, and I only have 145 grams, so here is what I do next. I scoop out about 105 grams of starter into a larger container. I have a crock that I use, but you can also use a larger jar or two jars. My original jar has about 35 grams of starter left in it. I scrape out most of that into another jar labeled “discard”, or you can put it in your compost bin. So I have my original jar of starter that now just has the scrapings, about 6 to 10 grams. I put a lid tightly on it and keep it in the fridge. I also put the discard in the fridge for another use. Now back to the crock that has 105 grams of ripe starter in it. I add 105 grams of room temperature filtered water and 105 grams of all-purpose flour. I always like to have a little extra just in case.

IMG_6980

105 grams starter + 105 grams water + 105 grams all-purpose flour

I mix it up really well, and put a loose fitting lid on it. The proportions of ingredients in this starter are different than the first starter, because now we have equal amounts of starter, flour, and water. This will rise much quicker than the first starter, so it should become “ripe”… somewhere between doubled and tripled in size, in about six hours. Because I can’t see the levels really well in this crock, I measure with a tape measure to get a better idea of the rise. But that’s just me.

IMG_6981

There is freshly mixed starter at the bottom of the crock.

Now about six hours later.

IMG_7005

Ready to go!

So here’s the deal. You have 300 grams of ripe starter ready to go for your sourdough bread recipe – hooray! And you have your jar of scrapings in the fridge that you can pull out next time you need starter for another recipe. Any extra (discard) can just go in another jar in your fridge, until you have enough to make something interesting, like sourdough English muffins, or sourdough maple walnut bread, etc. Or you can just throw out the discard, which isn’t much at all using the scrapings method. When you feel ready, check out my Sourdough: Part 2! post for my latest favorite sourdough bread recipe.

What if I need more than 300 grams of starter? If you need more than 300 grams of starter, just adjust your amounts of flour and water. For example, you have a recipe that calls for 450 grams of starter. For your first starter build, when you are using your scrapings, add 80 grams of flour and 80 grams of water. You will end up with 160 grams of starter. Now you have enough for your second build: 160 grams of starter + 160 grams of flour + 160 grams of water = 480 grams of starter. And so on.

You might ask what the difference is between the starter in the fridge and the discard in the fridge. Well, there is no difference at all. Except that the starter is the thing that you keep, and the discard is what you throw out or use in discard recipes. Or you can give the discard to a friend, and now they can start making sourdough bread. You still have your jar of scrapings. If you want absolutely NO discard, just be precise with measuring. In other words, you start out with 6 to 10 grams of starter (your scrapings), and you add 52 grams of water and 52 grams of flour. When it is time to scoop out starter for your second build, you will have about 104 grams of starter to mix with 104 grams flour and 104 grams water. Are you following? You now have fresh scrapings – about 6 to 10 grams of starter – close jar with a tightly fitting lid and put back in the fridge. And you end up with 300 or so grams of starter for your recipe. I like to have some wiggle room, so the extra 12 grams means some of the starter gets stuck on the spatula and some gets stuck inside the crock, and I still have 300 grams for my recipe. Whew!

So, hopefully this has been helpful. In summary, to maintain your sourdough starter (get some from a friend… just a tablespoon!!), and make enough starter for a bread recipe, you will need a 16 ounce glass jar that is straight up and down (with a tight fitting lid that can also just be put on loosely), a larger container for building starter (or just use two jars, but for me that got tedious), a kitchen scale that has grams, and a one-piece spatula for easy clean up. And of course, flour and water!

IMG_7109

Notes:

  1. Choose a good quality all-purpose flour, and stick with it for consistent results. For bread baking, I love King Arthur flour, and I also love our local Cairnspring Mills flour.
  2. If you have containers but don’t have lids, no worries. You can always lightly cover the top of your containers with a cloth napkin while your starter is on your counter. For tightly fitted covering in the fridge, you can use plastic wrap and a rubber band.
  3. For easy clean up, be sure to put anything that you need to wash in cold water right away to soak, since when starter dries, it becomes like glue, and is difficult to wash off. Using warm or hot water will only make the starter more gluey, so definitely use cold water.
  4. Don’t put discard down your drain. If you have discard, get as much of it in the compost bin as possible. A bunch of flour and water going down your kitchen pipes is not a good idea… remember, it is like glue.
  5. You don’t have to wash your original starter jar very often, you know, the one with the scrapings. Just scrape everything down to the bottom of the jar and pop it back in the fridge with a tightly fitting lid. After a while, if you really really want to wash that jar, just transfer the scrapings to a new jar and wash the old one. Soak it in cold water first!
  6. It’s helpful to know the weight of your containers. Write it on a piece of tape and put it on the bottom of your container.

Update: 3/16/21: I have written a new post about sourdough starter, in case you do want to have discard, and it’s what I’m doing lately.

IMG_6933


Posted in Fun in the kitchen!, Yeasty Things | 4 Comments

Chipotle Dry Rub

IMG_6470

Last weekend, we all went to visit Matthew’s mom. It was her birthday, and we all masked up and sat outside with her to celebrate.

IMG_6462

We took the masks off for the picture! Gramma is in the back at a safe distance.

We ended up staying a lot longer than anticipated, so I had to whip up a quick dinner when we got home, and chicken was on the menu. I found a recipe for chipotle dry rub on allrecipes, and it is so good! The only thing I did differently was to reduce the amount of chipotle so that my family would be able to eat it. And this is the moment where I realize that my girls will actually eat the chicken I make, because it is so good! This is a big deal. Trust me. When Mara was little, she used to say “I’m a vegetarian of that” whenever I would serve chicken for dinner. Well, she’s not a vegetarian of that anymore!

IMG_6469

Chipotle Dry Rub

(Adapted just barely from allrecipes)

  • 2 Tablespoons light brown sugar
  • 1 Tablespoon sea salt
  • 1 Tablespoon smoky paprika
  • 1/2 teaspoon chipotle chile pepper
  • 1 Tablespoon ground cumin
  • 1 Tablespoon dry mustard

Just mix all ingredients together and keep in an airtight jar. I like to write the ingredients on the jar so that I remember how to make it when it’s running low.

Here’s how I use it: In a glass bowl, I toss the chicken pieces in the spice mix until they look well coated. I then add olive oil to coat. I cover with plastic wrap and let sit for about a half hour while the grill heats up. During that half hour, I make rice. Then, once the chicken is on the grill, with about five minutes to go, I sauté a green veggie, usually broccoli because my girls will eat it, and everything is ready and hot all at once. This takes about 45 minutes total. I love having quick dinners in my repertoire!

IMG_6463

So easy to make!

IMG_6464

Easy marinade.

IMG_6469

Keep the dry rub your cabinet so it’s ready when you need it.

IMG_6470

Quick summer dinner!


Posted in Busy-day meals, Fun in the kitchen! | Leave a comment

Orange Fennel Poppy Seed Cake

IMG_6386

Okay, I know I just wrote about lemon pound cake, and even mentioned in that post about substitutions so that you could make this instead… so why am I devoting more time to this? Well, because Millie loves this cake. And it was magically created because I ran out of lemons and decided to get creative. And there might be some of you that don’t like lemon, and didn’t even bother to look at the lemon pound cake post, but will be curious about an orange cake. And of course there have been more tweaks making it even better. And did I mention fennel? Finally, I think this cake is so yummy that it deserves to be showcased. So there you have it.

Orange Fennel Poppy Seed Cake

(Adapted from Lauren Schaefer’s recipe)

  • 1 large navel orange, zested and juiced
  • 1 cup granulated sugar
  • 1 cup unsalted butter at room temperature
  • 3 large eggs at room temperature
  • 1 3/4 cups (8 ounces) all-purpose flour
  • 1 teaspoon baking powder
  • 1 teaspoon sea salt or kosher salt
  • 3 Tablespoons poppy seeds
  • 1/2 teaspoon fennel seeds, freshly ground
  • 2 Tablespoons powdered milk (optional)
  • 6 Tablespoons (3 fluid ounces) whole milk at room temperature
  • 5 Tablespoons granulated sugar (for the glaze)
  1. Preheat oven to 350°.
  2. Butter an 8 1/2″ x 4 1/2″ loaf pan. Line pan lengthwise with parchment paper, leaving a 2″ overhang on both sides.
  3. Using a Microplane (this is the fine grater that I normally use to grate Parmesan cheese), grate the zest of 1 large orange into your mixing bowl. Juice the orange and set aside.
  4. Grind the fennel seeds and set aside (I use a mortar and pestle).
  5. Add 1 cup sugar and 1 cup room temperature unsalted butter to your mixing bowl, and cream together with the zest on high speed for about 5 minutes, or until the mixture is light and fluffy. If you are using a stand mixer, you might need less than 5 minutes.
  6. Add eggs, one at a time, mixing well and scraping down the side of the bowl as necessary. Continue to beat for another minute or two until the mixture is fluffy.
  7. In a separate bowl, whisk together the flour, baking powder, and salt. If you want to go crazy, sift these ingredients together.
  8. Whisk the poppy seeds and ground fennel into the flour mixture.
  9. Add half of the flour mixture to the wet ingredients and combine on low speed just until the flour is incorporated.
  10. Add the milk and mix on low speed just until incorporated.
  11. Add the rest of the flour mixture and mix on low speed, yep, you got it, just until the flour is incorporated. Using a rubber spatula, swipe around the edge of the bowl quickly once or twice, making sure that everything is uniform and well mixed. Do not over-mix!
  12. Pour batter into prepared loaf pan and smooth the top with the rubber spatula.
  13. Place in preheated 350° oven on middle rack and bake for 45 to 55 minutes. I like to rotate the pan at about 25 minutes into the baking. Start to test for doneness (is that a word?) at 40 minutes by sticking a toothpick in the center. Mine takes about 50 minutes, but all ovens are different. Toothpick should come out clean when cake is ready… might have a crumb or two on it, but no wet batter.
  14. While cake is baking, make the glaze by mixing 5 Tablespoons granulated sugar with 4 Tablespoons orange juice in a small sauce pan over low heat, mixing until the sugar has dissolved. Remove from heat as soon as the sugar has dissolved and set aside.
  15. When cake is done, place the cake (still in its pan) on a cooling rack and let cool for ten minutes. After ten minutes, poke holes into the top of the cake using a wooden skewer, and brush the cake top with almost all of the glaze. Be patient and just keep brushing the glaze onto the cake. Next, pull the cake out of the pan using the parchment paper and brush the sides of the cake with the remaining glaze. Place cake back in its pan and let it cool completely before serving. Enjoy!

Notes: I use Gold Medal all-purpose flour for this cake, since it has a lower protein content, making the cake nice and tender. The addition of the powdered milk adds a richness to the cake that is lovely, but you don’t have to add it if you don’t have any handy.

IMG_6314

Prepare the pan.

IMG_6313

Zest the orange.

IMG_6335

Juice the orange.

IMG_6327

Crush the fennel seeds.

IMG_6316

Ready to mix zest, butter, and sugar.

IMG_6320

Make sure it is nice and fluffy!

IMG_6178

Add eggs one at a time.

IMG_6322

Nice and fluffy again!

IMG_6324

Sift the flour, baking powder, and salt (or you can whisk).

IMG_6325

But I’m starting to believe that sifting makes a difference!

IMG_6328

Add the poppy seeds and ground fennel.

IMG_6329

Whisk together.

IMG_6331

Add half of the dry ingredients to the butter/sugar/egg mixture.

IMG_6332

Don’t over mix!! Mix on low until just blended.

IMG_6330-1

Don’t forget to add and mix in the milk!

IMG_6331

Then add the other half of the dry ingredients.

IMG_6334

Put batter in prepared pan and smooth the top.

IMG_6336

After cake has cooled for ten minutes, poke holes and glaze.

IMG_6337

Brush the sides too.

IMG_6386

Enjoy!


Posted in Comfort Food, Desserts, Fun in the kitchen! | 3 Comments

Lemon Pound Cake

IMG_6195

Recently, Millie and I made pound cake. Millie has a group she bakes with once a week. Each week one kid picks a recipe, and teaches everyone how to make it. This last Sunday the recipe was pound cake. I don’t think I’ve ever made pound cake. And I don’t think I was ever really crazy about pound cake. It seemed like an afterthought… “We don’t have dessert, but we do have this pound cake…”  But I have to admit, there is something homey and comforting about the idea of pound cake. And if ever we all need some comfort, it is now.

IMG_6182

Doesn’t this make you feel all warm and fuzzy inside?

So I became a bit obsessed with pound cake, and I started imagining a certain kind of pound cake…what I might do differently… this happens to me a lot. What I wanted was a dreamy, velvety pound cake with a pronounced lemon flavor. So I began to do some research, and found a recipe from Bon Appétit by Lauren Schaefer that looked like just the thing.

IMG_6168

My first attempt.

Although the cake was darn near perfection, both Millie and I agreed, the cake flavor, although yummy, needed a bit more lemon oomph, and I felt that the cake was almost, dare I say it, too fluffy? It is a pound cake after all. So I tweaked the recipe a teeny bit, doubling the amount of lemon zest for more lemon zinginess, reducing the amount of baking powder to reduce the fluffiness (forgive me), and adding a bit more salt, to enhance the overall flavor. The result was just what I was looking for. The cake has a velvety texture, great lemon flavor, and I got the quintessential volcano running along the top of the loaf, which didn’t happen with the original recipe.

IMG_6197

This cake is not an afterthought!

Lemon Pound Cake

(Adapted from Lauren Schaefer’s recipe)

  • 4 lemons
  • 1 cup granulated sugar
  • 1 cup unsalted butter at room temperature
  • 3 eggs at room temperature
  • 1 3/4 cups (8 ounces) all-purpose flour
  • 1 teaspoon baking powder
  • 1 scant teaspoon sea salt or kosher salt
  • 6 Tablespoons (3 fluid ounces) whole milk at room temperature
  • 1 1/2 cups powdered sugar (for the glaze)
  1. Preheat oven to 350°.
  2. Butter an 8 1/2″ x 4 1/2″ loaf pan. Line pan lengthwise with parchment paper, leaving a 2″ overhang on both sides.
  3. Using a Microplane (this is the fine grater that I normally use to grate Parmesan cheese), grate the zest of 4 lemons into your mixing bowl. Juice the lemons and set aside.
  4. Add 1 cup sugar and 1 cup room temperature unsalted butter to your mixing bowl, and cream together with the zest on high speed for about 5 minutes, or until the mixture is light and fluffy. If you are using a stand mixer, you might need less than 5 minutes.
  5. Add eggs, one at a time, mixing well and scraping down the side of the bowl as necessary. Continue to beat for another minute or two until the mixture is fluffy.
  6. In a separate bowl, whisk together the flour, baking powder, and salt. If you want to go crazy, sift these ingredients together.
  7. Add half of the flour mixture to the wet ingredients and combine on low speed just until the flour is incorporated.
  8. Add the milk and mix on low speed just until incorporated.
  9. Add the rest of the flour mixture and mix on low speed, yep, you got it, just until the flour is incorporated. Using a rubber spatula, swipe around the edge of the bowl quickly once or twice, making sure that everything is uniform and well mixed. Do not over-mix!
  10. Pour batter into prepared loaf pan and smooth the top with the rubber spatula.
  11. Place in preheated 350° oven on middle rack and bake for 45 to 55 minutes. I like to rotate the pan at about 25 minutes into the baking. Start to test for doneness (is that a word?) at 40 minutes by sticking a toothpick in the center. Mine takes about 50 minutes, but all ovens are different. Toothpick should come out clean when cake is ready… might have a crumb or two on it, but no wet batter.
  12. While cake is baking, make the glaze by mixing 1 1/2 cups powdered sugar with lemon juice until it reaches the consistency you like. Start with two tablespoons of lemon juice, and add little by little after that. Set glaze aside. Keep the remaining lemon juice handy.
  13. When cake is done, place the cake (still in its pan) on a cooling rack and let cool for ten minutes. After ten minutes, poke holes in the cake using a wooden skewer, and brush the cake top with the freshly squeezed lemon juice (NOT THE GLAZE). If you want more lemon zinginess, pull the cake out of the pan and brush the sides and bottom of the cake with more lemon juice, but do not turn the cake upside down. Place it back in its pan and let it cool completely.
  14. When cake is completely cool, drizzle or spoon glaze over the top. Let glaze set for at least ten minutes before serving. This cake is even better the next day, if you can wait that long.

Note: A nice variation of this cake is an orange fennel poppy seed cake. Use orange zest instead of lemon zest, and orange juice instead of lemon juice (I use one large navel orange). Add about 3 tablespoons poppy seeds and 1/2 teaspoon crushed fennel seeds to the dry ingredients.

Below I will include pictures of the process.

IMG_6173

Buttered pan with lengthwise strip of parchment paper.

IMG_6174

Zested lemons.

IMG_6221

Juice the lemons then strain the juice.

IMG_6175

Ready to add room temp butter and sugar to the zest.

IMG_6176

My helper :).

IMG_6224

After beating the butter, sugar and zest until fluffy.

IMG_6178

3 eggs at room temperature.

IMG_6225

After beating in eggs one at a time – until fluffy.

IMG_6179

Dry ingredients. Weighing your flour is best!

IMG_6180

After adding in half the dry ingredients.

IMG_6330

Add the milk.

IMG_6180

Then add the other half of the dry ingredients. Don’t over mix!

IMG_6226

Put batter in prepared pan.

IMG_6181

Smooth the top. Bake for 45 to 55 minutes.

IMG_6182

Tah-dah! Let cool in pan for ten minutes.

IMG_6229

After ten minutes, poke holes in cake with wooden skewer and brush top with lemon juice.

IMG_6185

My helper pulls out the cake and brushes sides and bottom of cake with juice as well.

IMG_6183

Put cake back on parchment and put back in pan to let cool completely.

61274438318__E86613D2-828C-4C08-BE67-ED871FC45704.fullsizerender

Getting ready to glaze… ignore the skewer.

IMG_6338

Remove cake from pan and parchment and glaze over cooling rack.

IMG_6197

Let glaze set for at least ten minutes before serving.

IMG_6195

Enjoy!


Posted in Comfort Food, Desserts, Fun in the kitchen! | 1 Comment

Challah

IMG_5837

This past weekend was Mother’s Day weekend, and there were so many things that made it perfect. First of all, it was warm… no, hot and sunny all weekend, which meant wearing shorts and t-shirts and having all the doors and windows open and hanging out on the deck. This just never happens in May in Seattle, so it was a gift!

IMG_5794

We dined al fresco.

And every year, Matthew, Mara, and Millie plant flowers for me that I can enjoy practically all year round. It’s the best gift ever.

61083671772__1537C867-A007-4AC4-8A49-6DACBCD9BD7E

And we played “Farkle”, which is super fun. I love family game night.

IMG_5811

And the girls made beautiful cards for me. Notice the pop-up card in the middle is a replica of our kitchen, with cinnamon rolls cooling on the counter.

IMG_5817

I am a lucky mom.

We also watched “The New Legends of Monkey”, which is a new favorite show of ours. We did so many of our favorite things, and we did them together. It felt like the Best Mother’s Day Ever, because I got to spend it with my family. Oh, and one other reason it was the Best Mother’s Day Ever? I made the Best Challah Ever!!!

IMG_5849

Oh my!

On Sundays, Matthew makes french toast for brunch, and he uses Challah for it. Sometimes the stores and bakeries are out of it, so we have to go without. So for a long time now, making my own Challah has been on my list. But I have felt intimidated by it. I mean, the braiding…three-strand, four-strand… six-strand!! So I started out by experimenting with just the braiding part, using the white bread recipe that comes out so nicely.

IMG_5614

White bread with six-strand braids.

This bread came out so beautiful and delicious. But it was not Challah. My work was not yet done. I started doing research, and asking around for friends’ favorite recipes, and looking at a gazillion different blog posts, and checking on all of the Challah recipes in my favorite cookbooks. And I decided to try King Arthur’s Classic Challah.

IMG_5818

There are notes like this all over my kitchen…

The first time I made it, the dough was dense and dry, unlike any other bread dough I had worked with, and I had a hard time kneading it, but it was easy to work with for the braids. And the bread turned out nicely, although just a tad dense. I read all the reviews on the recipe, and a lot of reviewers complained about the dough being too dry, so I took their advice and tried adding more water the second time I made it.

Adding more water did make the dough easier to knead, but then made the braiding part very difficult. It was kind of a disaster, the dough being too soft, and the bread didn’t come out as well. So I went back to the recipe as it was. And watched King Arthur’s Isolation Baking Show with Jeffrey Hamelman, Certified Master Baker, and I quote him here “Challah dough should be a well developed, dry dough”… OHHHHHH!!!! So the dryness of the dough that reviewers were complaining about? It is supposed to be that way!

IMG_5686

It’s supposed to look like this!

So I made the recipe exactly as stated, and ended up with a beautiful, but a tad dense loaf. I weighed all of my ingredients, and even used fancy flour… uh oh. Maybe the fancy flour caused the denseness? So on Mother’s Day, I once again made Challah, but used King Arthur ‘s Unbleached All-Purpose flour. The result? Exactly what I was looking for!!! The dough was easy to work with, and the finished product was soft, slightly fluffy, but not overly so. It was feathery; that’s the only word I can come up with to describe it. Pure perfection.

IMG_5853

We all flipped out when we tried this one.

Here is something that I’ve known for a while now. Flour matters. Maybe that’s why I have at least eight different kinds of flour in my kitchen. While one flour will be magic for one recipe, it can completely ruin another. And here’s the bugger about it: there are differences (sometimes big ones) between all-purpose flours!!!! Yes, I have three different kinds of all-purpose flour right now. So if you are making a recipe that calls for all-purpose flour, and your friend made that recipe and had stellar results, and your results are less than stellar, it might be because of the flour! Of course, there are so many factors involved, but flour is a big one. So here is King Arthur’s Classic Challah recipe. I will include a picture tutorial at the bottom that will include all kinds of details that might be helpful. I have made both the six-strand braid and the four-strand braid.

Update 3/16/21: I have a newer post for challah that is a little fluffier than this one. So, depending on how you like your challah, one of these recipes might work better for you than the other. Both recipes make wonderful challah.


King Arthur’s Classic Challah

(Original recipe here)

Makes two smaller loaves, or one large loaf.

Dough

  • 1/2 cup (113g) lukewarm water (around 100° or so)
  • 6 tablespoons (74g) vegetable oil
  • 1/4 cup (85g) honey
  • 2 large eggs
  • 4 cups (482g) King Arthur Unbleached All-Purpose Flour
  • 1 1/2 teaspoons salt
  • 1 tablespoon instant yeast

Glaze

  • 1 large egg, beaten with 1 tablespoon cold water

To make the dough:

  1. Mix the water, oil, honey, and 2 eggs in a large bowl.
  2. In a separate bowl, whisk together the flour, salt, and instant yeast.
  3. Pour the flour mixture into the wet ingredients and mix with a wooden spoon or Danish dough whisk until dough comes together; it will be dense and maybe a bit dry.
  4. Fold the dough in the bowl with a spatula or bowl scraper until dough is workable, then knead by hand in the bowl, rotating the dough after each fold. Continue to knead for about 8 minutes; dough will be smooth and firm.
  5. Cover bowl with plastic wrap and let rise for two hours.
  6. Transfer dough to work surface (can be dusted lightly with flour).
  7. Depending on what kind of braid you are doing, and how many loaves, divide dough into number of pieces you need. I like to make two smaller loaves, so I start by dividing in half, and then into smaller pieces.
  8. Braid loaf (or loaves) and place on parchment lined baking sheet. Cover with greased plastic wrap and let rise for 90 minutes to two hours at room temperature. Loaves will be puffy and almost jiggly. Preheat oven to 375° near the end of the rise time and place rack in lower third of oven. You’ll want your oven to preheat for at least twenty minutes so there are no hot spots.
  9. At the end of the rise time, whisk together one egg and one tablespoon water and brush the glaze onto the risen loaves.
  10. Place baking sheet on a second baking sheet (I turned mine upside down) to keep the bottom of the loaves from burning, and place in lower third of preheated oven.
  11. After twenty minutes, check to see if the loaves are browned enough. At this point, place a sheet of aluminum foil lightly over the loaves to stop the bread from over-browning.
  12. Continue to bake for another 7 to 8 minutes more for two loaves, or 10 to 15 minutes more for one large loaf. Loaf will sound hollow when tapped on the bottom, and instant-read thermometer will register 190°. Don’t over bake!
  13. Remove Challah from oven and let cool on rack.

IMG_5837

And now, some pictures with details!

IMG_5681

Mix lukewarm water, oil, honey, and eggs (I measure and weigh the water and oil).

I like to do all the mixing in a large, wide, shallow glass bowl, because it is easy to get my hand in there later for kneading. Everything stays in the bowl!

IMG_5683

Get your dry ingredients ready (weigh that flour!!!).

IMG_5684

Add dry ingredients all at once (flour, salt, and yeast).

IMG_5685

Stir to combine; dough will seem dry, and that’s okay.

IMG_5686

Now the dough is coming together.

I like to do all the mixing and kneading by hand. It gives me a better sense of the readiness of the dough. I don’t work too hard at it, just a gentle consistent kneading.

IMG_5687-1

Now I start to fold the dough over using this bowl scraper.

IMG_5688-1

The dough begins to firm up as gluten develops.

IMG_5689

Time to start kneading by hand.

IMG_5693

Keep going! 8 minutes! If dough sticks to the bowl, just use scraper or spatula to scrape it back into the dough ball.

IMG_5696

Dough will be strong and elastic. You might even suddenly notice the texture change in your hands.

IMG_5699

Ready to cover and let rise.

IMG_5702

After rising for two hours.

IMG_5703-1

Weigh the dough.

IMG_5704-1

Cut in half for two loaves. I find it easier to make two smaller loaves.

Notice that there is hardly any flour on the work surface. This is important, because you will not be able to successfully roll out the dough into ropes if the dough is sliding around in flour. The original recipe says to work on a lightly oiled surface, but that doesn’t work for me, so I just use a dry surface. The dough has enough oil in it that it doesn’t stick.

IMG_5709

Cover one half of dough. Divide the other half into six pieces. I weight them…

I find that pre-shaping the dough pieces before rolling into ropes makes the rolling out much easier, and the ropes have a very nice consistent shape. There are different ways to pre-shape, but I like this method best.

IMG_5710

Gently pat out the dough. Just slap it a few times.

IMG_5711

Fold top third over and press with fingers.

IMG_5713

Turn piece around and fold over the top third again, pressing with fingers.

IMG_5714

Now fold in half lengthwise and press the seam together.

IMG_5715

Cover the pre-shaped pieces and let rest while you work on the other half.

IMG_5717

Divide into six pieces…

IMG_5718

Pre-shape.

Now you are ready to go back to the first set of six that have been resting. Make room on your work space and get ready to roll ;-).

IMG_5725-1

Start by using one hand and rolling in the middle to desired thickness.

IMG_5728-1

Now switch to two hands and roll and move hands out as you go, lengthening the rope.

IMG_5730-1

Try to get your ropes to the same length, about 14 inches for smaller loaves.

IMG_5731-1

Once ropes are ready, sprinkle the ropes lightly with flour for easier braiding.

IMG_5732-1

Then roll each rope to coat lightly with the flour.

Now, I can’t believe I have pictures for all of this. It kind of makes my head spin, and I’m thinking it will make your head spin as well. Here is the video tutorial I found the most helpful for how to do a six-strand braid. Start watching at about 4 minutes into the video. If you watch from the beginning, you will see that she doesn’t pre-shape her pieces. You might think that is the easier way to go, but trust me. Pre-shaping makes the rolling out so much nicer, and the dough behaves much better. The end result is a beautiful rope without inconsistencies.

IMG_5733-1

Your set up. Heavy container keeps braid stable.

IMG_5733

Number the ropes (in your mind) from left to right. You’ll start with strands 5 and 6.

IMG_5734-1

5 goes all the way over, 6 goes in the middle.

IMG_5734-2

Now re-number the ropes (in your mind) and use strands 1 and 2.

IMG_5735-1

2 goes all the way over, and 1 goes in the middle.

IMG_5735-2

Renumber ropes (in your mind….).

IMG_5736-1

5 goes all the way over, 6 goes in the middle.

IMG_5738-2

Renumber….

IMG_5739-1

2 goes all the way over, 1 goes in the middle.

IMG_5740-1

5 goes all the way over, 6 goes in the middle.

IMG_5741-1

2 goes all the way over, 1 goes in the middle.

IMG_5742-1

5 goes all the way over, 6 goes in the middle.

IMG_5743-1

2 goes all the way over, 1 goes in the middle.

IMG_5744-1

5 goes all the way over, 6 goes in the middle.

IMG_5745-1

Whew!! Pinch the ends together!

IMG_5746-1

Now pinch top ends together.

IMG_5747-1

Braid is loose – that is good as it allows room to rise without distortion.

IMG_5748

Tuck pinched ends under and “plump” the loaf, in other words, do the opposite of stretching it out.

IMG_5750-1

Carefully place loaves on parchment lined baking sheet and re-plump.

IMG_5751

Cover with lightly greased plastic wrap.

IMG_5752

Top with a lightweight tea towel, just for good measure.

At this point, once you have set your loaves aside to rise, you’ll want to set your timer for 90 minutes. At the 90 minute mark, preheat your oven to 375°. It’s a good idea to preheat your oven for a good twenty to thirty minutes so it doesn’t have any hot spots. Now set your timer for another 30 minutes, so that your loaves will rise for a total of two hours.

IMG_5754

After two hours of rising – WOW.

IMG_5756

Mix egg with 1 Tbsp water and gently brush loaves with egg wash. Get into every crack and crevasse.

IMG_5759-1

Take baking sheet with loaves and set it on top of an upside down baking sheet.

Now you will place the loaves on the double baking sheets and set all of it in the lower third of your preheated oven. Let bake for twenty minutes.

IMG_5829

At the twenty minute mark they might look like this.

After twenty minutes, rotate the pan, and place a sheet of aluminum foil loosely over the tops of the loaves to stop them from over-browning. This is called “tenting”. Just set the foil lightly on top.

IMG_5830

Those loaves are so cute peeking out from under the foil.

Let the loaves bake for maybe another 7 to 8 minutes or so. To test for doneness, tap the bottom of the loaf and it should make a hollow sound.

IMG_5760-1

Place loaves on a cooling rack, and marvel at the result of your handiwork.

Making a four-strand braid is very similar to the six-strand braid, but just easier!

IMG_5800

Four strands! Number them from left to right.

IMG_5801

3 goes all the way over, 4 goes in the middle.

IMG_5802

2 goes all the way over, 1 goes in the middle.

IMG_5803

3 goes all the way over, 4 goes in the middle.

IMG_5804

2 goes all the way over, 1 goes in the middle.

IMG_5806

3 goes all the way over, 4 goes in the middle.

IMG_5807

2 goes all the way over, 1 goes in the middle.

IMG_5808

3 goes all the way over, 4 goes in the middle.

IMG_5809

Pinch ends, tuck under, and plump!

So, I did make the recipe with one very large loaf, and here it is.

IMG_5875

I got impatient, and didn’t let it rise long enough during the second rise, so if you are wanting to make one large loaf, please make sure to let it rise for the full two hours for both rises. You can even go a bit longer on the second rise, just to be sure to get a fluffy loaf. I did the six strand braid, rolling out the ropes to about 20 inches.

IMG_5866

I measure the strands.

I was worried it would be unwieldy, but it wasn’t. I just needed a bit more counter space.

IMG_5868

Getting ready.

And no, I’m not going to show you all the weaving….

IMG_5872

One big loaf…

And after rising…

IMG_5873

It’s big, but I could have let it rise even more!

Add egg wash.

IMG_5874

Oops. A little sloppy, but that’s okay.

And done!

IMG_5875

I will say though, I really like making two loaves. You don’t need as much counter space for braiding, you don’t need to worry about extra long rise time, and you have an extra loaf to give to a neighbor or save for french toast.

IMG_5837

On the left is the six-strand braid, and on the right is the four-strand braid.

I hope you have as much fun making this Challah as I do!

IMG_5849


Posted in Dairy-free, Fun in the kitchen!, Yeasty Things | 1 Comment