Whole Wheat Cinnamon Rolls

IMG_1400

A couple of days ago I made a couple of loaves of whole wheat bread. I was trying to make something that would work for sandwich bread, and because I am compelled to experiment, I decided to make one of the loaves a cinnamon whole wheat bread. This is what the bread looked like.

IMG_1355

Now, you can’t completely tell by the photo what a fail this was, but nevertheless, my daughters loved it. I sliced it and toasted it for breakfast for the last few days. Yesterday, my 8-yr-old daughter Millie got to be on stage and play her recorder with a few other classmates with The Seattle Symphony Orchestra. Yes, that’s right. Benaroya Hall was packed with 3rd, 4th, and 5th graders, and about thirty kids got chosen to actually be on stage to perform with the symphony, through the amazing Link Up program. I got to be with her (We chaperones were hiding in the back row.), and it was so electrifying to be on the other side of the conductor. Wow. Just wow. On the bus ride home, I asked Millie, “So, what was your favorite part of the day?”. Millie’s response: “Breakfast”.

Well, I had to laugh. “Really?”, I asked, “What about the symphony?”  “It was a tie”, responded Millie. Now, don’t get me wrong and get all excited about my strange experiment. My kids just really really really love anything that slightly resembles cinnamon rolls. So today, I decided to take the bread recipe and make actual cinnamon rolls with it, not some strange bread that has trouble holding together. I took the recipe, that I found here on Jami Boys’ blog, and combined it with how I make cinnamon rolls, with just a bit of guesswork on rise times, etc. This is what I came up with:

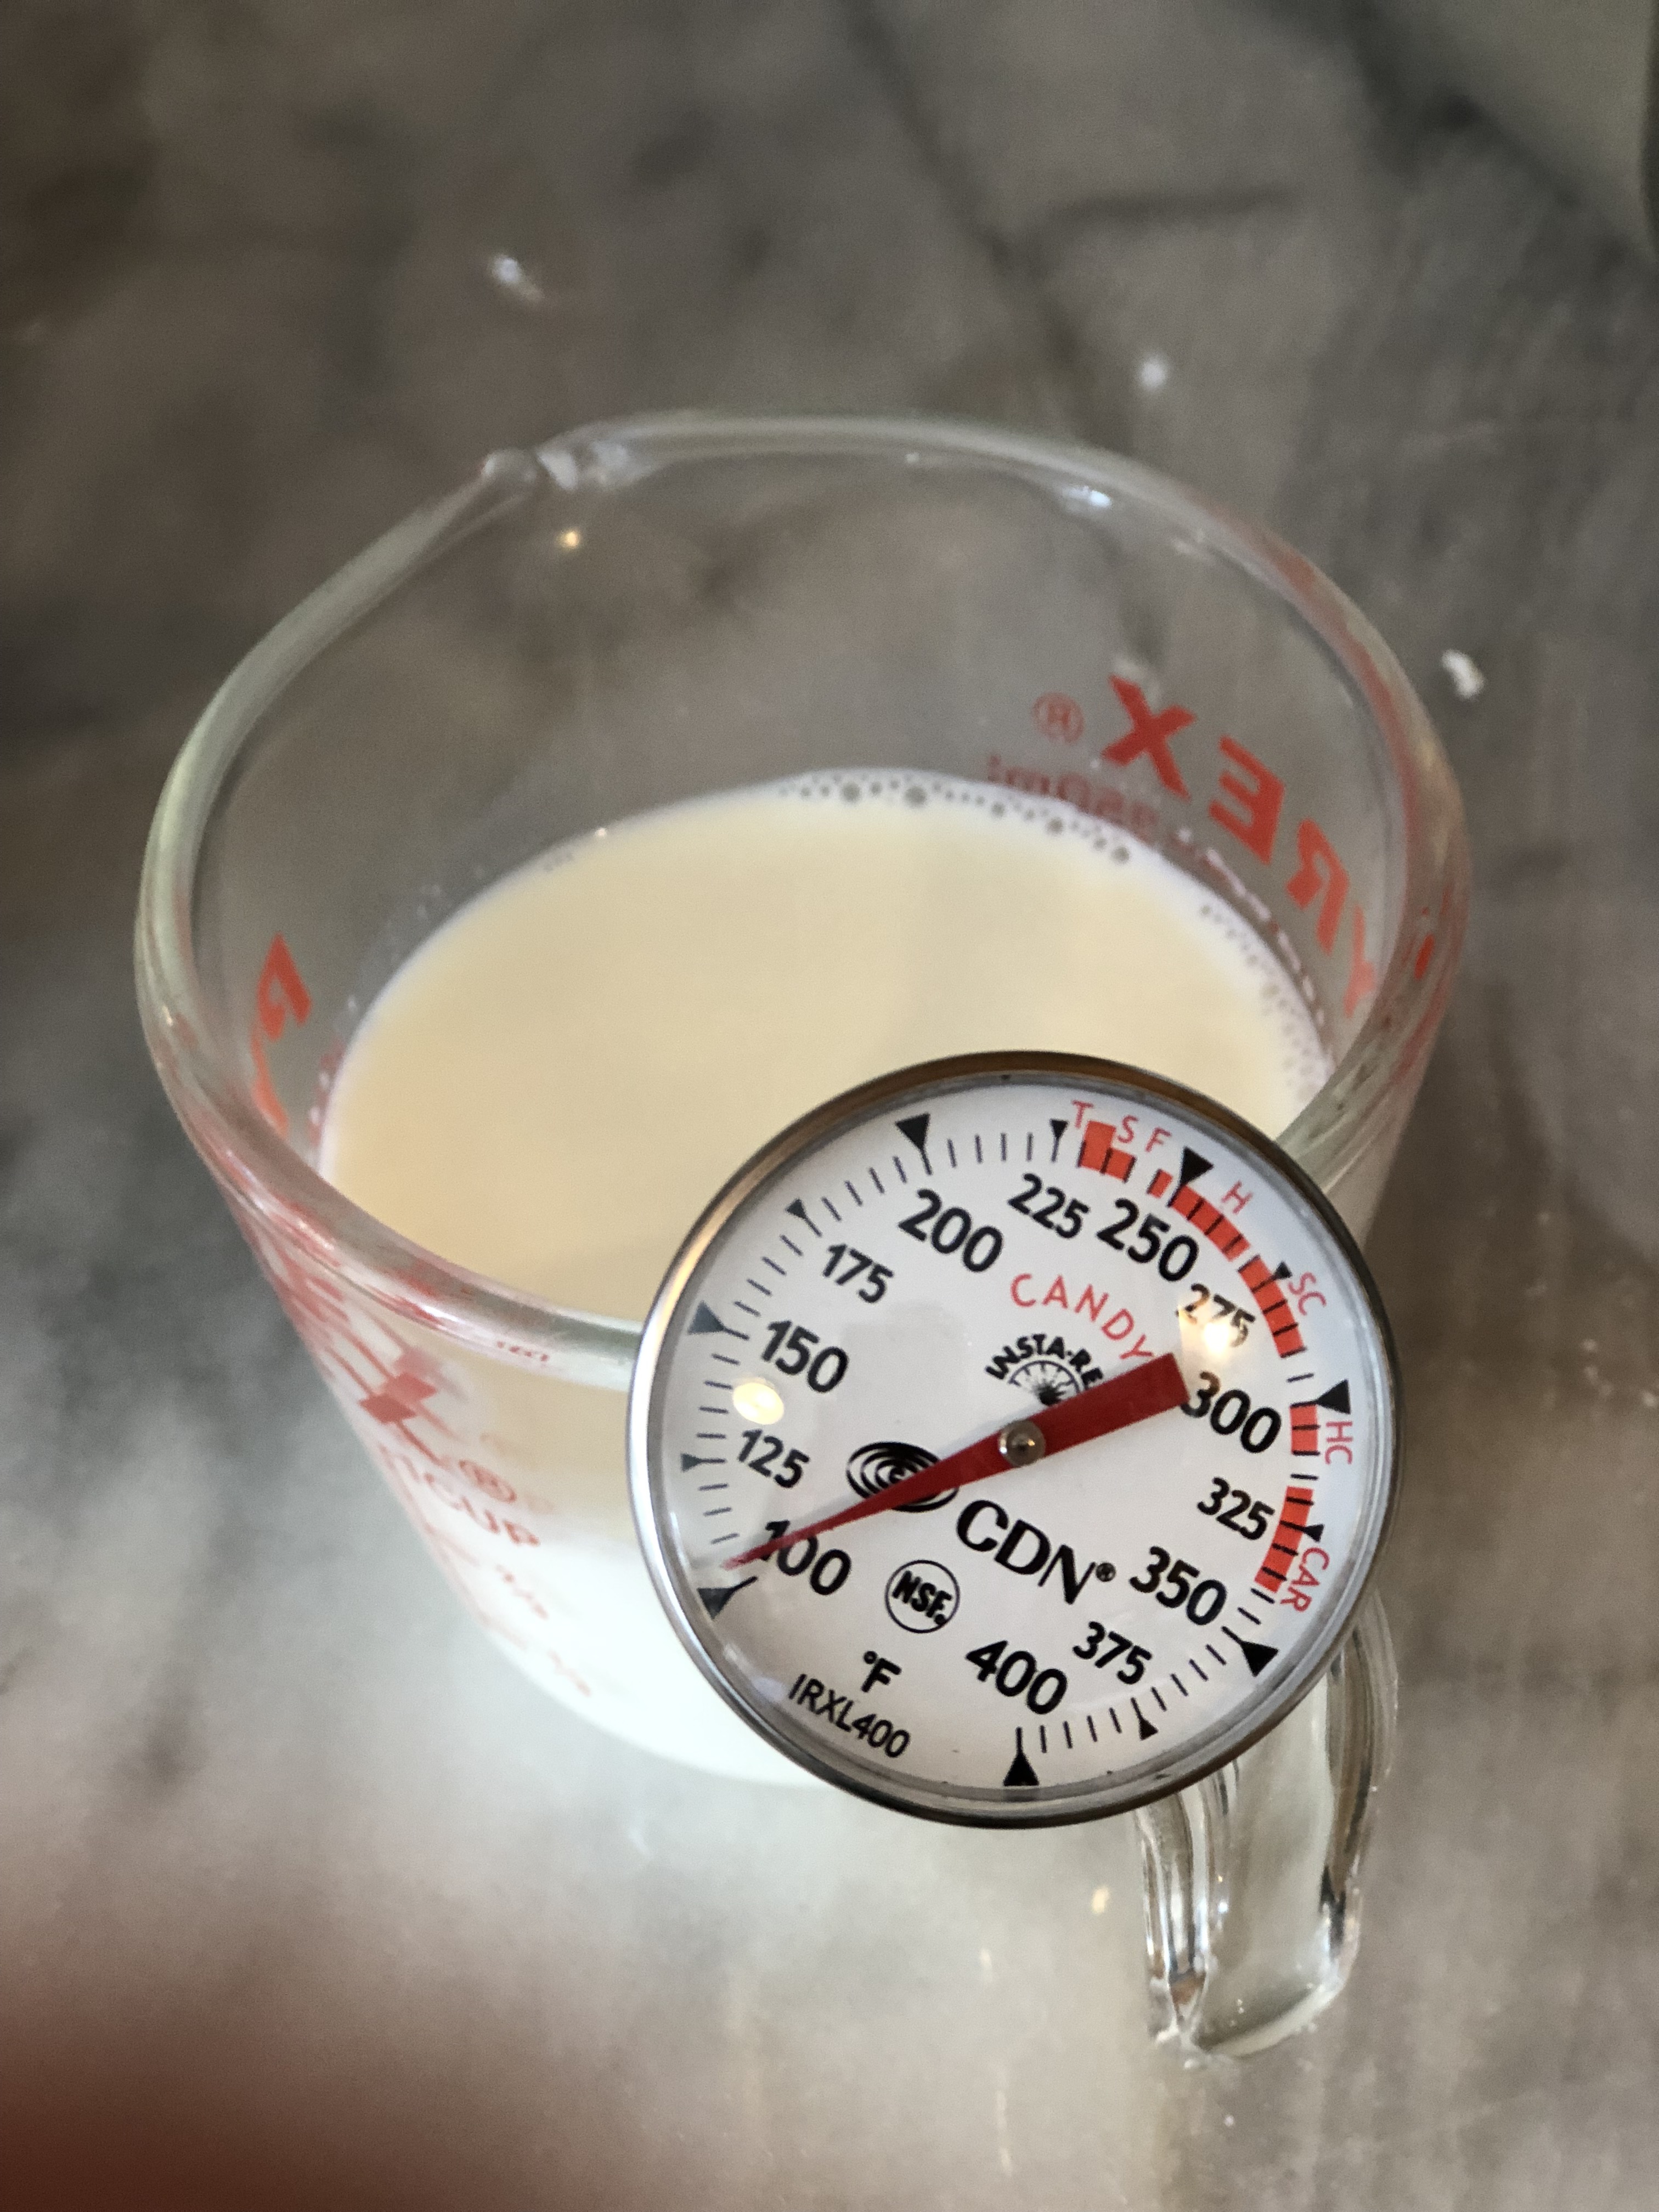
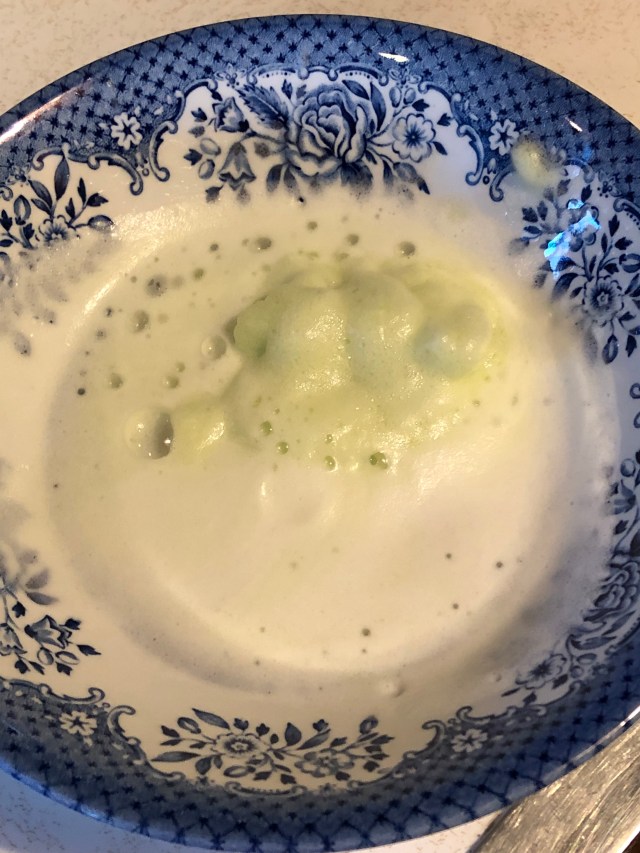
Heat up 2 1/2 cups water to about 110° and pour into the bowl of a stand mixer. Add 1 1/2 tablespoons active dry yeast. The yeast should start to foam a tiny bit pretty much right away. Just a bit.

IMG_1366

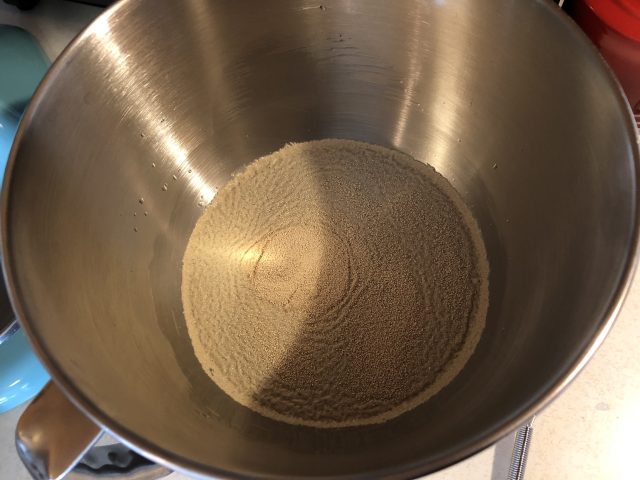
Yeast is my latest obsession.

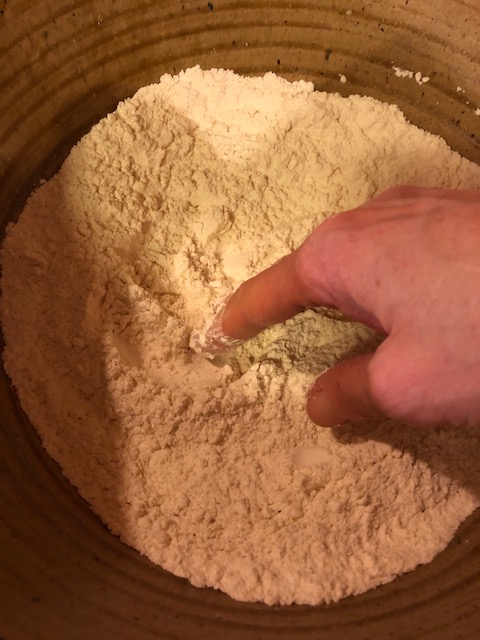
Then add and mix in two cups (9 ounces) white whole wheat flour, and mix until it’s mostly not lumpy anymore.

IMG_1369

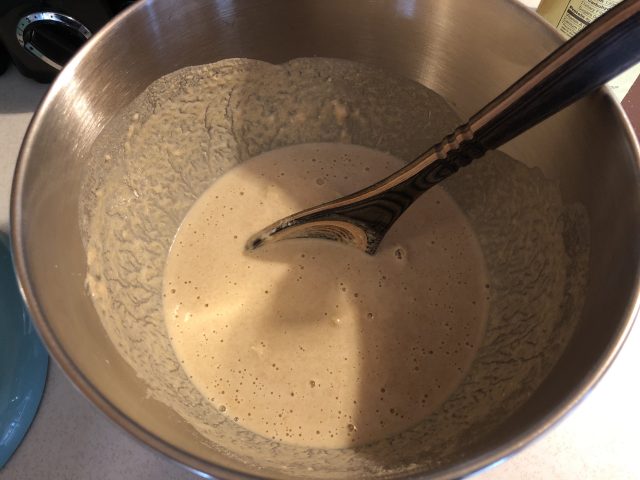
You can see the bubbles already starting to happen.

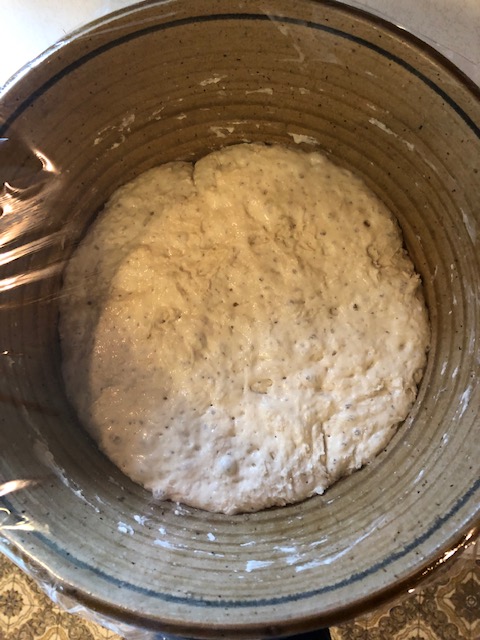
Scrape down the sides of the bowl and let this sit for 15 to 20 minutes, until it has risen and is more bubbly/foamy. This is called the “sponge”. I love this process. It’s the most fun science experiment ever.

IMG_1371

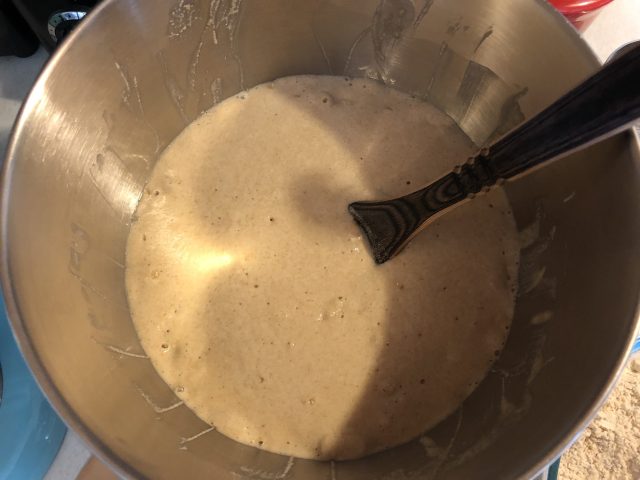
After twenty minutes, it has bulked up and is foamy.

Now add 1/3 cup vegetable oil, and 1/3 cup honey.

IMG_1372

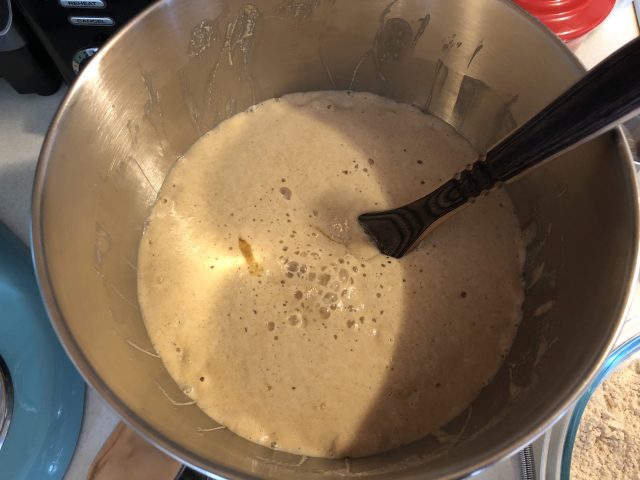
It really bubbles up when you add stuff!

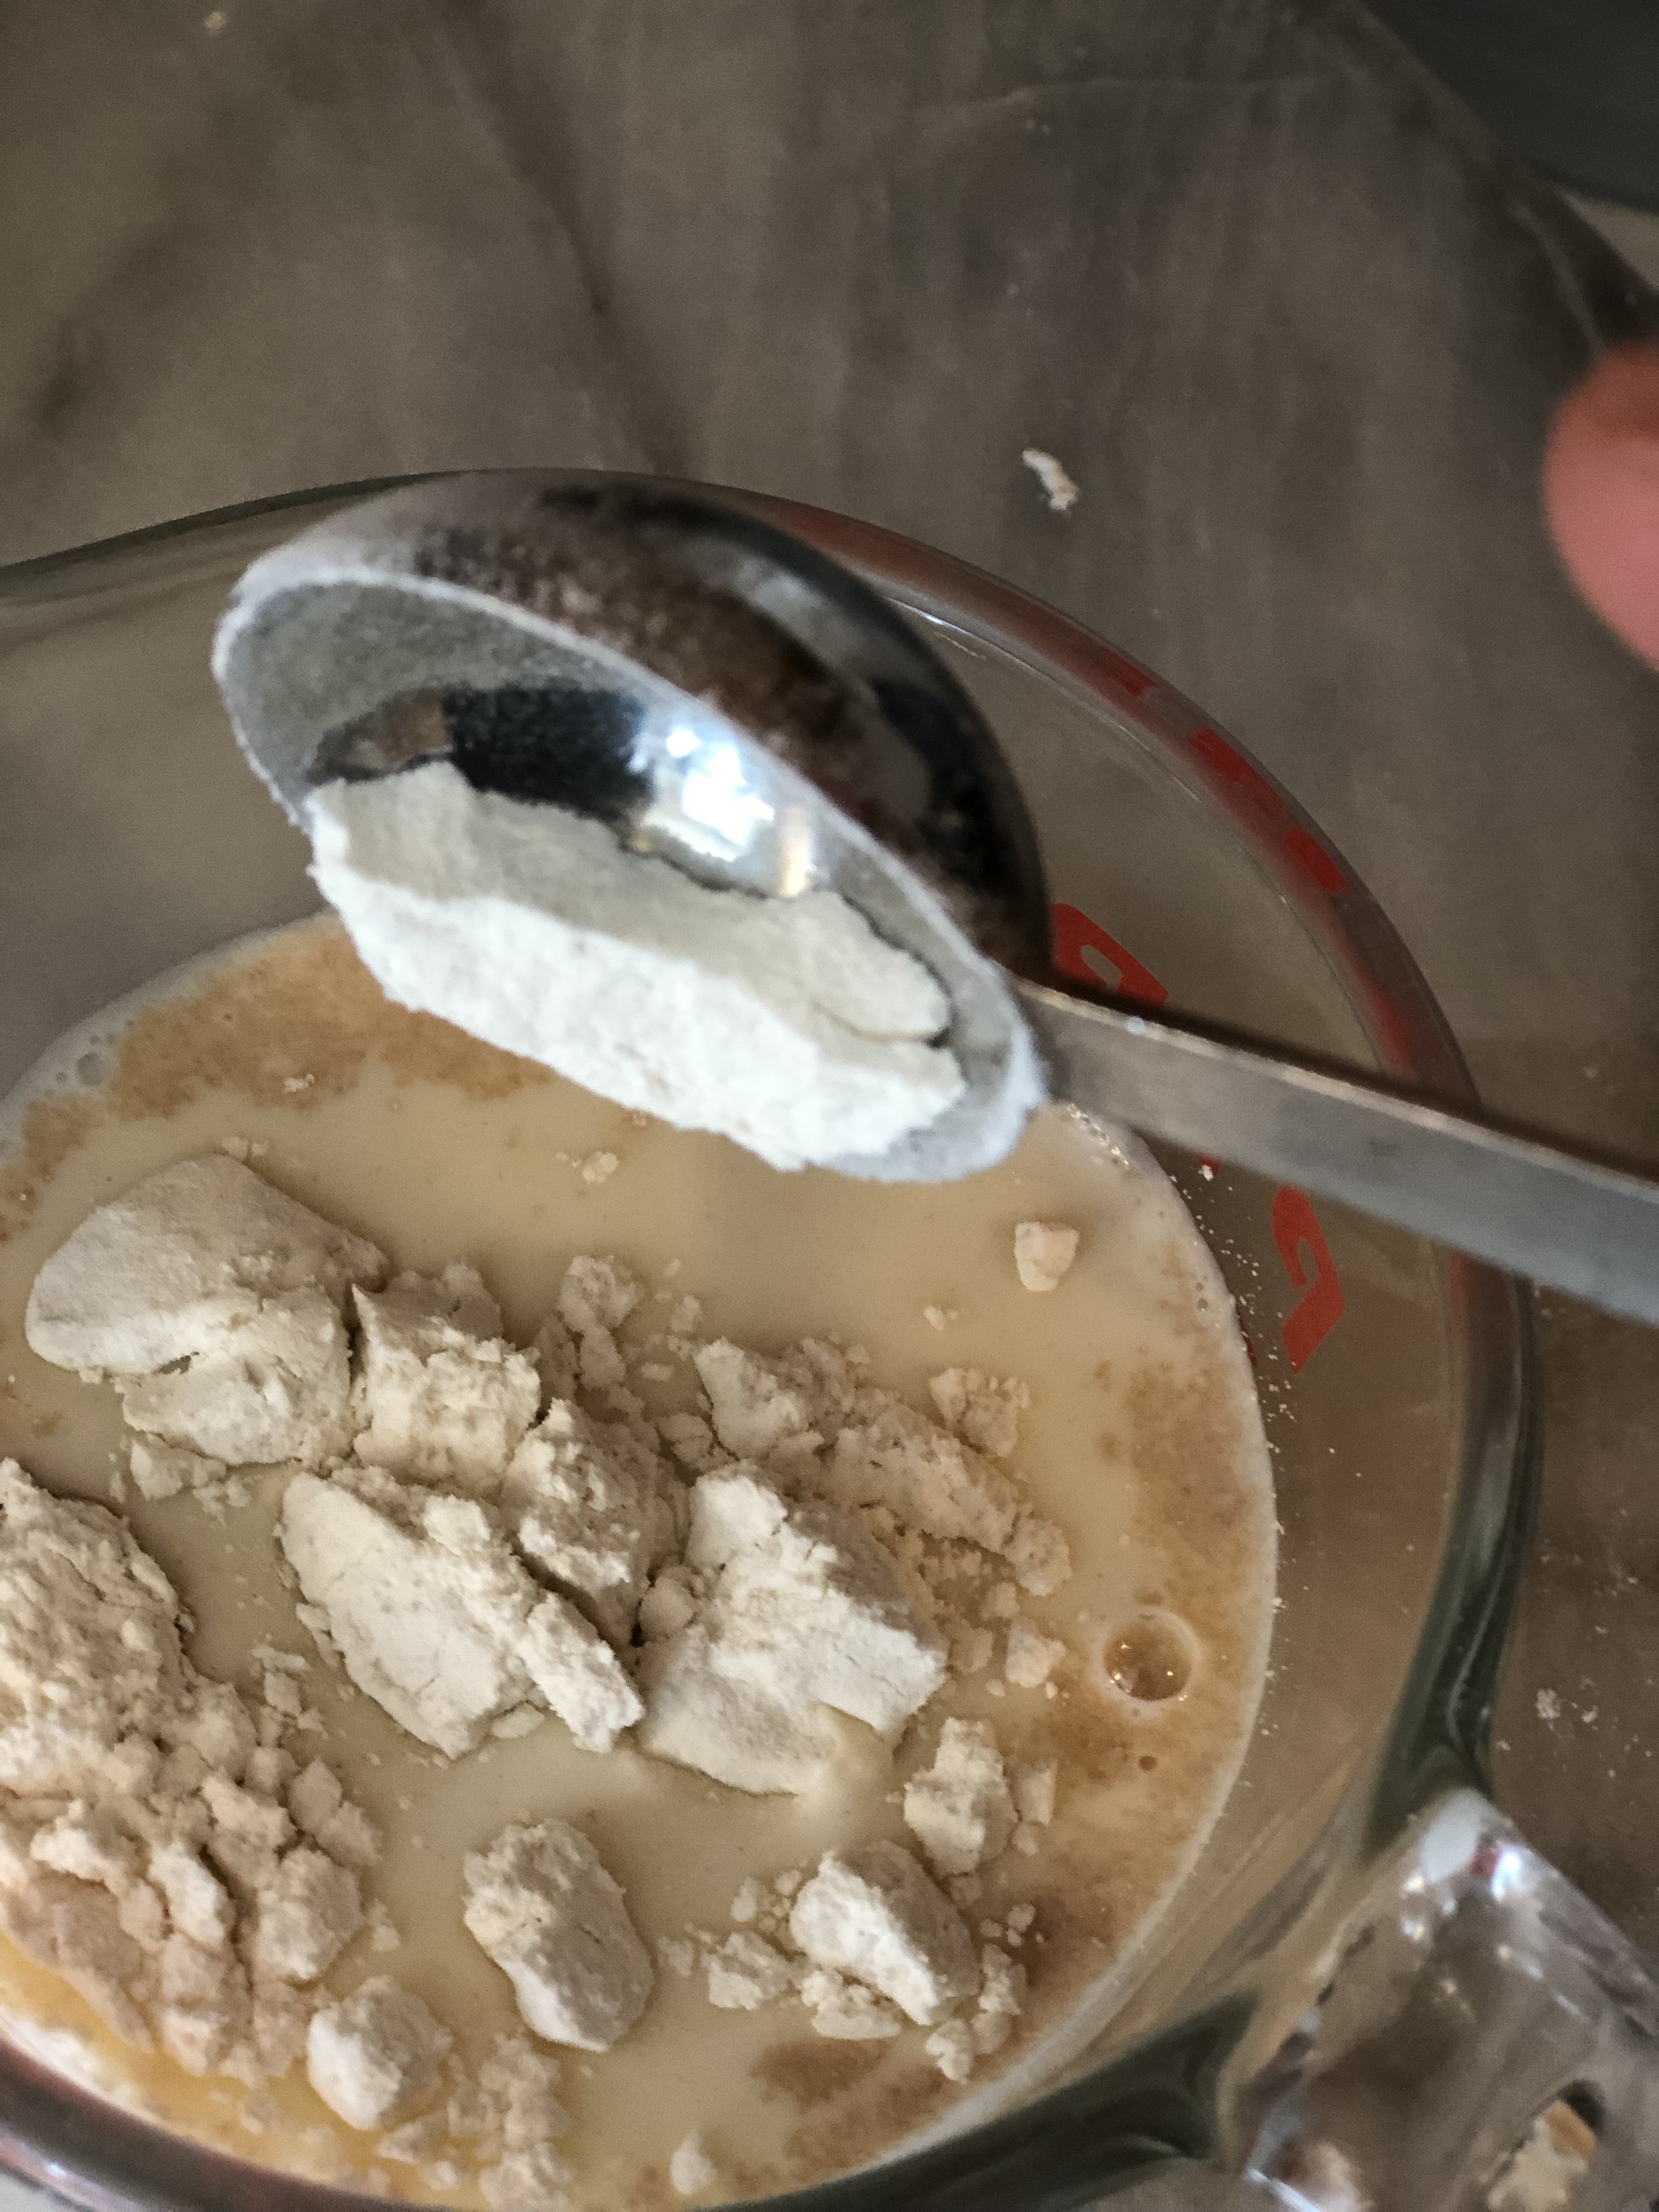
Mix together 4 cups (1 pound plus 2 ounces) whole wheat flour and 2 1/2 teaspoons salt, and dump it all in, all at once. By the way, when you measure your flour, stir it up first with a spoon so that it isn’t packed down, then spoon it into your measuring cup to measure, leveling it with a knife. If you just jam your measuring cup into your flour to scoop it up, it will be packed, and you will end up using too much flour, leading to a dense bread.

IMG_1374

The bubbles go wild when I add the flour. It almost looks like it’s boiling!

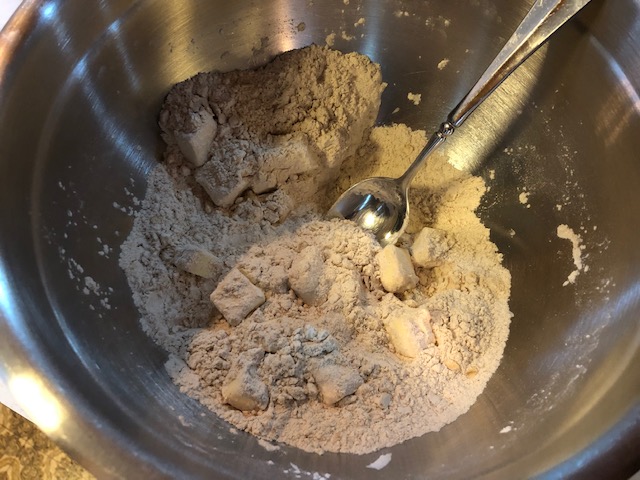
With the paddle attachment of your stand mixer, mix everything together on low. This shouldn’t take long at all. You just want everything mixed.
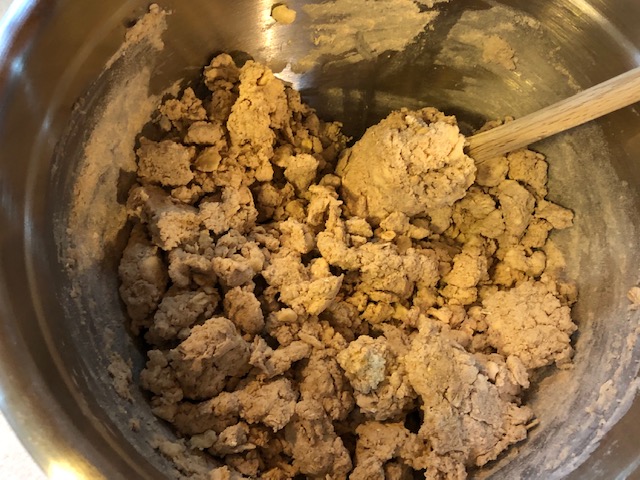
IMG_1375

Shaggy dough.

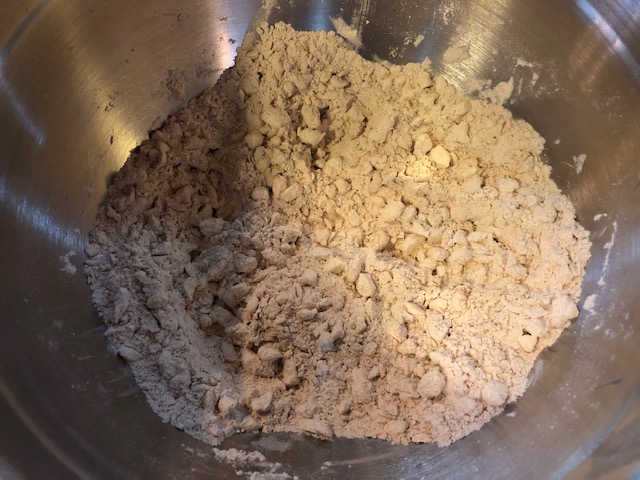
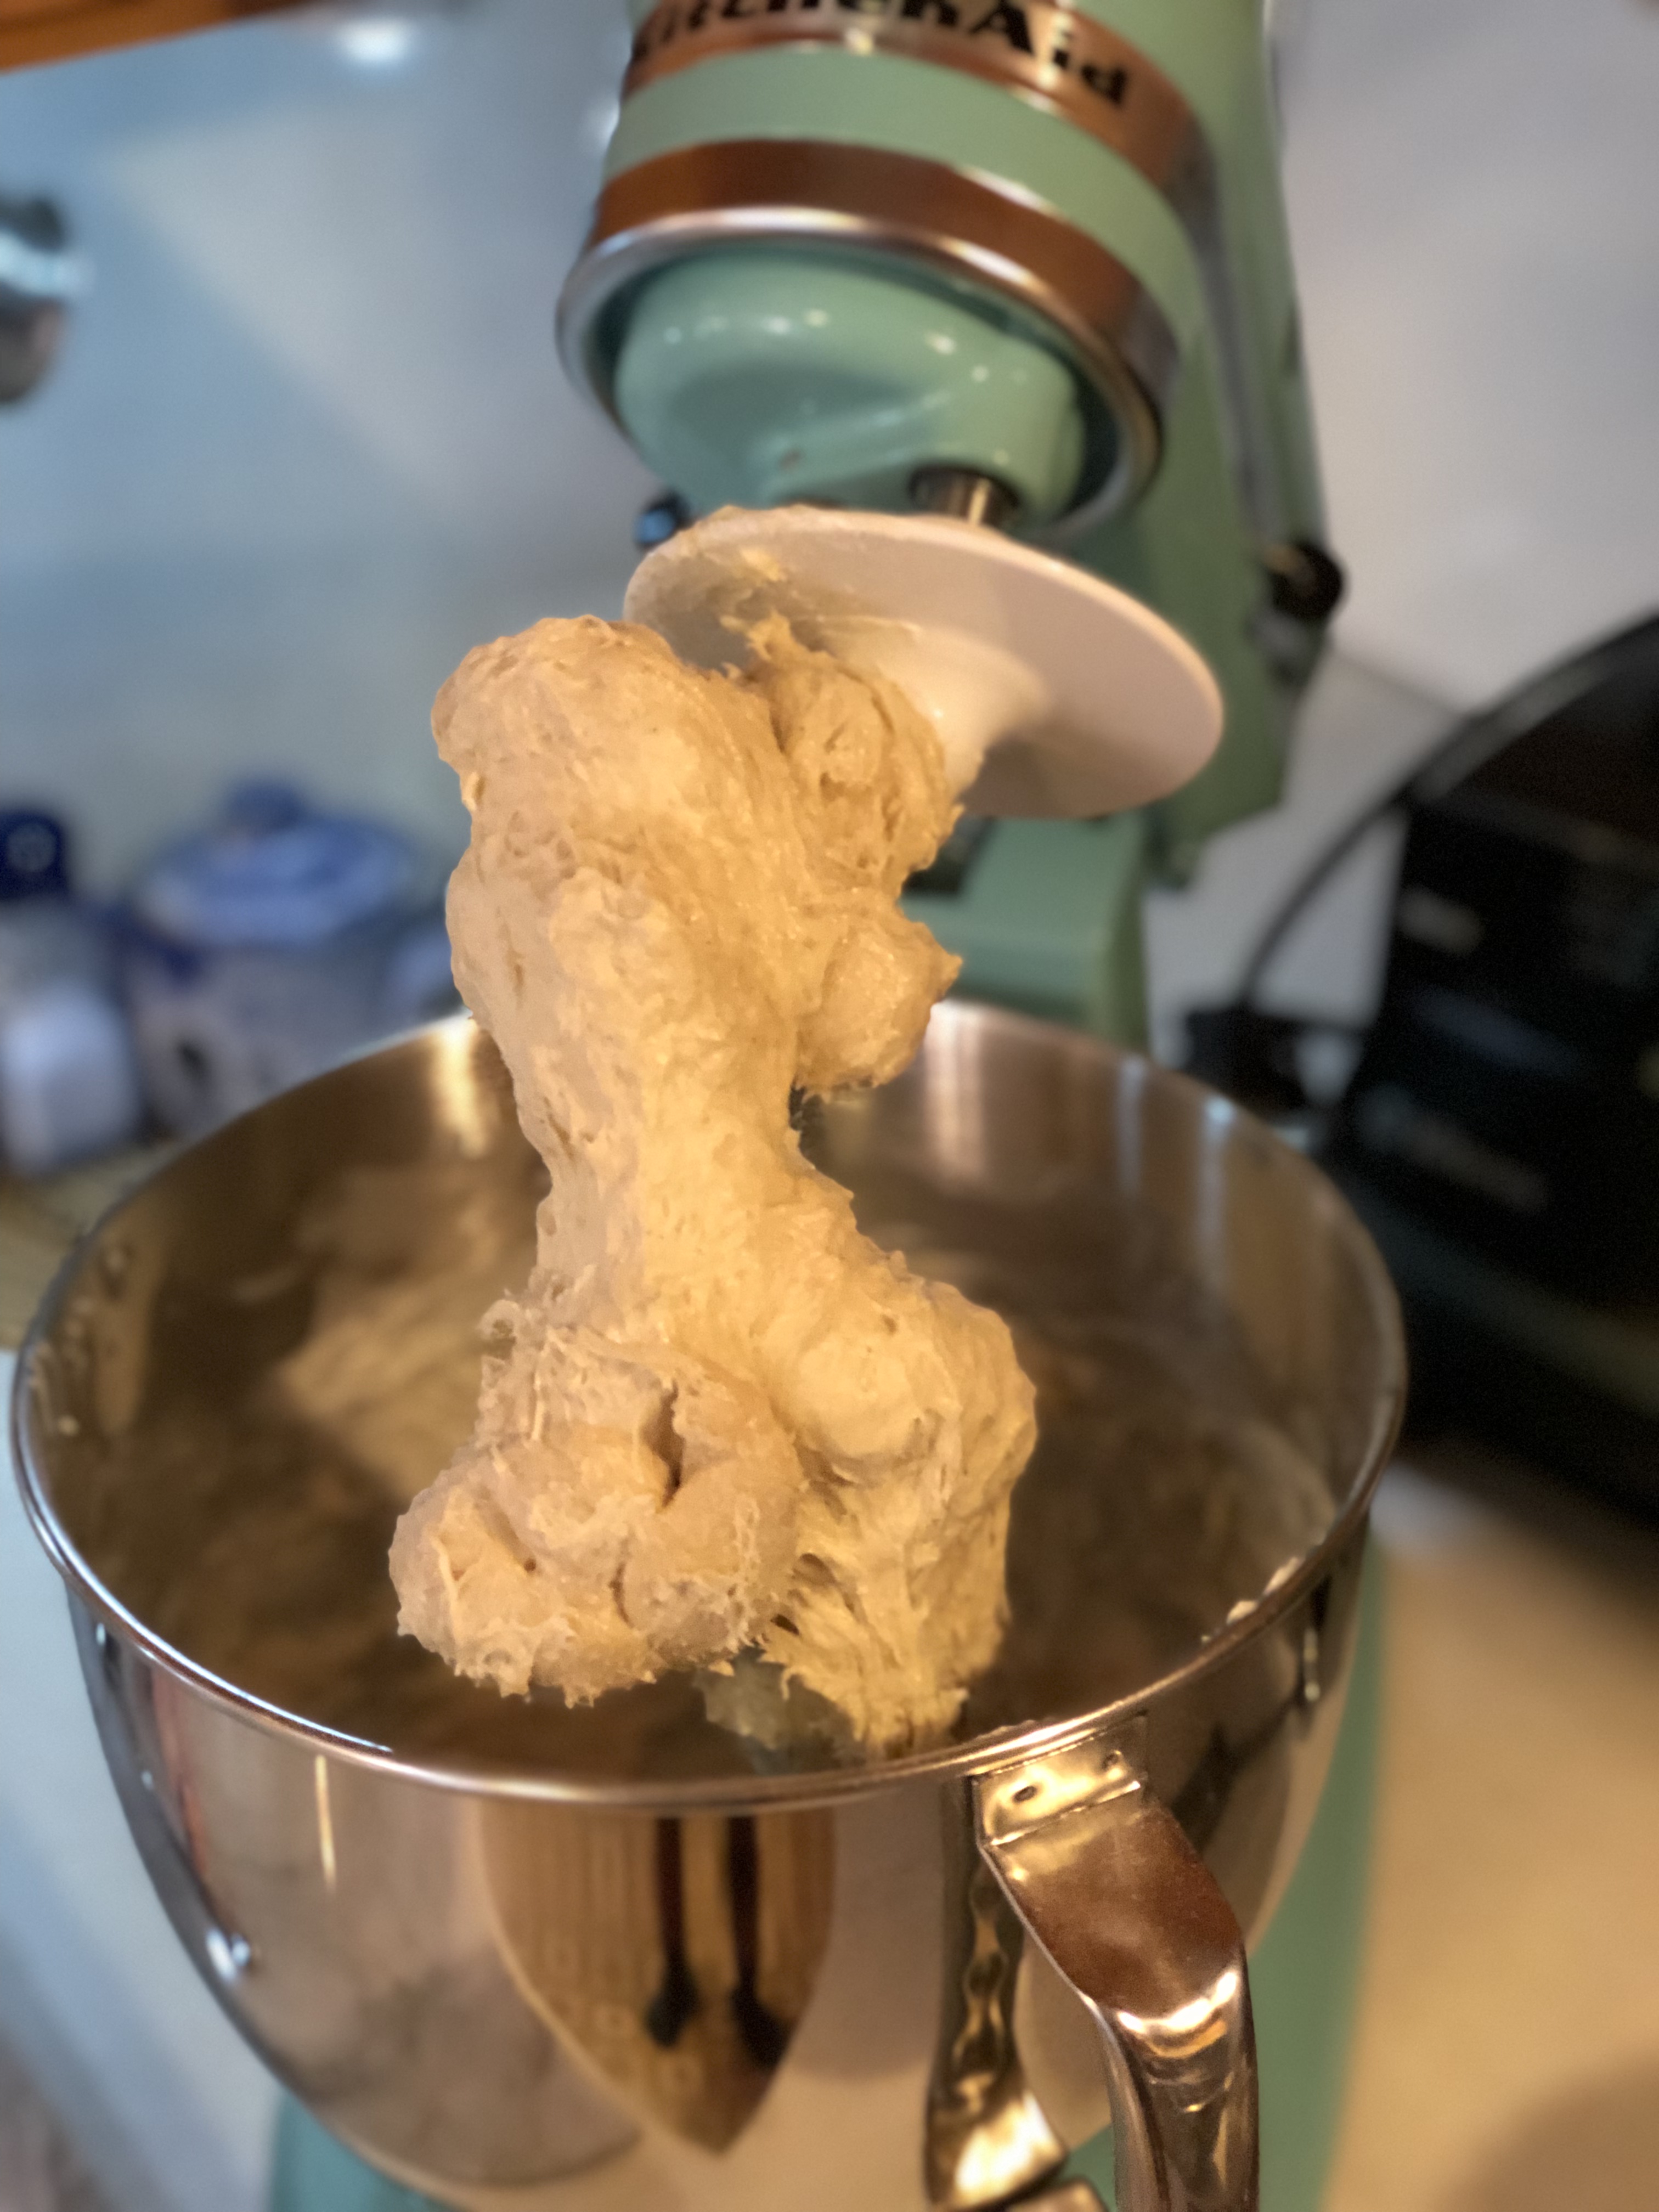
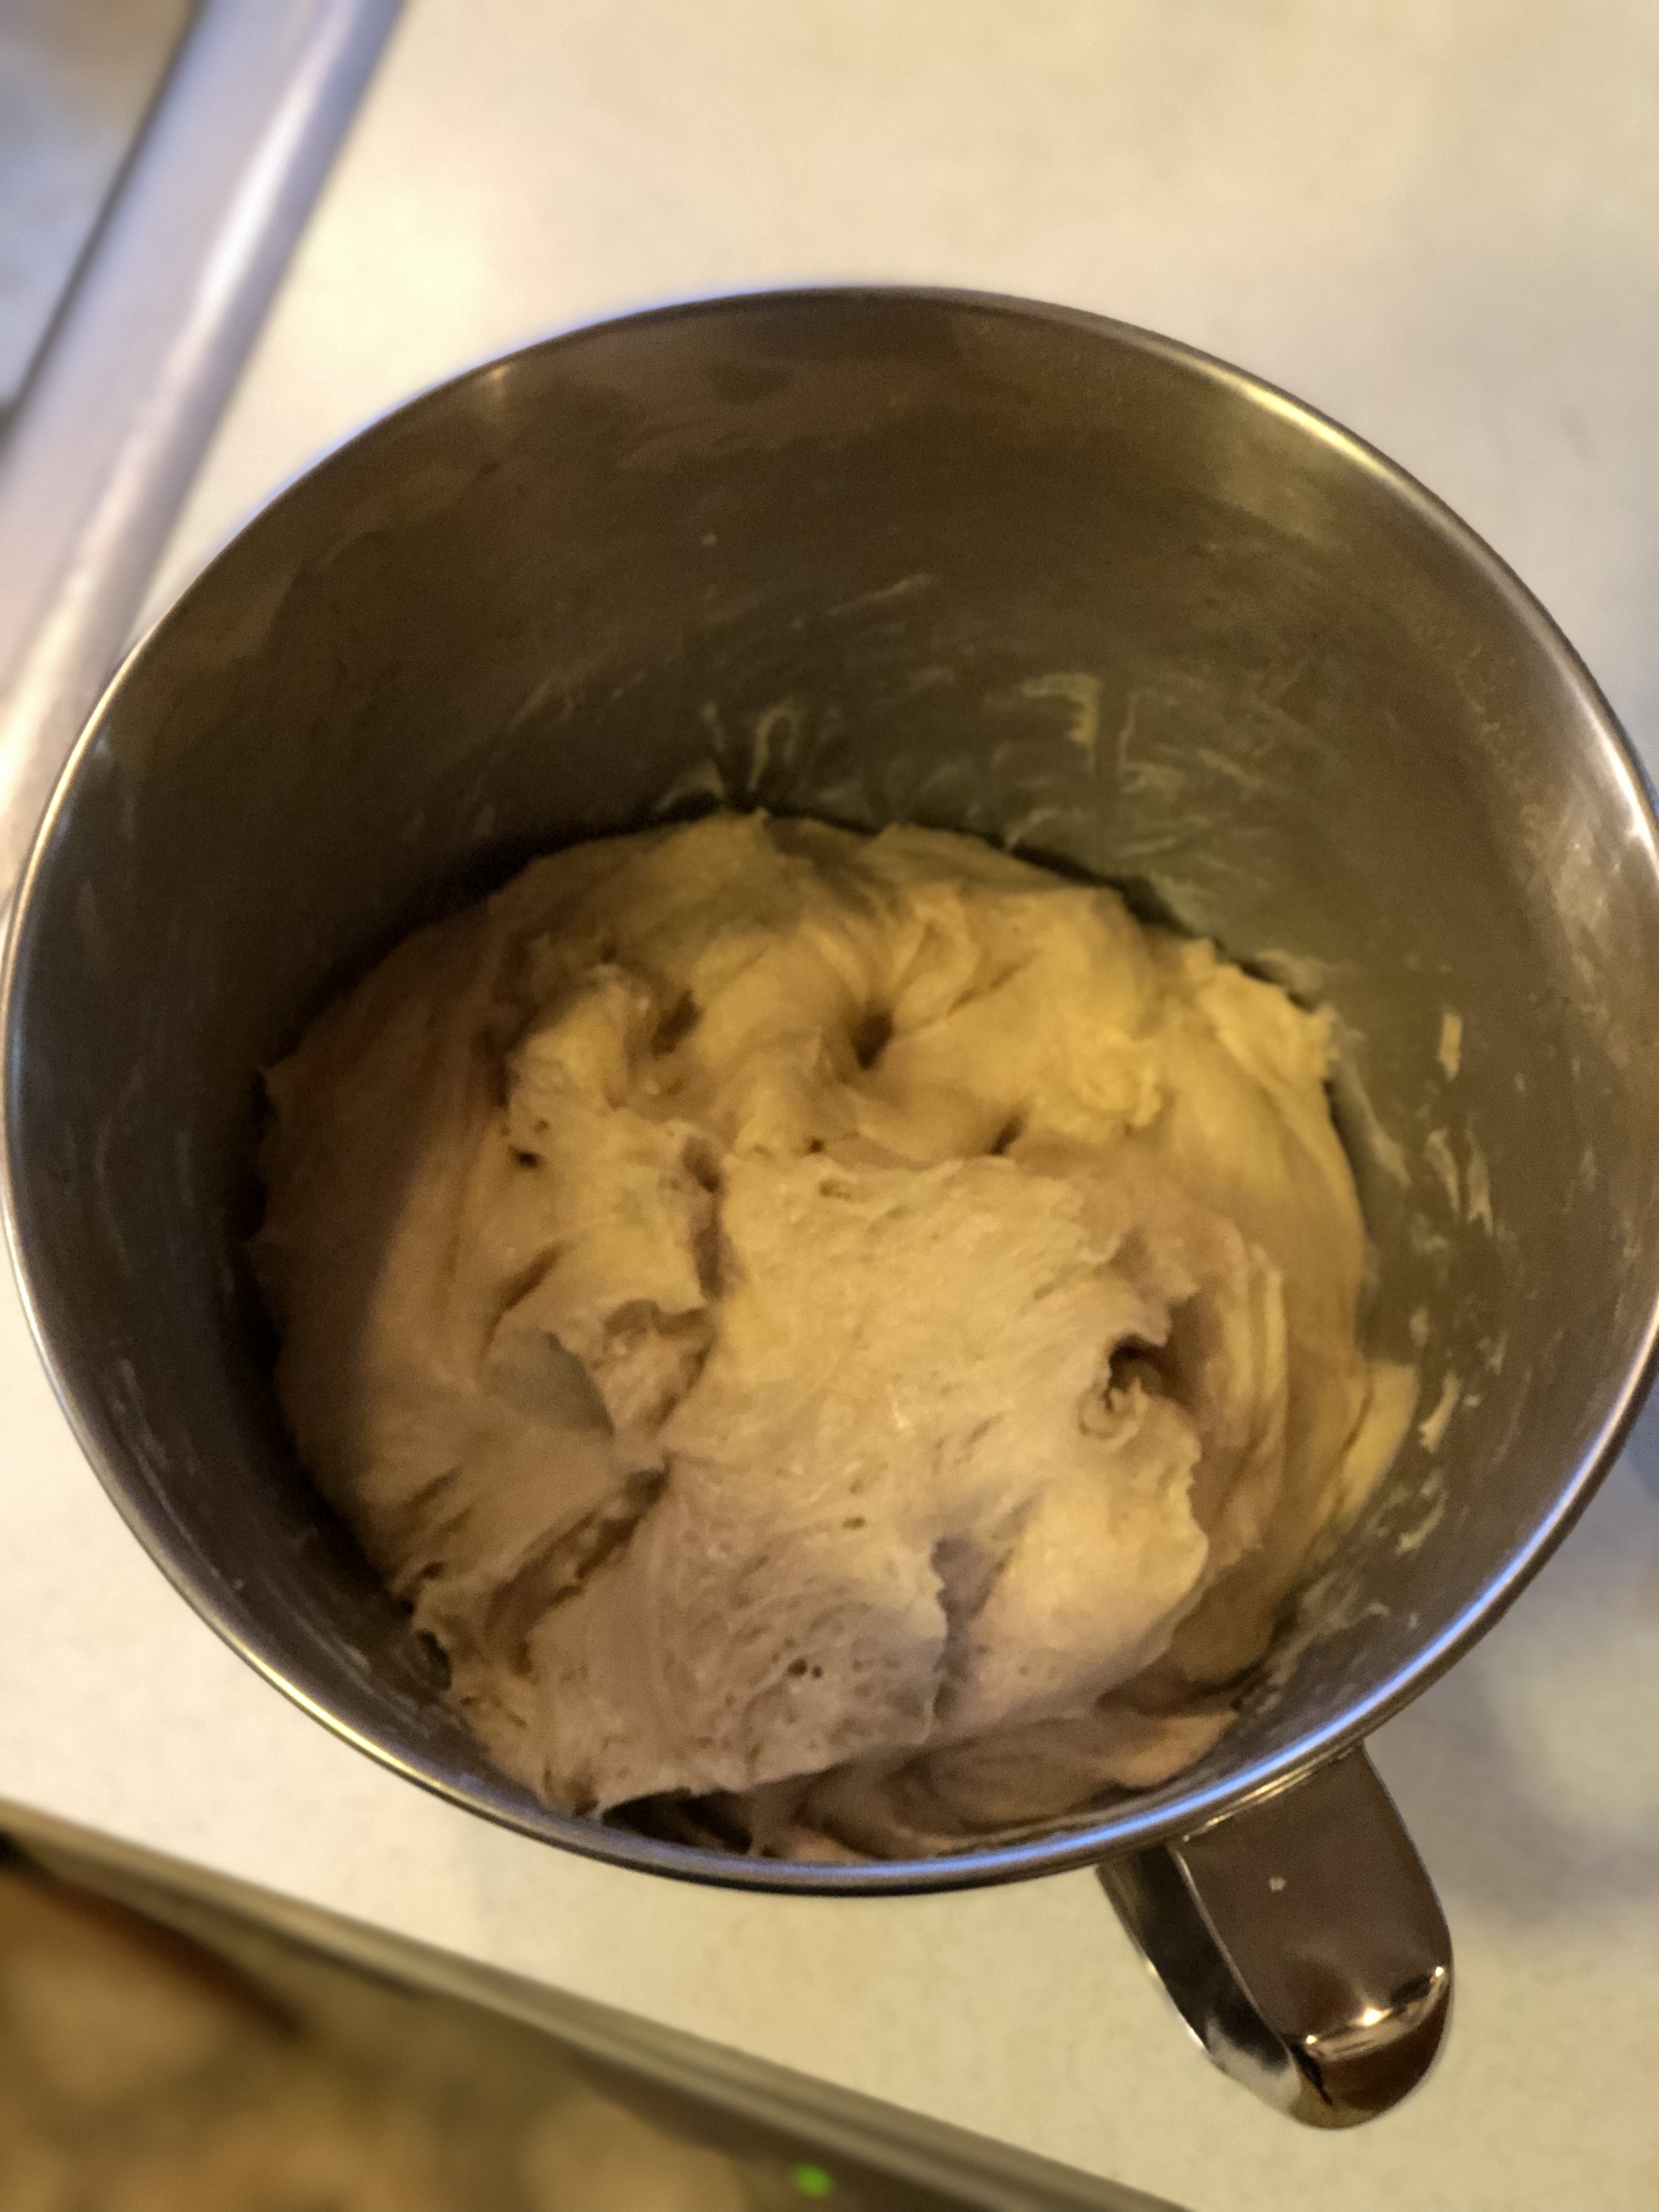
Switch to your dough hook, and mix on low (it’s #2 on my kitchenaid mixer) for 7 minutes. By that time, the dough should be elastic and pulling away from the sides of the bowl. The first time I did this, the dough pulled away perfectly from the sides and I didn’t have to add any more flour. Today, it didn’t, so I added more flour, one tablespoon at a time, until the dough pulled away from the sides of the bowl. I probably added three spoonfuls. Your dough should be tacky, but easy to handle, stretchy and elastic.

IMG_1379

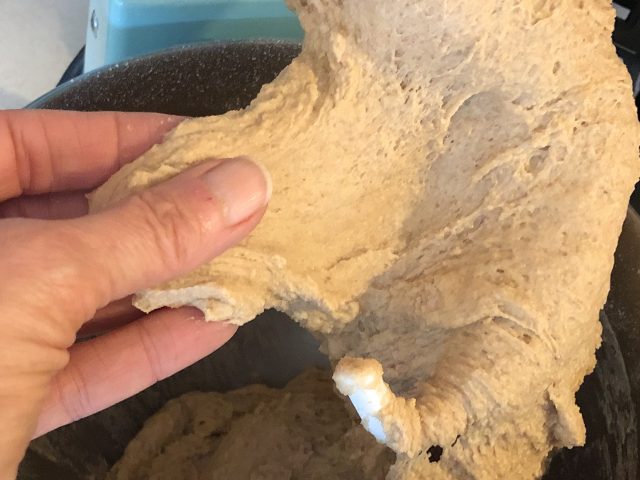
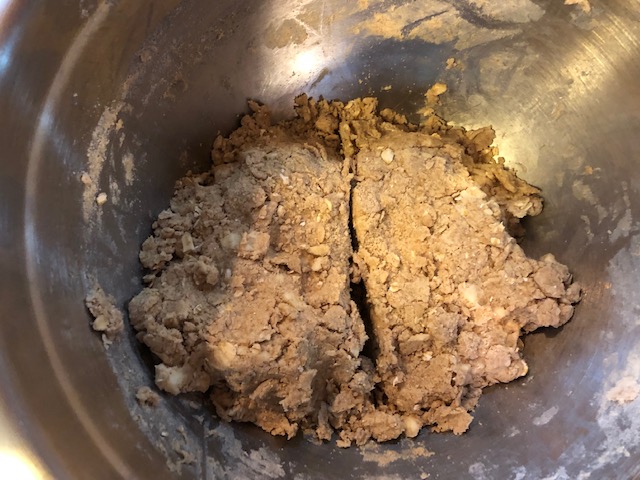
The dough feels really lovely! A little warm and stretchy; tacky but not sticky.

Flour your counter or board lightly. Put your hunk of dough on it.

IMG_1381

Dough is beautiful.

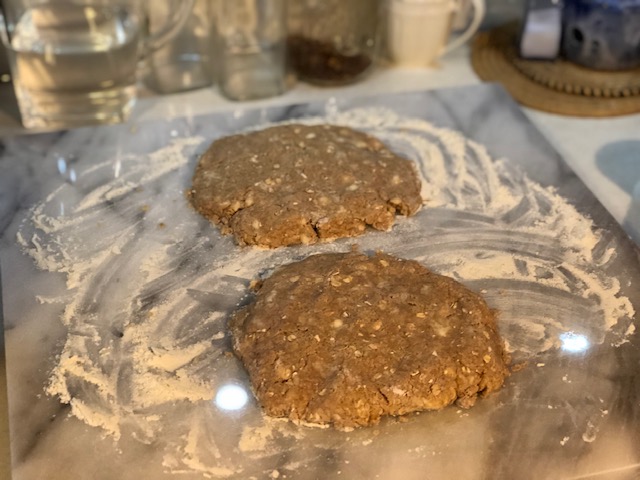
Stretch it out to make a large rectangle-y square-y shape. Mine ended up 18″ by 16″. You want your dough to be about a half inch thick at the most. Make sure as you do this that your dough is not sticking by checking occasionally. Do this quickly!

IMG_1383

Your dough should be easy to handle. Flour your hands a little to make it easier.

Now take a cube of unsalted butter (1 stick, or half cup) that is partially warmed up but not completely melted, whip it up in a bowl with a fork. You want the butter to be spreadable, but not melted. You actually might want to do this part while the dough is mixing so that your butter is ready to go.

IMG_1385

Smear it all over your dough. Then sprinkle 2 1/2 Tablespoons of cinnamon over it.

IMG_1387

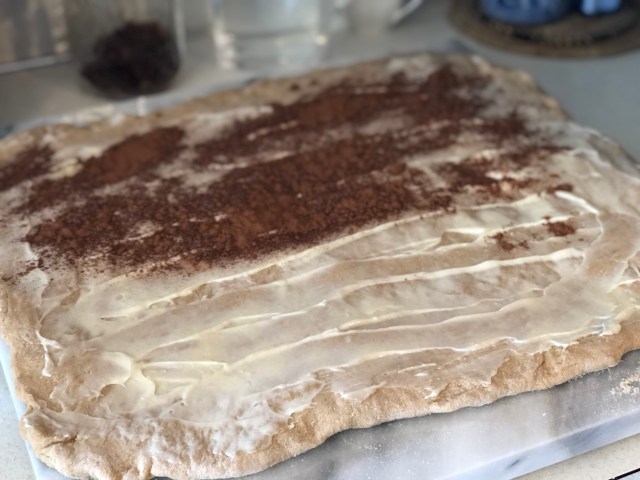
This is halfway through the cinnamon sprinkling part.

IMG_1388

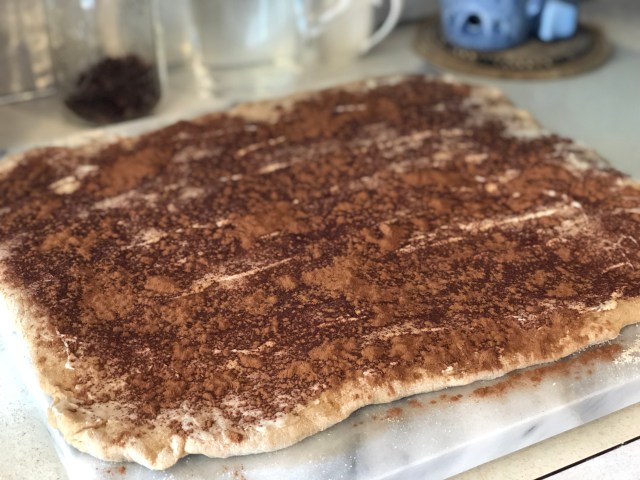
Completely covered with cinnamon.

When you have covered the butter with all of the cinnamon, then add a cup (packed) of brown sugar, sprinkling it evenly over the butter and cinnamon, and then smoothing it out a bit.
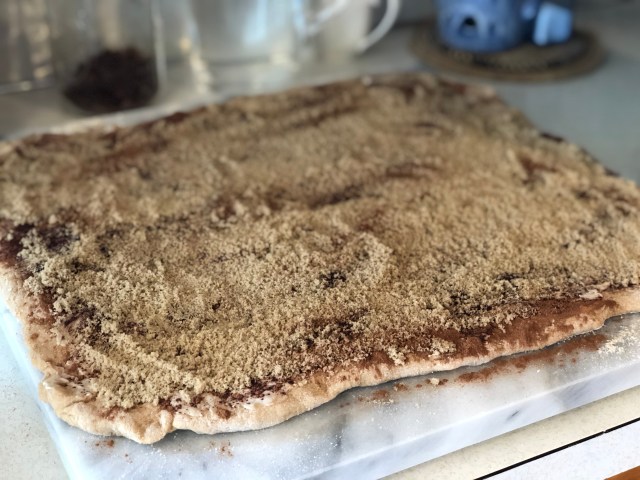
IMG_1389

A nice even layer.

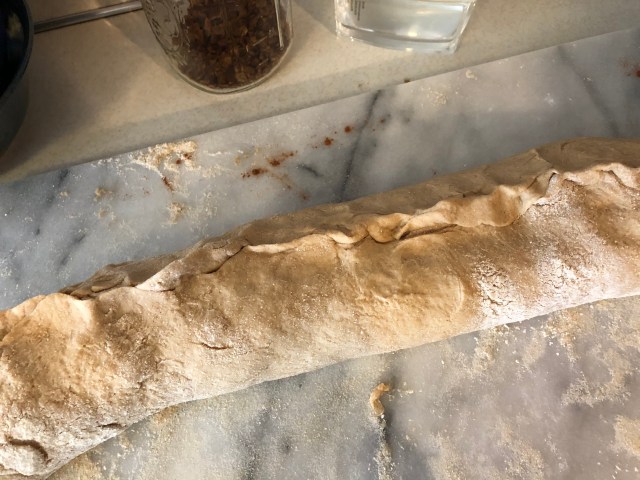
Roll it up. Don’t worry if the ends don’t look pretty or if stuff oozes out of the ends.

IMG_1390

Mine was snaking over the edges of my pastry board!

Pinch the seams.

IMG_1391

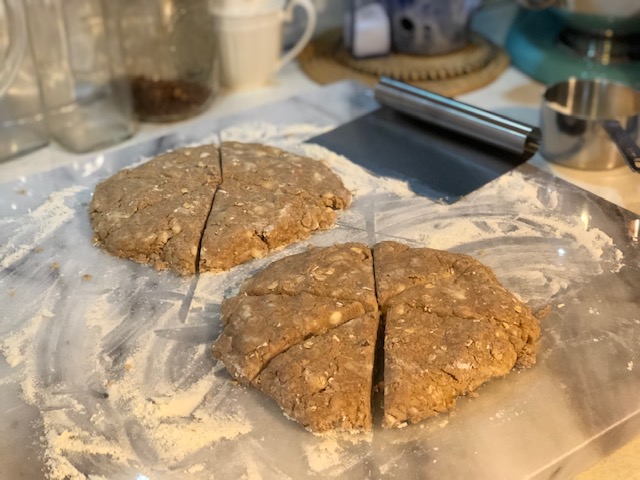
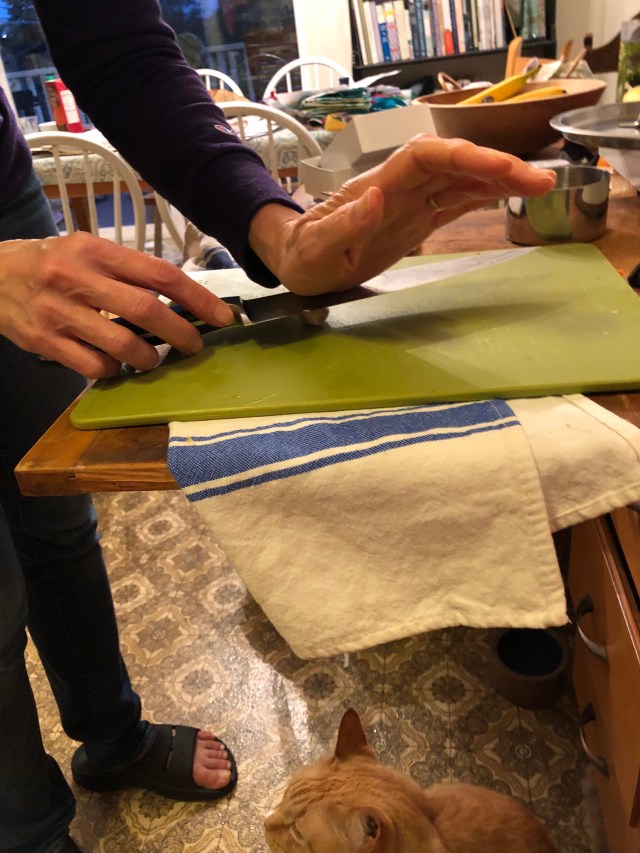
With a sharp knife, make a mark in the middle, then each half in half, etc, until you have 16 pieces, not including the messy ends. Pieces should be about an inch thick. Now cut all the way through with a nice sharp knife. Cut the messy ends as well. This should give you twenty cinnamon rolls (16 good ones, 4 runts).

IMG_1393

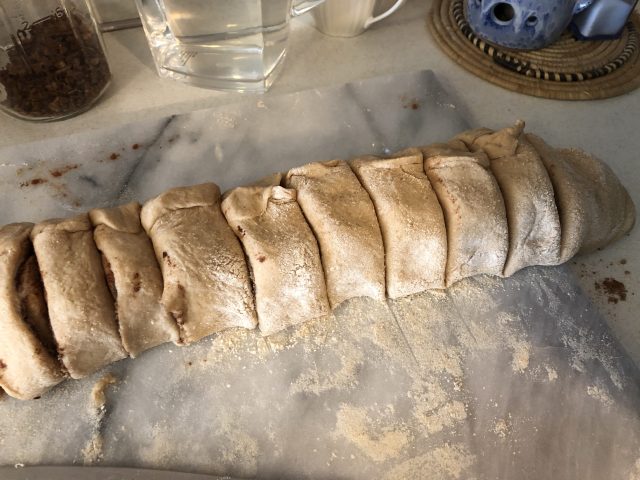
My slices were a bit uneven, but it doesn’t matter.

Put the slices in a buttered baking dish. I used my lasagna dish, because this recipe makes a lot of cinnamon rolls. However you slice your rolls, thicker or thinner, choose a baking dish that will hold the rolls rather snugly together – they should be touching.

IMG_1395

It looks sloppy, and that’s okay.

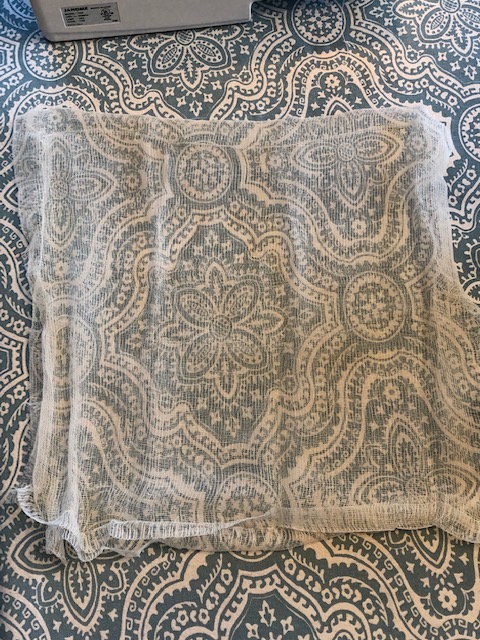
Cover with a tea towel and let rise for about 45 minutes in a draft-free area of your kitchen. Before the 45 minutes are up, at the 30 minute mark, preheat your oven to 375°.

When you remove the tea towel, your cinnamon rolls should have risen and smooshed together in the pan.
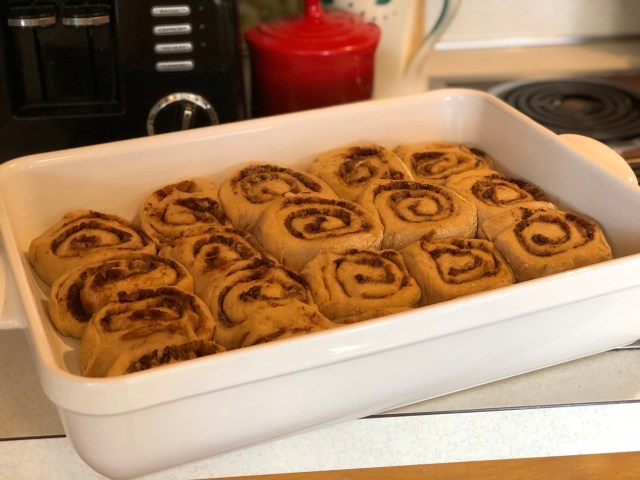
IMG_1398

Cozy!

Put them in the oven and bake for 20 to 25 minutes. The tops should be golden brown. I like to rotate the pan halfway through for even baking, and also so I can get a closer look at things. When they look ready, take them out and let them cool almost completely before frosting. Or at least that’s what I did. Because I was busy.

57428560856__4F383FBE-5A60-464C-902A-4B620948AB47.fullsizerender

Golden and rustic.

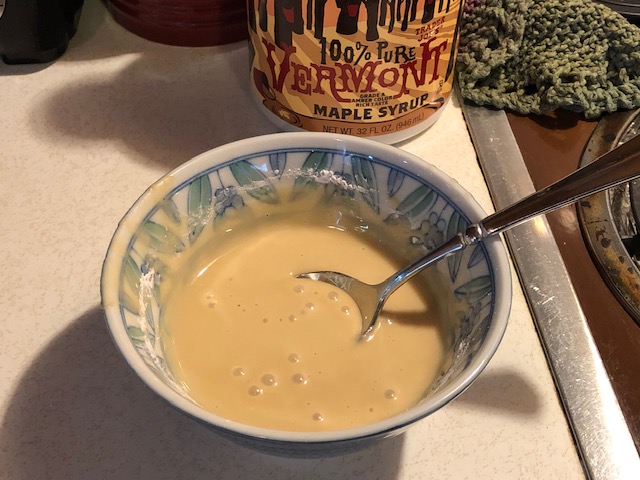
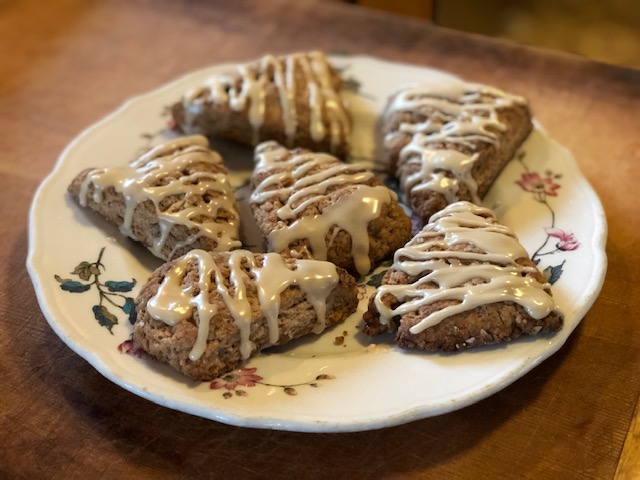
You may be tempted to try them without frosting. We did, and I advise you to frost them. They were a bit too rustic sans frosting. Icing is 2 cups of powdered sugar, 3 to 4 Tablespoons milk, a couple pinches of salt, and a half teaspoon vanilla extract. Make it so that you can drizzle it. You want it to be thick enough that it stays mostly on top of the cinnamon rolls, but still able to drizzle and have some ooze into the crevasses.

IMG_1400

The missing ones are the ones we ate without frosting. They are better with frosting!

I think these cinnamon rolls are pretty good. They are 100% whole wheat, so I am going to pretend that makes them healthy. They are definitely better than the strange cinnamon bread experiment I did a couple of days ago. These are just my first attempt (at whole wheat cinnamon rolls), and I am pretty happy with the results, but because of my inexplicable desire to experiment, I know it is not my last.

IMG_1402

After school snack.

Whole Wheat Cinnamon Rolls

Dough:

  • 6 to 6 1/2 cups  (27 ounces) white whole wheat flour
  • 2 1/2 cups warm water (110°)
  • 1 1/2 Tablespoons active dry yeast
  • 1/3 cup vegetable oil
  • 1/3 cup honey
  • 2 1/2 teaspoons salt

Filling:

  • 1/2 cup (1 stick) unsalted butter, softened and stirred up
  • 2 1/2 Tablespoons cinnamon
  • 1 cup (packed) brown sugar

Icing:

  • 2 cups powdered sugar
  • 3 to 4 Tablespoons milk
  • couple pinches salt
  • 1/2 teaspoon vanilla extract
  1. In bowl of stand mixer (I do this part with a wooden spoon), mix warm water, yeast, and 2 cups whole wheat flour.
  2. Let sit for 15 to 20 minutes until foamy. This is the “sponge”.
  3. With the paddle attachment of your mixer, add to the sponge the  honey, oil, salt and remaining 4 cups of flour, and mix until all ingredients are incorporated. This shouldn’t take long.
  4. Switch to the dough hook attachment and mix on low (it is #2 on my Kitchenaid mixer) for 7 minutes. The dough should pull away from the sides of the bowl, and be tacky, stretchy, and elastic.
  5. Flour counter top or work surface and dump your dough out. Stretch it and shape it into a large rectangle. Dough should be about 1/2 inch thick.
  6. Smear butter onto dough
  7. Sprinkle cinnamon in an even layer across the butter
  8. Sprinkle the brown sugar over the cinnamon and butter, and smooth it a bit.
  9. Roll the dough starting with one of the longer ends.
  10. Pinch seams and cut into 1″ thick slices.
  11. Place slices cut side down in buttered lasagna dish
  12. Cover with tea towel and let rise for about 45 minutes. Preheat oven to 375° at the 30 minute mark.
  13. Remove tea towel and bake cinnamon rolls on center rack in over for 20 to 25 minutes. Tops should be golden brown. Rotate pan halfway through for even baking.
  14. Remove and let cool in pan.
  15. Frost when cinnamon rolls are still warm, but no longer hot.

IMG_1400


Posted in Comfort Food, Fun in the kitchen!, Yeasty Things | Leave a comment

Limpa Bread (Swedish Rye)

IMG_1141

A bit of old-world comfort.

The other day I went to visit my friend Carol. Somehow we got on the subject of bread. Maybe it was because I told her she had to come to my house and teach me how to make some of the wonderful breads she makes… yeah, that was it. Anyway, she mentioned a couple of different kinds, including a Swedish Rye bread she makes, called Limpa bread. I had not tried that one, but it sounded amazing, and I really wanted to know how she made it. She said it was a recipe that her grandmother made, but it was a bit dry, so Carol had played around with it and come up with her own version. By the way, Carol’s grandchildren call her “Swede”. I just love that.

Mickey (her husband) said this bread was absolutely delicious with split pea soup, so you know I was convinced. You’re going to think that split pea soup is the only kind of soup I ever eat! Anyway, we set a date, and Carol came over. I told her I had most of the ordinary ingredients…. yeast, flour, etc. But she brought some other things: rye flour, an orange, and some fennel and anise seeds.

IMG_1297

An aroma sensation!

She had me at fennel and anise; I practically buried my face in the little packets and breathed in deeply. I have left these packets out on the counter since our bread baking day, just so the aroma keeps filling my kitchen.

So here is what we did. In the bowl of a stand mixer, mix together:

  • 3 cups hot water (around 110°)
  • 1/2 cup oil
  • 2 packets active dry yeast (1.5 Tablespoons)
  • 1/3 cup sugar
  • 1/4 cup molasses
  • 1 teaspoon anise seeds (heaping please)
  • 1 teaspoon fennel seeds (also heaping, please)
  • grated rind of one or two oranges (we used just one)
  • 1 Tablespoon salt
  • 2 cups (9 ounces) rye flour
  • 2 cups (9 ounces) all-purpose white flour (but you’ll need at least 3 more cups, just not now)

Mix with the paddle attachment of stand mixer, or a large wooden spoon by hand. Mix well, and let sit for 15 to 20 minutes. I have since learned that this is called the “sponge”.

Now switch to the dough hook attachment if you are using your stand mixer (or if you are doing this by hand, roll up your sleeves and get ready to sweat).

Turn the stand mixer on low and add in, little by little, the 3 additional cups of flour. This is where things got a little fluid, and by that, I mean that I’m not really sure exactly how much flour went in when making this with Carol. I kept adding while the mixer was going, and Carol kept saying “add a little more”. At one point, when I turned away to turn the kettle on for tea, I noticed out of the corner of my eye that Carol had taken the bag of flour and was just pouring more and more into that bowl. The kitchen was a floury mess. But I will tell you this – everything Carol does in the kitchen is magic. We kept going, and the dough ended up being a bit tacky, but not too sticky. It was a little bit elastic. The whole stand-mixer-dough-hook-mixing probably lasted around 7 to 8 minutes.

At this point, you will dump the dough out onto a well floured counter or pastry board. And I mean really well floured, like a seriously thick layer of flour. Knead the dough by hand… a lot. What happened to me and Carol was that we forgot to add the grated orange rind to the “sponge”, so I kneaded it in, so the kneading took a while to get the rind incorporated evenly. Carol says all that kneading made the bread extra wonderful, but she is just sweet like that. Knead the dough until it is kind of springy. This might take 5 minutes or so. Cover with a tea towel (right there on the counter or board, no need to transfer it to a bowl) and let rise for about an hour. It should double in size.

Once the dough has doubled in size, punch it down – you might hear air escaping like a sweet little sigh – and cut the dough in half. Shape each half into a rectangle, then fold one of the short ends in, then the other, like an envelope, then do that again. You can refer to my no-knead bread post to see what this looks like. You will have a kind of a ball. Shape it so that it is roundish, and flip it so that the ball is seam side down, placing it on a greased or parchment-lined pan. Repeat this with the other half of the dough. Both should fit on a large cookie sheet.

At this point, turn the oven on to preheat to 350°, then cover the dough with tea towel and let rise another 30 minutes while the oven is preheating.

I chose to make some cuts (about 1/2 inch deep) on the top of one of the loaves to make it look extra pretty, but it’s not necessary. Put the pan with the loaves into the preheated oven, and bake for 35 to 40 minutes. The bread should sound hollow when you tap it on the bottom. Place the loaves on a cooling rack and let cool almost completely before slicing.

IMG_1138

One with pretty cuts, one without. Both are fabulous.

And yes, I did make split pea soup for lunch that day, so that Carol and I could have our fabulous Limpa Bread with it, just like Mickey suggested. The bread is so comforting and delicious; fragrant and earthy, with a slight sweetness. It will fill your house with such heavenly smells that you will want to make it every day.

IMG_1143

You can have this bread with soup, or just eat slice after slice with butter. So good.

IMG_1145

Carol (Swede) on the left. She is one of my favorite people.

Limpa Bread (Swedish Rye)

  • 3 cups hot water (around 110°)
  • 1/2 cup oil
  • 2 packets active dry yeast (1.5 Tablespoons)
  • 1/3 cup sugar
  • 1/4 cup molasses
  • 1 teaspoon anise seeds (heaping please)
  • 1 teaspoon fennel seeds (also heaping, please)
  • grated rind of one or two oranges (we used just one)
  • 1 Tablespoon salt
  • 2 cups rye flour
  • 5 cups all-purpose white flour (plus a lot more for flouring and kneading)

Mix ingredients in order, but only using 2 cups of the white flour. Let sit for 15 to 20 minutes. Then slowly add the remaining 3 cups flour, using dough hook of stand mixer. Let it mix for about 8 minutes. Dump dough onto floured surface and knead by hand for a bit more. Cover and let rise for one hour. Punch down, cut in half, and shape into loaves on parchment-lined or greased pan. Cover and let rise about 30 minutes. Bake in a preheated 350° oven for 35 to 40 minutes. Let cool almost completely before slicing.

**By the way, for the all-purpose flour, I used Cairnspring Mills flour, which is a local, small production mill right here in our Skagit Valley, and they use the grains that come from our local farmers to make their flour. It doesn’t get much better than that. Read more about them here: Cairnspring Mills.

Posted in Comfort Food, Fun in the kitchen!, Yeasty Things | 5 Comments

Oat Scones with Maple Glaze

IMG_1031

The first bite is like heaven.

The other day, my friend Kristen texted me from Utah, saying that she had lost the recipe I gave her for my Maple Oat Scones, and she was having a craving. I don’t know about you, but when I have a craving and can’t find the recipe, it is very serious. I texted dear husband and told him exactly where the recipe was, and asked him if he could take a picture and text it to me (I was out browsing at a kitchen store just minutes before the beginning of the Great Seattle Snowpocalypse of 2019, and it was making dear husband very nervous, but I’m from the Midwest, and these things don’t bother me much).

IMG_1023

Can you read my writing?

I texted the recipe to Kristen, and all was well in the world once more.

Kristen and I made these scones together at my house not long before she moved away, so this is a very special recipe to me. It was a recipe that I suffered over, searching high and low to try to achieve a certain texture; a dense, crumbly, melt-in-your-mouth scone. Not light and cakey. If you are looking for a light and cakey scone, this is not for you. If there is anything I hate, loathe, despise and abominate, it is a cakey scone.

IMG_1029

Dense, but still flaky and melt-in-your mouth perfection.

When I came across Rose Beranbaum’s recipe for Flaky Scones, I was thrilled. It was exactly what I was looking for… almost. The texture was wonderful, but they were plain scones, and I was obsessed with the idea of a Maple Oat scone, something brown-sugary cinnamony maply oh my goodnessy. So I tweaked a thing here and there, and this is what I ended up with, adapted from Rose (or Rosy, as I like to refer to her, since I love her scones so much) Beranbaum’s Flaky Scone recipe:

Preheat your oven to 400° 30 minutes before baking. Set a baking sheet in the oven before preheating.

Have ready and waiting for you in your fridge:

  • 1/2 cup (1 stick) very cold unsalted butter, cut into 12 to 16 cubes.
  • 1 cup heavy cream, very cold.

In a large bowl, whisk together 2 cups (9 ounces) all purpose flour, 1/4 cup light brown sugar, packed, 1/3 cup old fashioned rolled oats (or quick cooking), 1 1/2 teaspoons cinnamon, 1 teaspoon baking powder, 1/4 teaspoon baking soda, and 1/8 teaspoon salt.

IMG_0997

This is the easy part. Whisk it all together.

Now get that cold cubed butter out of the fridge or freezer,

IMG_0998

and dip your fingers into the flour mixture, then press the cubes of butter into large flakes. Do this quickly so that the butter doesn’t melt. Sometimes I hold the cold plate with my fingers first, to make sure my fingers aren’t too warm.

IMG_1001

Okay, it’s a weird picture, but I wanted you to see the flattened butter cube!

Do this with all the butter, adding them to the flour mixture as you go.

IMG_1003

Stir in the cream just until the flour is moistened and the dough starts to come together in large clumps.

IMG_1004

Knead the dough in the bowl just a little bit, until it starts to hold together, then dump it out onto a floured board or countertop.

IMG_1006

There will be lots of crumbly bits, and that’s okay. It will all get slowly incorporated as you go along. Shape dough into a 4″ x 12″ rectangle.

IMG_1007

Don’t worry if it looks sloppy.

If you have read my post about making biscuits, this is the same process. Cut the rectangle into three sections with a sharp knife or bench scraper. I love my bench scraper.

IMG_1008

I love the crumbly bits.

Stack the three pieces and rotate one quarter turn.

IMG_1012

Dense and beautiful.

Flatten the stack into a rectangle with your knuckles or bench scraper and do the whole process (cut, stack, and rotate) two more times. Do this quickly so the butter doesn’t melt. It’s messy and lumpy, and that’s the way it’s supposed to be. Imagine you are Daisy on Downton Abbey. No, wait, I am Daisy, and you can be Mrs. Patmore. Your third rectangle might look something like this, with most of the crumbly bits incorporated.

IMG_1013

Still looks rustic.

Now take a lightly floured rolling pin and roll it out a little more, until it’s about 3/4″ thick.

IMG_1014

Don’t roll it too much!

You should end up with a 4″ x 12″ rectangle. Mine this time was more like 6″ x 12″, which is why my scones look so long and narrow… Trim the edges and cut into triangles with a sharp knife or bench scraper.

IMG_1016

Mash the edge scraps together to make a small rectangle, and cut into two triangles. These ones will be misshapen, but they are always my favorites. Nobody can have those but me.

IMG_1017

What’s not to love?

Transfer all of the cut scones to a cookie sheet lined with parchment paper. Make sure there is about an inch (more or less) of space between the scones.

IMG_1018

Place tray in the hot oven on top (nested) of the cookie tray that is already in there. Bake for about 15 minutes, until the edges start to brown. Place a tea towel on a cooling rack.

IMG_1019

Take the scones out of the oven and carefully transfer them to the tea towel that is on the cooling rack.

IMG_1021

The misshapen ones look weird, but they are so good!

Now cover them lightly with a second tea towel and let cool until scones are almost to room temperature.

IMG_1022

When I first saw this technique for cooling scones (and I have seen it several times), I couldn’t believe it. I thought for sure they would end up soggy, but somehow, magically, they are still crispy and flaky on the outside, and oh-so-melt-in-your-mouth perfect on the inside. Believe it.

Now make your maple glaze – stir together 1/2 cup plus 2 Tablespoons powdered sugar, 1/4 cup pure maple syrup, and 1/2 teaspoon vanilla. Stir until smooth.

Drizzle over the scones once they are at room temperature, or close to it. You can drizzle a little or a lot. The recipe makes a lot of glaze, just in case you like to drench your scones. That has never happened at our house.

IMG_1024

This one makes me want to cry.

Yes, that is the misshapen one. I’m not obsessed over it or anything. What I really want to try sometime is to make these scones, but skip the whole stacking and turning thing. Just knead a teeny bit and make a large round of the dough and bring it together as best as I can, and then cut the round into pie shaped wedges. But the way I do it now works so well that I’m not willing to mess with it. I may just try it tomorrow. In the meantime, if you are still following along, grab your scone and cup of tea and relax. As Millie once said to me when she was less than 2 years old and I was hustling and bustling around the kitchen, “Wewax Mommy, wewax and dwink woh tea.”

IMG_1035

Do you like my sincere fox mug?

By the way, these keep nicely for a couple of days, wrapped airtight and kept at room temperature. Reheat in a 250° oven for about 5 minutes.

Oat Scones

  • 2 cups (9 ounces) all purpose flour
  • 1/4 cup brown sugar, packed
  • 1/3 cup old fashioned or quick cooking rolled oats
  • 1 1/2 teaspoon cinnamon
  • 1 teaspoon baking powder
  • 1/4 teaspoon baking soda
  • 1/8 teaspoon salt
  • 1 stick (1/2 cup) unsalted butter, cut into 16 cubes, chilled
  • 1 cup heavy cream, chilled

Maple Glaze

  • 1/2 cup plus 2 Tablespoons powdered sugar
  • 1/4 cup maple syrup
  • 1/2 teaspoon vanilla extract

Directions:

  1. Preheat oven to 400° 30 minutes before baking. Set a baking sheet in oven before preheating.
  2. In a large bowl, whisk together all the dry ingredients.
  3. Add the butter, and with your fingertips, press the cubes into large flakes.
  4. Stir in the cream just until the flour is moistened and the dough starts to come together in large clumps.
  5. Knead the dough in the bowl just a bit, until it holds together, and turn it out onto a floured board or countertop – it will be crumbly.
  6. Shape dough into a rectangle (4″ x 12″), and cut into three sections, stack, rotate, flatten and repeat two more times. End up with a 4″ x 12″ rectangle (roll with rolling pin if necessary).
  7. Trim edges and cut into triangles with a sharp knife. Transfer scones to cookie tray lined with parchment paper.
  8. Mash the edge scraps together to form a small rectangle. Cut into two triangles and transfer to cookie tray.
  9. Place cookie tray in the oven, nesting it in the hot cookie tray that is already in the oven. Bake 15 to 18 minutes, or until the edges start to brown.
  10. Cool in tea towels on cooling rack.
  11. Drizzle with glaze when scones are almost at room temperature.
  12. Enjoy warm or at room temperature.

These were done with the second, more traditional method.

Yes, well, tomorrow has come, and is now today. I had to try doing this the other way, without all the stacking and turning, without flattening the butter into large flakes… in other words, a much less fussy way. My conclusion? Both are fabulous! The first method, stacking and rotating, etc, makes scones that rise evenly and are smooth on top, and have a very smooth texture. The second method, that I will go over, the scones (shown above) are craggy and nubbly, less fussy to make, and still have a wonderful crispness on the outside and a dense but melt-in-your-mouth texture inside. So if you like a more rustic scone, keep reading.

Have ready and waiting for you in your fridge:

  • 1/2 cup (1 stick) very cold unsalted butter, cut into 12 to 16 cubes.
  • 1 cup heavy cream, very cold.

Mix the dry ingredients: 2 cups all purpose flour, 1/3 cup old fashioned rolled oats (or quick cooking), 1 1/2 teaspoons cinnamon, 1 teaspoon baking powder, 1/4 teaspoon baking soda, and 1/8 teaspoon salt, (but not the brown sugar). Once everything is well combined, toss in the cubed cold butter (1/2 cups worth).

Now cut the butter in with a pastry cutter or two sharp knives. Should look like this.

Now stir in 1/4 brown sugar. And then stir in 1 cup cold heavy cream just until the flour is moistened and the dough starts to come together in large clumps.

Now knead the dough a bit to bring it all together in the bowl.

Cut the dough in half.

Turn both halves out onto a floured board or countertop and shape into rounds.

Grab a sharp knife or your bench scraper and cut each round into 6 wedges.

Transfer all of the cut scones to a cookie sheet lined with parchment paper. Make sure there is about an inch (more or less) of space between the scones.

Place tray in the hot oven on top (nested) of the cookie tray that is already in there. Bake for about 15 minutes, until the edges start to brown. Place a tea towel on a cooling rack. Take the scones out of the oven and carefully transfer them to the tea towel that is on the cooling rack. Now cover them lightly with a second tea towel and let cool until scones are almost to room temperature.

Now make your maple glaze – stir together 1/2 cup plus 2 Tablespoons powdered sugar, 1/4 cup pure maple syrup, and 1/2 teaspoon vanilla. Stir until smooth.

Drizzle over the scones once they are at room temperature, or close to it. You can drizzle a little or a lot. With these craggy, nubbly scones, the glaze will seep a bit into the crags which makes them extra delicious.

Oat Scones

  • 2 cups all purpose flour
  • 1/4 cup brown sugar, packed
  • 1/3 cup old fashioned or quick cooking rolled oats
  • 1 1/2 teaspoon cinnamon
  • 1 teaspoon baking powder
  • 1/4 teaspoon baking soda
  • 1/8 teaspoon salt
  • 1 stick (1/2 cup) unsalted butter, cut into 16 cubes, chilled
  • 1 cup heavy cream, chilled

Maple Glaze

  • 1/2 cup plus 2 Tablespoons powdered sugar
  • 1/4 cup maple syrup
  • 1/2 teaspoon vanilla extract

Directions (method #2):

  1. Preheat oven to 400° 30 minutes before baking. Set a baking sheet in oven before preheating.
  2. In a large bowl, whisk together all the dry ingredients except the brown sugar.
  3. Add the butter, and cut into the flour mixture with a pastry cutter until butter is size of small peas.
  4. Stir in the brown sugar.
  5. Stir in the cream just until the flour is moistened and the dough starts to come together in large clumps.
  6. Knead the dough in the bowl just a bit, until it holds together, cut in half, and turn out both halves onto a floured board or countertop.
  7. Shape each half into a round that is about 3/4″ thick.
  8. Cut each round into 6 wedges. Transfer scones to cookie tray lined with parchment paper.
  9. Place cookie tray in the oven, nesting it in the hot cookie tray that is already in the oven. Bake 15 to 18 minutes, or until the edges start to brown.
  10. Cool in tea towels on cooling rack.
  11. Drizzle with glaze when scones are almost at room temperature.
  12. Enjoy warm or at room temperature.


Posted in Comfort Food, Fun in the kitchen! | 1 Comment

Belgian Sugar Waffles (Gaufres de Liège)

IMG_0762

Imagine a hot croissant or brioche fresh out of the oven, bespeckled with bits of crispy, melt-in-your mouth sugar, and covered with crispy caramelized sugar in places, and you would be getting close.

My friends Cheryl and Brian recently sent me a fabulous waffle iron – best gift ever! So you know I just had to get to work doing some waffle research. By coincidence, I happened to notice these at the grocery store:

What perfect timing to notice these!

I noticed them by accident, and had no idea what they were for. I looked at the back of the packet, and found a recipe for Belgian Sugar Waffles!!! So now I was intrigued. I made the recipe as printed on the back of the packet, and thought they were really unusual and delicious, but a little too dense. So a lot more research happened, (we were having a “Snowpocalypse” in Seattle, where it rarely snows, and I had an unusual amount of time to putter in the kitchen).

We live on a steep hill!

Here is what I came up with, adapted from the recipe on the back of the Lars Belgian Pearl Sugar packet. It’s a lot of pictures and details. I need that with yeasty things.

Heat up one cup of milk to just 100°.

Still need to let it cool down five degrees.

Add 1 packet active dry yeast to the milk. Just sprinkle it on top.

Just sprinkle it on top.

Looks like this.

Now add 1 Tablespoon granulated sugar.

And add 1 Tablespoon all purpose flour. Stir it a little bit and let it sit for 5 to 10 minutes.

Now, the last time I made these, I followed these steps and waited, and nothing happened. No beautiful foam. Super disappointing. This is what the mix looked like:

No foam. Not good.

Well, I have read in other recipes that if the yeast doesn’t foam, pitch the whole thing and start over again. Now being that it was the Seattle Snowpocalypse, and we were running low on milk (grocery stores were out of everything!), I wasn’t willing to throw away a cup of milk, and I wouldn’t have wanted to do that anyway, so I just added another packet of yeast to the milk concoction (what’s the worst thing that could happen?), and this is what it ended up doing:

Success!

Now that’s what it’s supposed to look like. Kind of like a latté. I am only just getting to know yeast. As my friend Carol says, yeast is weird and unpredictable. But I know this, I wasn’t going to make an entire recipe and not know if the yeast was bad or good. I’ve done that before and regretted it. Make sure the yeast foams up a bit! Once you’ve gotten this far, put the milk/yeast/sugar/flour mixture into a large mixing bowl or bowl of your stand mixer (or to save time, do the whole thing in the mixing bowl to begin with. Then add 3 and 3/4 cups (17 ounces) of all purpose flour, 2 eggs at room temperature, 1 teaspoon salt, 1 teaspoon vanilla, and 1 teaspoon cinnamon. Just plop it all in there all at once.

You can mix this by hand with a nice solid wooden spoon, or use the paddle attachment and mix it in your stand mixer. I’ve done it both ways, and I think it is a bit easier using the stand mixer. Either way, mix it well, until the dough becomes a bit elastic or stretchy. At this point you will want to add in the softened butter  (1 cup, or 2 sticks, cut into pieces) little by little – switch to a dough hook! (By the way, if you are doing this by hand, mix everything at once, butter and all.) But back to the stand mixer. Add in the butter, using the dough hook, and mixing on a low speed, until all the butter is incorporated.

Eek! Don’t worry. It’s just dough.

This may take a while. Scrape down the sides of the bowl as necessary. When it’s properly mixed, the dough will be softer, and still a bit elastic.

Soft, but still stretchy.

Now scrape down the sides and cover your bowl of dough with plastic wrap and put it in a warm place in your kitchen, or at least an undisturbed place.

Before it has risen. Now cover that bowl!

Here’s a trick: turn your oven on to preheat to 350° for one minute, no longer. Turn the oven off. You are not trying to actually get your oven to heat up to 350°. You just want the oven to get a teeny tiny eensy weensy bit warm. I had to do it, because it is winter and right now my kitchen is cold! You can now put your bowl of dough that is covered in plastic wrap in a warm corner of your kitchen, on top of your fridge (it’s sometimes warm up there), or in the oven. Let it rest for at least a half hour, until doubled in size. Might take a bit longer.

Wow! That got big!

Now punch the dough down.

It got small again…

Ok, so the dough got smaller, but not as small as it was originally, and the texture should be soft and a little buttery (surprised?) and easy to handle. Now throw in about a cup and a half (or one entire package) of the pearl sugar. I know it looks like a lot. Don’t worry. It will be amazing!

Add the pearl sugar.

Sprinkle about a tablespoon or two of flour on top of that, and get your hand in there and mix the sugar with the dough, so that the sugar pearls are evenly distributed. It’s fun.

Now divide the dough into about two dozen balls and put them on a cookie sheet – they should be bigger than golf balls, but smaller than tennis balls.

These are way too big.

Cover with plastic wrap and let sit for about 15 minutes while you go have a cup of tea and get your waffle iron ready.

These are huge!

This batch for some reason I made only twelve balls, and they were ginormous, and got even more ginormous after sitting there for fifteen minutes, so I split each ball in half to make two dozen. Yes, this recipe easily makes two dozen waffles.

Ah, that’s better!

Once your waffle iron (Belgian waffle iron) is good and hot, place one ball of dough in each waffle square. No need to oil your waffle iron – these have lots of butter in them and they shouldn’t stick!

Don’t worry if some of the sugar pearls are coming out. They will melt into caramelized sugar – delicious. It might take around 3 minutes or so to cook, but that was just for my waffle iron. They should be golden brown.

Carefully remove from the waffle iron with wooden tongs or something else that won’t scratch your waffle iron – these waffles will be HOT, due to the melted sugar, so don’t touch them with your fingers. I learned that lesson the hard way. Dear husband says I have “restaurant hands” and can touch very hot things, but not melted sugar. That’s where I draw the line. Transfer them to a cooling rack. And don’t worry about any sugar pearls that are remaining on the waffle iron. Just put your next batch on there to cook. The more sugar residue there is, the more caramelized each batch will be.

Beautiful!

These are best eaten warm (not hot!), but they are good at room temp, and even right out of the fridge if you can’t wait…. not that that has ever happened here….

Eat them plain; we think they are best that way. But if you want to go crazy, add whipped cream, chocolate sauce, caramel sauce…. not that that has ever happened here….

Over the top.

During our crazy snowmageddon here in Seattle, I sent some of these out to the neighbors that were sledding and skiing (yes, that’s right) down our street. They were a big hit!

Cutie-pie! Look at that expression!

Now, if you have any left after sharing them with your neighbors, and trying more than one to make sure that you like them, wait until they have cooled completely, and store them by wrapping in waxed paper, then aluminum foil, and keep them in your freezer. They are very easy to re-heat for a fun snack. Just put them back in your hot waffle iron – they will fit like a puzzle piece. You can also heat them in a 250° oven on a cookie sheet lined with parchment paper for 5 to 10 minutes if you don’t feel like getting your waffle iron out.

Oh, and here’s how to clean your waffle iron! While it is still hot, unplug it. Pour a little water in each waffle section, then close the waffle iron and let it bubble and steam in there for about thirty seconds. Open it up. When it cools a bit, take a wash cloth and soak up the water and wipe the iron clean. Easy!

What you will need to make these, aside from a Belgian waffle iron:

  • 1 packet active dry yeast
  • 1 cup milk, warmed to 100°
  • 1 Tablespoon granulated sugar
  • 3 3/4 cups all purpose flour and a couple more Tablespoons of AP flour
  • 2 eggs at room temperature
  • 1 teaspoon salt
  • 1 teaspoon vanilla
  • 1 teaspoon cinnamon
  • 1 cup (2 sticks) unsalted butter at room temperature (should be soft)
  • 1 1/2 cups Belgian Pearl Sugar

To make:

  1. Combine the yeast, warm milk, 1 Tablespoon granulated sugar, and 1 Tablespoon all purpose flour in a large mixing bowl or bowl of a stand mixer, and let sit for 5 to 10 minutes, until foamy.
  2. Add 3 3/4 cups flour, 2 eggs, 1 teaspoon salt, 1 teaspoon vanilla, and 1 teaspoon cinnamon. Mix until well combined and dough is a bit elastic.
  3. Add in little by little the softened butter, mixing each addition until well incorporated.
  4. Cover bowl in plastic wrap and set aside to rise. Dough should double in size, so let it rest for a half hour to an hour.
  5. Punch down dough, pour in the pearl sugar, and sprinkle the top with a Tablespoon or two of all purpose flour. Mix with your hand until pearl sugar is well distributed.
  6. Divide dough into twenty-four balls of dough, put them on a cookie sheet, cover them with plastic wrap and let rest (and rise a bit more) for 15 minutes.
  7. Heat waffle iron and cook the waffles until golden brown.
  8. Remove from waffle iron with wooden tongs and let cool a bit on a cooling rack.
  9. Enjoy warm!


Posted in Fun in the kitchen!, Yeasty Things | Leave a comment

Velvety Vegan Split Pea Soup

IMG_0586

When I was in college, I was a vegetarian, and that is when I discovered this amazing split pea soup. The recipe came from Anna Thomas’ The Vegetarian Epicure Book Two. I only ever made delicious and delightful things from both Book One and Book Two. My copies are falling apart and full of stains and splashes and memories. I have loved everything I have made from these wonderful books.

IMG_0802

Note to self: don’t put hot sauce pans on top of your cookbooks.

Over the decades that I have been making this soup, I have made only a few tweaks, but I have learned lots. In fact, I have learned something that I wish I would have known right from the start: if your split peas don’t start to fall apart and become velvety after about 45 minutes of simmering, they are a bad batch!!! Some say, “Just boil them longer!” Nope. This doesn’t work, plus, who has time to wait and wait and wait for hours, just to be disappointed by split peas that will never become tender?

Why, you ask, would split peas be bad?  Well, they might just be old. If you dig around in your cupboard and find a bag of split peas that has been there since you moved in, use those in your kid’s sensory table or craft bin. They will be useless for cooking. Also, if you buy split peas in the bulk section of your grocery store, they may have been there for a while, exposed to moisture in the air, so those are risky. Buy the packaged split peas, and check the expiration date. The fresher the peas, the better. Even with these precautions, you might still end up with a bad batch. It happened to me just last week. If you have a good batch, your split peas, after about an hour of simmering, should look like this.

IMG_0785

Velvety, surrounded by green clouds!

I also have other little tricks and techniques that I will share with you, if you don’t know them already. So here is how to make a velvety, luscious split pea soup, adapted from Anna Thomas’ version.

Sort and rinse a pound of split peas… I used to spread them out on a cookie sheet to sort and make sure there were no rocks or other odd items, but now I slowly pour them into my hand, and let them fall through my fingers into a large stock pot, eyeballing every one to make sure it’s not a rock. Do this, then add water and swish it around and pour the water out. Do the swishing and rinsing three times. The fourth time, add four quarts of cold tap water and put the stock pot over high heat until it comes to a boil. Reduce the heat to a simmer, and skim the foam off the top with a slotted spoon and discard. Stir every now and then to prevent peas from sticking to the bottom of the pot.

IMG_0775

Almost looks like a matcha green tea latté…. almost.

Let the peas simmer for about 45 minutes. If they are not falling apart and starting to make a green cloud of velvety-ness, if they are still almost completely whole, like they don’t care that you have been simmering them all that time, you must change your plans and order out. Or pull leftovers out of the fridge.

But, if all is going well, keep those peas gently simmering in a stock pot on a back burner, and get out a nice heavy-bottomed soup pot – I like to use my Le Creuset dutch oven – put it over medium heat and pour a couple tablespoons of olive oil in to heat up. If you don’t need this soup to be vegan, you can use two tablespoons of butter instead… you know that’s what I do.

Now add 1 cup finely chopped onions. Here is my chopping onion trick to not get stinging eyes, and it works like a charm! Every second that you are chopping these onions, breathe through your mouth. Don’t even breathe through your nose one time to check and make sure you still can. Don’t even swallow, because it’s hard to swallow and not breathe through your mouth, if not impossible. Do this in private if you have to, but really, it works! And be quick about it.

IMG_0560

I didn’t cry over these.

And here’s my other trick about onions. Even though I can chop them without crying, I still don’t like chopping onions. Shhhhhh. I find that a good sized onion will make about two cups chopped, so I just put the other cup of chopped onions into a baggie and freeze them for the next time I need them. Yay! I love that trick. Sometimes I end up with several baggies of frozen chopped onion in the freezer, but I always end up using them.

Next, add one and a half cups chopped carrots and a half cup chopped celery to the pot (sorry, no picture, but I think you know what that looks like). And drum roll please… here is the most exciting ingredient in this fabulous soup…. add one cup of peeled and chopped white fleshed sweet potato. This makes your soup stand out from the others. Fantastic!

IMG_0565

White fleshed sweet potato, like a “Hannah”.

I’m pretty sure it’s the “Hannah” sweet potato that I use. Just make sure it has white flesh. If you can’t find that kind of sweet potato, you can substitute a Yukon Gold potato, which is on the sweet side. The potato is what helps to create the velvety quality of this soup.

Oh, and another trick? If you have an annoying cutting board that swivels around when you are using it, put a tea towel underneath it to keep it from moving. My friend Johanna taught me that trick. She is magic in the kitchen.

Stir the veggies and let them simmer for about ten minutes, until tender.

IMG_0783

Now add 1 teaspoon dried basil, 1 teaspoon dried marjoram, and 1 teaspoon cumin powder. And also 1 clove crushed garlic. Another trick? Place the clove on a cutting board or steady surface. Place a knife blade flat on top of the clove, and bang once with the heel of your hand. This breaks the clove and makes the garlic so easy to peel! Don’t show this picture to dear husband. It will make him nervous.

IMG_0568

Orange Boy must think it’s dinner time.

Stir veggies and herbs and cook another five minutes or so.

IMG_0784

Delish!

In the original recipe, it says to now add the veggies to the stock pot, but I really like every speck of deliciousness that has accumulated in the veggie pot, so I choose to just pour in (carefully!) the split peas and water into the dutch oven. You can use a ladle to do this if you are worried about splashing.

IMG_0787

Let it simmer for another 45 minutes or so. Now, if you don’t have an immersion blender, I must beg you to go and get one. Borrow one from your neighbor. Just get one. It is one of the best kitchen inventions ever. Using your immersion blender, blend the soup until it is the consistency you like.

IMG_0792

If you don’t have an immersion blender, you can ladle some of the soup into a blender or food processor to purée it, and then add it back in. Keep doing that until you get it to the right consistency.

IMG_0793

Sorry this is not the most flattering shot, but you get the idea.

The soup will be sweet, so add about one and half teaspoons salt (or to taste) and some fresh cracked pepper. The original recipe called for white wine as well, but I find it delicious as is, so I don’t add the wine. This soup is fabulous served with a good crusty bread.

img_0586

Or if you didn’t plan ahead, you can always whip up some biscuits to go with it.

IMG_0796

This soup, like most soups, is wonderful as leftovers. Even better than the first day. Store the extra in your fridge (use within a week) or in the freezer (should be fine for up to three months). When reheating, you will find that the soup has thickened a LOT. Thin it with broth or water to the consistency you like.

Finally, as an afterthought, I just wanted to say that I think this soup is beautiful. You can leave it not fully puréed, so that you have mini specks of orange and white, or you can fully purée it. Either way, I love the ruddy green color and velvety smooth texture. It is much different than what you might be used to. You can also add tiny cubes of ham to it if you like. Add them at the end, reheat, and serve. They will add a nice burst of salty, smoky flavor. Garnish with toasted pine nuts or pepitas… you know, be creative! Or just enjoy it plain, as I usually do.

Here is what you will need to make this soup, aside from a large stock pot, a heavy bottomed soup pot, and an immersion blender or regular blender:

  • One pound (16 oz) split peas
  • 4 quarts cool tap water
  • 2 Tbsp olive oil
  • 1 cup chopped yellow onion
  • 1.5 cups diced carrots
  • 1/2 cup diced celery
  • 1 cup diced white fleshed sweet potato or yukon gold potato
  • 1 tsp dried basil
  • 1 tsp dried marjoram
  • 1 tsp ground cumin
  • 1 clove garlic
  • 1.5 tsp salt (or to taste)
  • 1/2 tsp freshly cracked black pepper (or to taste)


Posted in Comfort Food, Fun in the kitchen!, Soups | 5 Comments

No Knead Bread

img_0628

I wanted to find out what all the fuss was about with this No Knead bread business. My family and I were visiting family in St. Louis, and our friend Brian made a loaf – it was beautiful, and so yummy! He gave me Jim Lahey’s recipe from the New York Times, with a few tweaks that worked for him. I just recently got it in my mind that I had to try making this. My first attempt was burnt on the outside, and gummy on the inside….. What did I do wrong?

img_0529

Burnt on the outside and gummy on the inside.

I read many articles and blogs about this… about the no-knead bread turning out gummy, and the crust being burnt, and some of the replies were “Sounds like you are doing everything right!”. Well, I know what I like, and I know what good bread tastes like, and this wasn’t it. So the next time I reduced the temperature of my oven, and here is what I got.

img_0536.jpg

Beautiful, right?

img_0537

Looks perfect, but it’s still gummy!

So this second time, although the bread looked pretty, it was still gummy. My family loved it, but I was not happy about it.

Let me say that I am a bread “newbie”. I don’t really know what I’m doing. I’ve worked with yeast a little bit for things like cinnamon rolls or yeasted dough crumb cake, but my actual bread experience is very limited. A couple of years ago I made bread using The New Artisan Bread in Five Minutes a Day book. I made it for a couple of weeks, but then stopped. I can’t even remember how it was or why I stopped. I’m just like that sometimes.

But back to now. One thing that this no-knead recipe was missing was details. Being that I’m such a newbie, I really needed more details to do it right. For example, it said that you want to let it rise for 12 to 18 hours, with 18 hours being ideal. So that’s what I did. Both times. 18 hours. The recipe states that the dough should be covered with bubbles when it is ready. Here is what mine looked like.

img_0539

Just try to erase this out of your mind now.

Okay, so the problem here is that I didn’t know what I was looking for. Bubbles? What kind of bubbles? How many bubbles? The recipe just said the dough would be ready when the top was covered with bubbles. Dear husband and I agreed, more bubbles is better, right? Well, no. If you look at the picture above, and really, I can’t believe I am even posting it, because it is one ugly picture, you will see that all of the bubbles have popped open, and the dough has started to collapse and turn gray :(.

For me and my kitchen, 18 hours was way too long to let the dough rise, and my kitchen overnight is not a warm kitchen. And here’s another disaster that happened. Because the dough had collapsed and was wet and difficult to handle, when I put it in a well floured towel to let it have its final rise, the dough stuck to the towel something fierce. It was a huge mess!!!

The entire experience was very frustrating, so hopefully, if you follow these directions (still Jim Lahey’s recipe), with pictures and lots of details!!!, you won’t have to make the same mistakes that I made. Here you go:

Put 3 cups (13.5 ounces) all purpose flour into a large bowl. Add 1 tsp salt (or a tad more), and 1/4 teaspoon Instant Yeast and stir it all around with your hand to mix well.

img_0588

I love using my fingers for this.

Now add 1 and 1/3 cups cool to room temp filtered water and stir with your fingers quickly until you end up with a shaggy dough.

img_0589

Cover bowl with plastic wrap and put it somewhere it will be undisturbed for about 12 hours, but you decide after looking at the bubbles! Start checking at 11 hours. After 12 hours, mine looked like this:

img_0597-1

Bubbles!

Here is a close up of the bubbles. They kind of look like chewing gum bubbles right before they pop. It’s okay if some of them have popped, but you want plenty of them to still be un-popped.

img_0593

I know it looks weird, but now you know what to look for!

When your dough has reached this stage, lightly flour a counter top or working surface, and scrape the dough out onto it. I scrape with my fingertips to make sure to get every bit.

img_0600

Flour your hands and flour the dough lightly, then stretch it to shape it into a rectangle. Stretching the dough is good!

Ok, so it doesn’t have to be a perfect rectangle, but you get the idea.

Then fold over the right side.

img_0601

Then fold over the left side.

img_0602

Rotate it a quarter turn.

img_0603

Fold the right side over again.

img_0604

And now the left side.

img_0605

Now sprinkle the top with a little flour and cover lightly with plastic wrap. Let it sit for about 15 minutes while you go have a cup of tea.

img_0607

After 15 minutes, get a kitchen towel (NOT terry cloth) – I like the tea towels from Trader Joe’s or IKEA – and put a generous layer of course stone ground cornmeal or wheat bran on the towel.  You can also do this with flour, but I am so traumatized after my dough sticking that one time that I use corn meal instead – it works for Brian every time. But really, that old dough stuck so badly because it had fermented too long, but let’s continue.

img_0610

Yes I use that much.

Flour your hands and try to shape your dough into a ball shape. I say try because I’m just not very good at this part. Take your dough ball and place it seam side down on your towel. Sprinkle the top with corn meal or wheat bran or flour.

img_0613

Pretty!

Now very loosely cover the dough by folding over both sides of the towel. Loose so that it has room to rise. Let it sit for a total of two hours, but be aware that at the 1.5 hour mark, you will need to turn your oven on to 450° (please use an oven thermometer) and place a dutch oven with lid (and oven-safe knob) into the oven to preheat. You want to give your oven and the dutch oven a solid half hour to get good and hot!

img_0614

Leave it alone.

During some of that two hours, clean up the flour mess with a bench scraper. I love my bench scraper.

img_0615

A bench scraper makes quick and easy work of floury messes.

img_0616

At two hours, your dough should hopefully have doubled in size, and your oven should be crazy hot!

img_0617

It really did get bigger!

With oven mitts or cute potholders that your kids made for you, pull out your dutch oven (I use a Le Creuset dutch oven) and carefully take the lid off. Remember that your dough is seam side down on the towel. Place your hand on top of the dough and flip it over into that hand so that the seam side is up. Now plop it into your dutch oven, seam side up. This can get a little confusing, and I’m pretty sure I screwed it up on my third try, but the bread still turned out great. Grab your mitts and shake the pot a bit to center the dough.

img_0618

Hard to tell, but it is seam side up.

Don’t worry about all the cornmeal, or whatever. You can always brush it off when the bread is done. Now, to help the bread to rise evenly, take some kitchen scissors and make four even cuts into the dough. I know it’s hard to see it, but I really did get in there with scissors.

img_0620

Snip Snip

And the four cuts look like this.

With your oven mitt, put the lid back on your dutch oven and put the whole thing back in the oven.

img_0635

Quit looking at the bottom of my oven. That’s not what this picture is about.

The lid keeps steam in for the first part of the baking, which creates a lovely, crispy crust. Set your timer for 30 minutes. When the 30 minutes are up, take the lid off of the dutch oven. Your bread might look something like this.

img_0622

Gorgeous!

Set your timer for 15 more minutes, and continue to bake your bread without the lid. This last part crisps up the crust nicely. You can peek at it and make sure it isn’t getting too dark for your liking. When the crust looks the right color to you – dark is good, and I find that 15 minutes is about right – get your oven mitts and take the pot out of the oven. With a spatula, carefully remove the bread from the pot and place it on a rack to cool. If you tap the bottom of the loaf, it should sound hollow.

img_0624-1

Sunny day in Seattle makes for strange lighting!

Now, here’s a cool thing. Get close to your work of art and listen. If all went well, you should hear the crust crackling. Magic. It is best to let the loaf cool for two hours, because it continues to cook during this time. You might be able to get away with one and a half hours, but do try to be patient! Now brush off the excess cornmeal or whatever, and dig in.

img_0629

I know, there’s a big old hole in the middle, but if you watch Jim Lahey’s videos, his breads are full of big holes. It’s the taste and texture that I’m concerned with, and this bread is really delicious!

Update: I have been making this bread at least once a week now, and just yesterday, I got so busy that I forgot about dough that was resting in the bowl since the night before. By the time I got to it, it had been rising for almost 16 hours. But the dough still looked fine. So I made the bread, and it was amazing. Best yet. The crust was thin and crispy/chewy, and the bread was light and airy and melt-in-your mouth delicious. So here is what I think – the first couple of times I made the bread, I followed Jim Lahey’s recipe exactly, which called for 1 5/8 cups water. Then I had that wet dough sticking to the towel, so I reduced the water to 1 1/2 cups. The bread still came out gummy. Finally, I reduced the water to 1 1/3 cups, and that is the magic amount *for me*. Letting the dough ferment longer yesterday just made it better. Here is the thing: if you use a measuring cup and just jam it into your flour to measure, your flour will be tightly packed, thus using more flour, and needing more water. I always stir up my flour to aerate it, and then spoon it into the measuring cup to measure before leveling. So I didn’t need as much water. You have to find the perfect amount of water for you. Trial and error is part of the process. I hope you make this bread, and I hope you love it as much as my family and I do.

Enjoy it toasted with your morning scramble.

img_0623

Enjoy it with your favorite soup… it is so good with split pea soup.

img_0587

Or just enjoy it all on its own.

img_0633

Here is what you will need to make this bread:

  • Dutch oven with a lid
  • Large bowl
  • Plastic wrap
  • Kitchen towel
  • Cooling rack
  • 3 cups all purpose flour
  • 1 1/4 tsp salt
  • 1/4 tsp instant yeast
  • 1 1/3 cups filtered water (tap water is ok too)
  • More flour for dusting
  • Course stone ground cornmeal or wheat bran or more flour

Other things that come in handy:

  • Oven thermometer
  • Bench scraper, to clean up flour mess!

If you make this bread, or have already done so, let me know what you think!


Posted in Fun in the kitchen!, Yeasty Things | 3 Comments

Favorite Nutty Granola

img_0494

I can’t believe I’m posting this recipe, since I give this granola as gifts every Christmas… anyway, if you have a couple of hours to spend in the kitchen, this granola is well worth your time. My entire family is obsessed with it, even my youngest, who enjoys it with yogurt and maple syrup. Who am I kidding? That is my favorite way to eat this granola as well… she got the idea from me :).

img_0488

I found out about this granola from my friend Glyn, and she found out about it from the “MAKE-A-MIX COOKERY” cookbook. Glyn said the recipe was very forgiving, and I find that definitely to be true, so here is my version of this granola.

img_0458

I hope you like the cat sticker, which hides an unsightly stain.

Oh, and I don’t use shredded coconut; I use coconut chips. And although there are sesame seeds and sunflower seeds in the recipe, I don’t use them. (The sesame seeds all fall to the bottom, and I’m not big on the flavor that the sunflower seeds add. ) The nuts are raw and the coconut chips are raw as well. Here are the first ingredients you’ll need if you make your granola as I do. Everything but the wheat germ can be found at Trader Joe’s, which I find very convenient. I got the wheat germ at my local health food store. You can probably just skip it if you can’t find any.

img_0459

Front row is raw pecan halves, raw walnut halves and pieces, and raw almonds.

Preheat your oven to 300°. Put the oats, coconut chips and wheat germ in a very large bowl and set aside. Now, the fussy part. The nuts need to be chopped. If you buy them already chopped, they are ridiculously expensive, so I just buy them whole and raw. I use a cup each of almonds, walnuts, and pecans. I don’t like to chop nuts by hand, so here’s what I do: one cup at a time, I put the nuts in my blender (I have a Vitamix, but other blenders should work as well, or of course, a food processor, which I do not have.)

img_0461

Just pulse a few times to get the nuts chopped as you like. Nobody in my family likes large pieces of nuts in their granola, so I go pretty fine.

img_0462

Dump the cup of chopped nuts into the bowl with the oats, and then chop the next cup of nuts, etc. When done chopping the nuts, mix the oats, wheat germ, coconut, and chopped nuts thoroughly.

img_0467

Set that big bowl aside again. Here are the rest of the ingredients you will need.

img_0460

Now put the brown sugar, water, oil (I was low on canola oil this last time, so I added coconut oil as well and it came out great), honey, molasses (I use a bit less than a quarter cup… more like three tablespoons, and I find that black strap molasses is too strong a flavor, so I don’t use that kind), salt, cinnamon, and vanilla in a sauce pan on medium heat and stand there and stir until the sugar melts. Don’t let it boil! Don’t check your phone! Don’t do anything but stand there and stir. My assistant is helping me. Notice the bits of coconut oil that haven’t melted yet, but also notice the lovely color and smoothness of the syrup. It won’t look like this if you let it boil. Also, never  forget the salt! Glyn said this recipe is very forgiving, which is true. But not if you forget the salt. Trust me, I know.

img_0466

As soon as the sugar (and coconut oil if you use it) has melted, pour the syrup over the oat mixture and mix well with a large wooden spoon. The mixture will be wet and heavy.

img_0471

Now you will need two large cookie sheets with sides. Don’t use nonstick. Divide the mixture between the two sheets and spread evenly with that wooden spoon.

img_0473

My cookie sheets are very large – 13″ x 18″ – so I cook the granola one tray at a time. I suggest you do the same. Once I tried putting a tray on each rack in the oven, to save time. The granola did not cook evenly, and it was way more of a hassle trying to switch the trays to different racks, etc., etc., to try to get it to cook evenly, so don’t do that. You can’t be in a hurry when you make this. Another thing I tried once was putting all of the granola on one tray, to save time. That was a very bad idea. Don’t do that either. Now, write down what time it is on a piece of paper or sticky note somewhere, then put the first tray on the center rack in your preheated, 300° oven, and set the timer for 10 minutes.

img_0475

When the timer goes off, open the oven, pull the rack about halfway out, and stir the granola… go find that large wooden spoon you were using. Push the rack back in, close the oven, and set the timer again for ten minutes. Don’t forget to set your timer! When the timer goes off, stir your granola again, and set the timer for ten minutes again. By the time your timer goes off the third time (this should equal thirty minutes of bake time… if you are unsure, go walk yourself over to that piece of paper where you wrote down what time it was when you started this whole process), your granola should start to have golden edges appearing, and should look something like this:

img_0476

Golden edges starting to happen.

Now, stir it again, and set the timer for 10 minutes. Be careful! I find that around 40 minutes or so makes the perfect granola for me – crispy, and deep golden brown. BUT, there have been times where I forgot that last timer, or even that I didn’t forget the timer, but wandered off to do something (which is fine!), but then when I heard the timer go off, I was distracted and waited a few minutes too long to get back to the kitchen. If you’ve ever tried toasting nuts in your oven, you will know that they can go from perfectly toasted to horribly burnt in a matter of minutes, and so it is with this granola. When the timer goes off, take a look. If you think it needs a minute or two more, set your timer for a minute or two more, and then stand there and wait. Srsly. When it looks right, don’t stir it, just take it out of the oven and set the tray somewhere to let it cool completely. It crisps up as it cools. It should look something like this:

img_0479

This is perfect.

Now, write down what time it is on a little piece of paper or sticky note somewhere, set your timer for ten minutes, put the second tray in the oven, and do the whole thing over again. Yep, that’s right. 40 more minutes. You can do this. If successful, you will end up with about 10 cups of ridiculously delicious granola, and you will feel nervous when your family snarfs it down in a couple weeks time. Don’t they know how long it took you to make this?

Update: I have recently been baking both trays of granola at the same time, with better luck, and it makes the whole shebang much less time consuming. Just make sure that you rotate and switch pan positions every ten minutes for even baking, and don’t skip the stirring. When you place your trays in the oven, do it like this:

A few notes:

Make sure to let the granola cool completely before storing it, otherwise it will get mushy from condensation and be ruined. Store it in airtight containers, and it should last up to six months (!!!), but it never does at my house. Not even close.

Also keep in mind that some ovens run hotter than others, so your timing might differ from mine. Change your cooking times as necessary. I find it comforting to use an oven thermometer so I know what’s really going on in there.

If you want to add dried fruit, do this once the granola is completely cool and just before storing. And if you have lots of time to spare, you can, of course, double the recipe, which is how I used to make it, but I find the whole thing rather unwieldy and difficult with that much granola to mess with, so I just make it more often.

Put it in lovely, airtight containers and give as gifts. I do.

img_0494


Posted in Comfort Food, Fun in the kitchen! | 1 Comment

Reusable Cheesecloth

I have been looking for reusable cheesecloth, and I’ve found it!

When making yogurt, I like to strain it to get it thicker, more like Greek yogurt. I have been buying cheesecloth that works well, but it kind of falls apart if I try to clean it, so it’s single use only.

I tried using a nut milk bag, which is reusable, and works for many, but this is the mess I ended up with:

I did a lot of research and looked at lots of blogs, trying to find a solution to this issue, and there were lots of opinions about other types of cloths to use instead of cheesecloth, like muslin:

A tea towel:

Or even a hankie:

When looking through these fabrics, I wasn’t convinced that they would strain as efficiently as cheesecloth, so I kept looking. I bought a small amount of cheesecloth from my local craft store, and this cheesecloth seemed a bit sturdier than what I had found at the grocery store. When I opened it up, I found that it was folded in the same way that the grocery store version was, with the cut edges in the center:

So I completely unfolded it, and then just folded it in half. You really want to have the cheesecloth doubled so that it is sturdy enough to handle and work with.

This still left me with the raw edges that tend to fall apart when wet, so I rolled the edges, and then sewed a rolled hem:

So it ends up kind of looking like a hankie, but nice for straining:

When I used it for straining yogurt, it worked like a dream. The yogurt pulls neatly away from the fabric.

And this is what it looks like after peeling the yogurt away; practically no waste!

And the best part? I just rinsed the cheesecloth with hot water, squeezed the water out, and then hung it to dry, and it’s good as new! So there you have it, reusable cheesecloth!

And just because the yogurt is so pretty (and delicious), I leave you with this picture.


Posted in Crafting, Fun in the kitchen! | 2 Comments

Tuna Melt is back!

img_0292

Comfort food is big at my house. Simple is better. In fact, SO simple, that I sometimes despair at ever being able to make “fancy” food again. So when my older daughter came home from babysitting and told me that she had a tuna melt, and it was good, I was overjoyed! Something new I could start to make without complaints from my lovely family. And it falls into the comfort food category, of which I am very fond.

Okay, tuna melts are not fancy, but I can get excited about them if they are on croissants. For now, they are on store bought croissants – – really good ones from Whole Foods bakery. Also, when I was a kid, my mom used to put Worcestershire sauce in her tuna salad. It was so good! So that is the secret ingredient. I really don’t like tuna salad without it. It adds a zing. I was curious, so I started looking around on the internet, and sure enough, Worcestershire sauce in tuna salad is a thing. So this may not be news to you, but if it is, you must try it!

img_0274

This is what you will need, plus your favorite cheddar.

Oh, if you have cats, put them outside now so they won’t bother you while you are making this. And don’t ask me how those splash marks got on the glass doors. I have no idea. I have children and cats. Preheat your oven to 375°.

img_0294

They both really really wanted to sit on that cushion.

Okay, I use three small (5 oz) cans of tuna – albacore packed in water. I like the tuna with salt added; that’s just me. Drain it, but save the water for your cats. They will love you. Orange boy LOVES tuna juice.

img_0295

I don’t really have exact measurements for this, but just put the tuna in a bowl, and throw in some mayonnaise. Just regular mayonnaise please. I don’t like tuna salad that is too mayonnaise-y, so I just put a couple of dollops in.

img_0280

Mix it lightly, but not so much that you can no longer see the flakes of tuna. I don’t like a mushy tuna salad.

img_0281

Now add the Worcestershire sauce. Like I said, I don’t have measurements, but if I did, it might be a tablespoon? I just douse the tuna with it and mix it in.

img_0283

Now chop up your celery (one stalk or so) into cute little tiny cubes. I cut the stalk in half. Then cut each half into four long strips, then chop. This may seem obvious, but really, it’s more fun to have teeny tiny cubes of celery than to have large chunks.

img_0279

Then mix in that celery. Now cut your croissants in half and place the halves on a cookie sheet with parchment paper (that makes the bottoms get nice and crispy, and makes for easy clean up). Top with the tuna salad. Okay, so I have some picky eaters at my house. One only wants the croissant :), one doesn’t like celery… Hey!!! If you have leftover tuna salad, put it in a smaller container and refrigerate it, but DON’T rinse the bowl that you mixed the tuna salad in. Just set it aside; and no, you are not saving it for the cat.

img_0286

Now top with small slices of your favorite cheddar cheese. Or another cheese if you prefer.

img_0287

Put it all in your preheated 375° oven until the cheese melts. This usually takes less than five minutes, but make sure it melts. Dear husband complained one time that the cheese wasn’t melty enough… If it’s easy to do so, switch to broil for the last minute or so to make sure the cheese melts. Here is what I like: crispy bottom, melted cheesy top, but the tuna is still slightly cool in the middle.

img_0289

Now, I like to serve this with a green salad. I get some mixed greens and put them in the bowl that had the tuna salad in it.

img_0290

Dress your salad with extra virgin olive oil and balsamic vinegar, and then turn your salad around in the bowl to make sure the tuna salad leftover bits get mixed in. By the way, in France, they don’t toss their salad, they turn it. Aller, vas tourner la salade!

img_0291

Serve and enjoy!

img_0292

And by the way, my younger daughter requested that I learn how to make croissants… now that really would be a fancy tuna melt! So stay tuned.


Posted in Comfort Food, Fun in the kitchen! | 5 Comments

Perfect Fried Eggs

I know there are many techniques to making fried eggs – – over medium to be more specific, and until I found this one, I had many mishaps: broken yokes, eggs drift away from each other on the pan making them difficult to flip, difficult to flip anyway, yokes overdone, white underdone…

But with a good non-stick pan with a lid (preferably glass), you need never worry about these things again! No flipping necessary!

[This part right here might be extra important!! You don’t want the timing of making your toast to get in the way of your perfectly fried eggs, so here’s what you do: make and butter your toast, and put it directly on your middle oven rack, with the oven on “warm”. Do this before you start making your eggs. That way, when your perfectly fried eggs are ready, you will have hot and crispy toast ready to go! No more soggy toast!]

So here is my magic way of making fried eggs, pretty much perfect every time! First, you break the eggs into a shallow bowl that will pour easily.

img_0195

Yes, sometimes I have three. Don’t judge me.

Set your pan on a burner and heat it to medium-high. Set a digital timer (use your microwave timer or your smart phone timer if you don’t have a digital kitchen timer) for 50 seconds. Make sure to set the timer, but don’t hit “start” yet.

Toss a few drops of water in your pan. If they sizzle, you are ready to go. Don’t overheat the pan dry.

The next part needs to happen rather quickly and precisely, like clockwork. Once water drops will sizzle, put some butter in the pan and don’t be stingy about it. The butter will melt fast, and may even start to turn golden -that’s okay. Just don’t let it burn. Gently pour the eggs into your pan and put the lid on it immediately! Now hit the “start” button on your timer.

img_0199

When the timer goes off, immediately take the pan off the heat and to a burner that is not turned on, and restart the timer for another 50 seconds. Since the lid is glass (hopefully), you can kind of see whats going on in there. It’s the steam that is cooking those egg whites, so as soon as you notice that the egg whites are thoroughly cooked, go ahead and take the pan off the burner and slide the eggs onto your plate. Depending on the size of your pan (I use a 10″ pan), and also depending on whether you are making two or three eggs, this could take a bit longer than 50 seconds, or a bit less. That’s why monitoring is a good idea. The entire thing takes just a few minutes, so don’t wander off and check your email.

IMG_0202.jpg

Here’s what I love: a runny yolk, perfectly cooked egg whites that are tender and not rubbery, and a crisp edge. Oh yes, the crisp edge. By the way, that is curry powder that is sprinkled on the eggs. It is something that I remember my mom doing, and now it’s the way my entire family enjoys their eggs, even dear husband Matthew, who has his own technique for making eggs, which includes a lot of huffing and puffing, and maybe some swear words.

My friend Christy sent me a picture of her perfectly fried eggs. Look at the crispy edges and the runny yolk! And the beautiful blue and white plate. Eggs always taste better on a blue and white plate.


Posted in Busy-day meals, Comfort Food, Fun in the kitchen! | 12 Comments